How to Manage Your Loan Applications
Overview
This guide explains how employees can create, view, and track their own loan applications using the Self-Service Portal in the Payroll Workspace. Employees can submit loan applications directly and monitor their approval status, but editing or deleting is restricted once a loan application has been approved by payroll administrators.
Prerequisites
- Access to the Payroll Workspace platform
- At least one Loan Type must exist in the system (created by Payroll Administrators)
When You Need This
- Applying for a loan directly through the payroll system
- Tracking the approval status of a submitted loan application
- Reviewing the details of your loan applications
- Updating or deleting loan applications that are still pending
Step-by-Step Instructions
Step 1: Access the Loan Applications Page
- Log into your Organogram Payroll workspace at
payroll.organogram.app. - From the left-hand sidebar, click "Profile".
- Under Profile, select "Loan Applications".
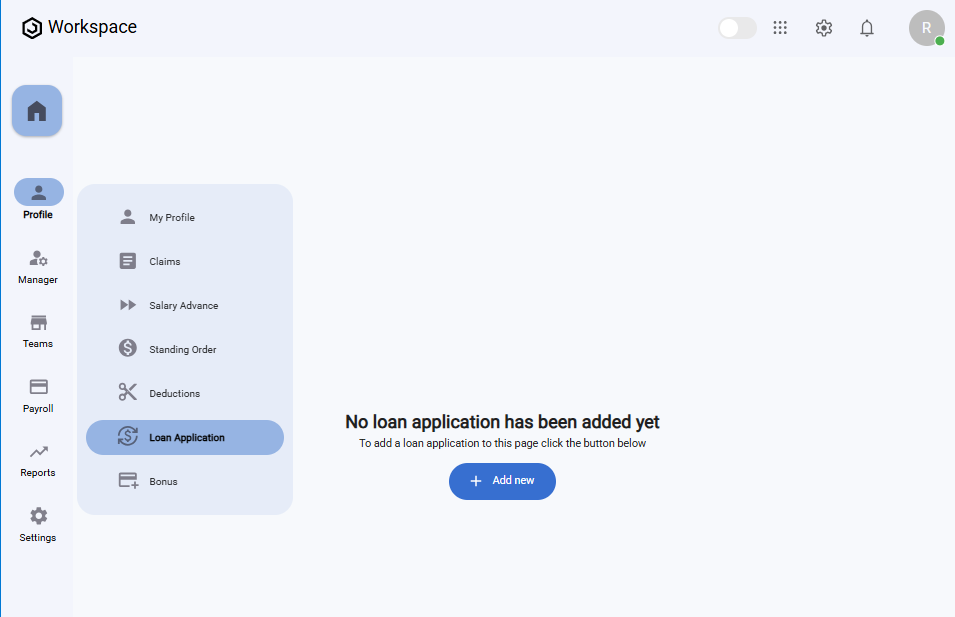
On this page you’ll see:
- A table displaying all your loan applications
- An "Add New" button to create a new loan application
- A message that says "No content found" if you haven’t applied for any loans yet
Step 2: Submit a New Loan Application
- On the Loan Applications page, click the "Add New" button.
- The Create Loan Application form will open.
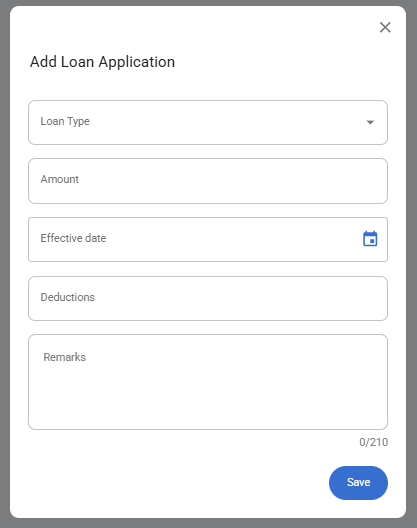
Fill in the following fields:
- Loan Type – Select the loan type from the dropdown (e.g., Car Loan, Housing Loan).
- Amount – Enter the total loan amount.
- Effective Date – Choose the start date of the loan using the datepicker.
- Deductions – Enter the deduction amount (per repayment cycle).
- Remarks – Add any notes or supporting comments.
- After completing the form, click "Save".
- A notification will appear: "Loan application created successfully".
- The new loan will appear in the Loan Applications Table with its details.

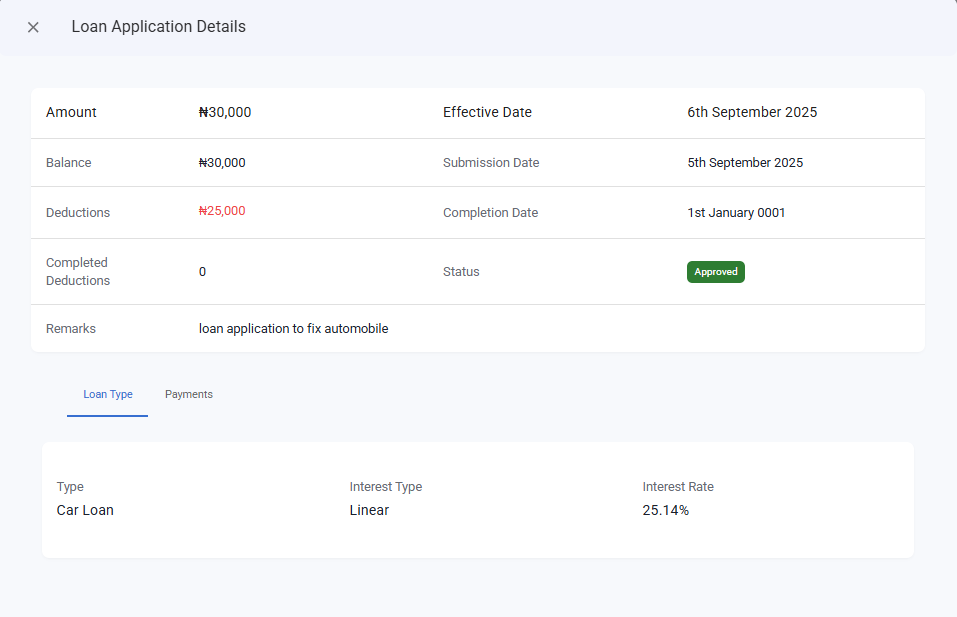
Step 3: View a Loan Application
- In the Loan Applications Table, find the loan you want to view.
- Click the three-dot menu icon (⋮) on the right-hand side.
- Select "View".
- A details dialog will open, showing:
- Loan Type
- Amount
- Effective Date
- Application Date
- Deductions
- Status (Pending, Approved, or Declined)
- Remarks
Step 4: Edit or Delete a Loan Application
- In the Loan Applications Table, click the three-dot menu icon (⋮) next to a loan.
- If the loan is still Pending, you will see options to Edit or Delete:
- Edit – Opens the loan form pre-filled with your data. Make changes and click Save.
- Delete – Prompts a confirmation dialog. Click Yes to remove the loan.
- If the loan status is Approved, the Edit and Delete options will not be available.
⚠️ Note: Once a loan application has been approved by payroll administrators, it becomes locked and cannot be edited or deleted.
What You’ll See
- The Loan Applications Table lists all your submitted loans.
- Each row displays key information such as Loan Type, Amount, Effective Date, Deductions, Status, and Remarks.
- The Status column reflects whether the loan is Pending, Approved, or Declined.