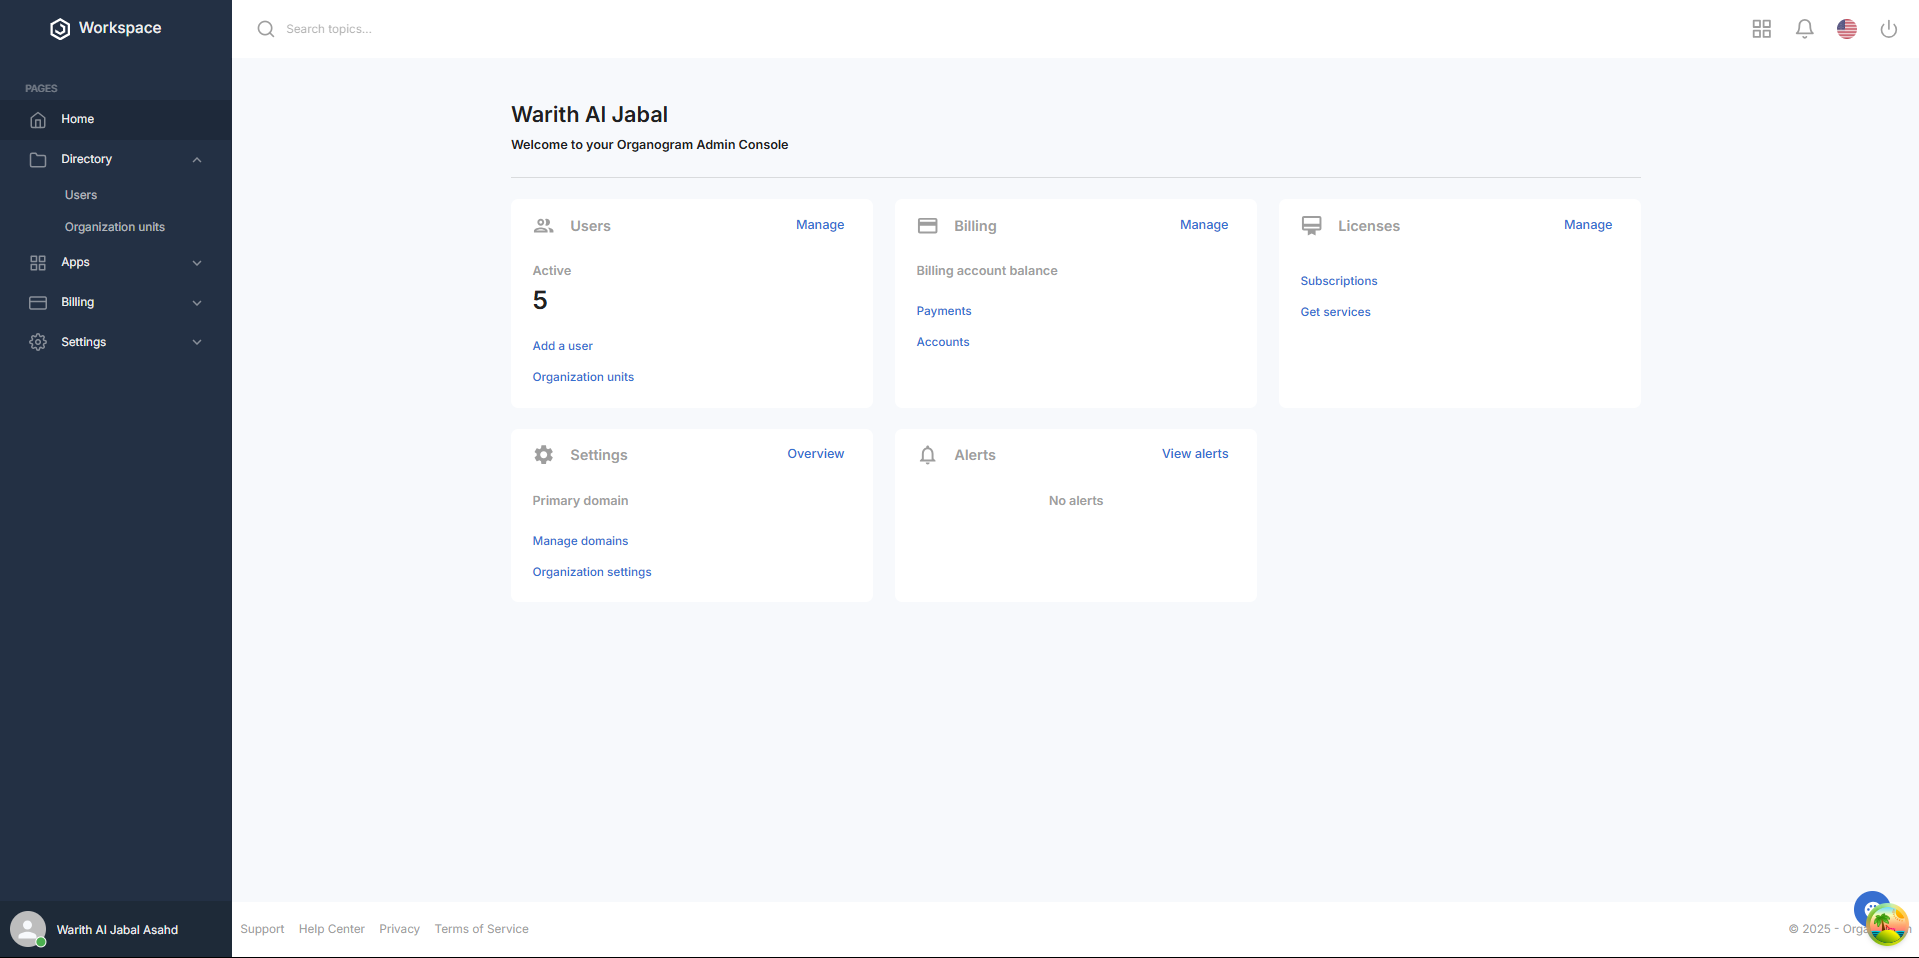
How to View and Assign User Roles
Overview
This guide walks you through the process of viewing roles for applications and assigning users to roles in the Organogram Workspace Admin platform across multiple applications (Admin Console, Payroll Application, and People Application). You'll learn how to access the role management section, view roles for a selected application, and assign users to roles via the role table.
Prerequisites
- Access to the Organogram Workspace Admin platform
- Knowledge of the user, application and role to be assigned
- User must already exist in the system
When You Need This
- Viewing available roles and their descriptions in the Admin Console, Payroll Application or People Application
- Assigning users to specific roles for application access
- Updating user responsibilities to align with organizational needs
- Reviewing users assigned to a specific role
- Ensuring compliance with role-based access control policies
Step-by-Step Instructions
Step 1: Access the App Authorization Section
- Log into your Organogram Workspace Admin platform at
admin.organogram.app
- In the left sidebar, click Settings > Authorization > Apps to navigate to the app authorization page.
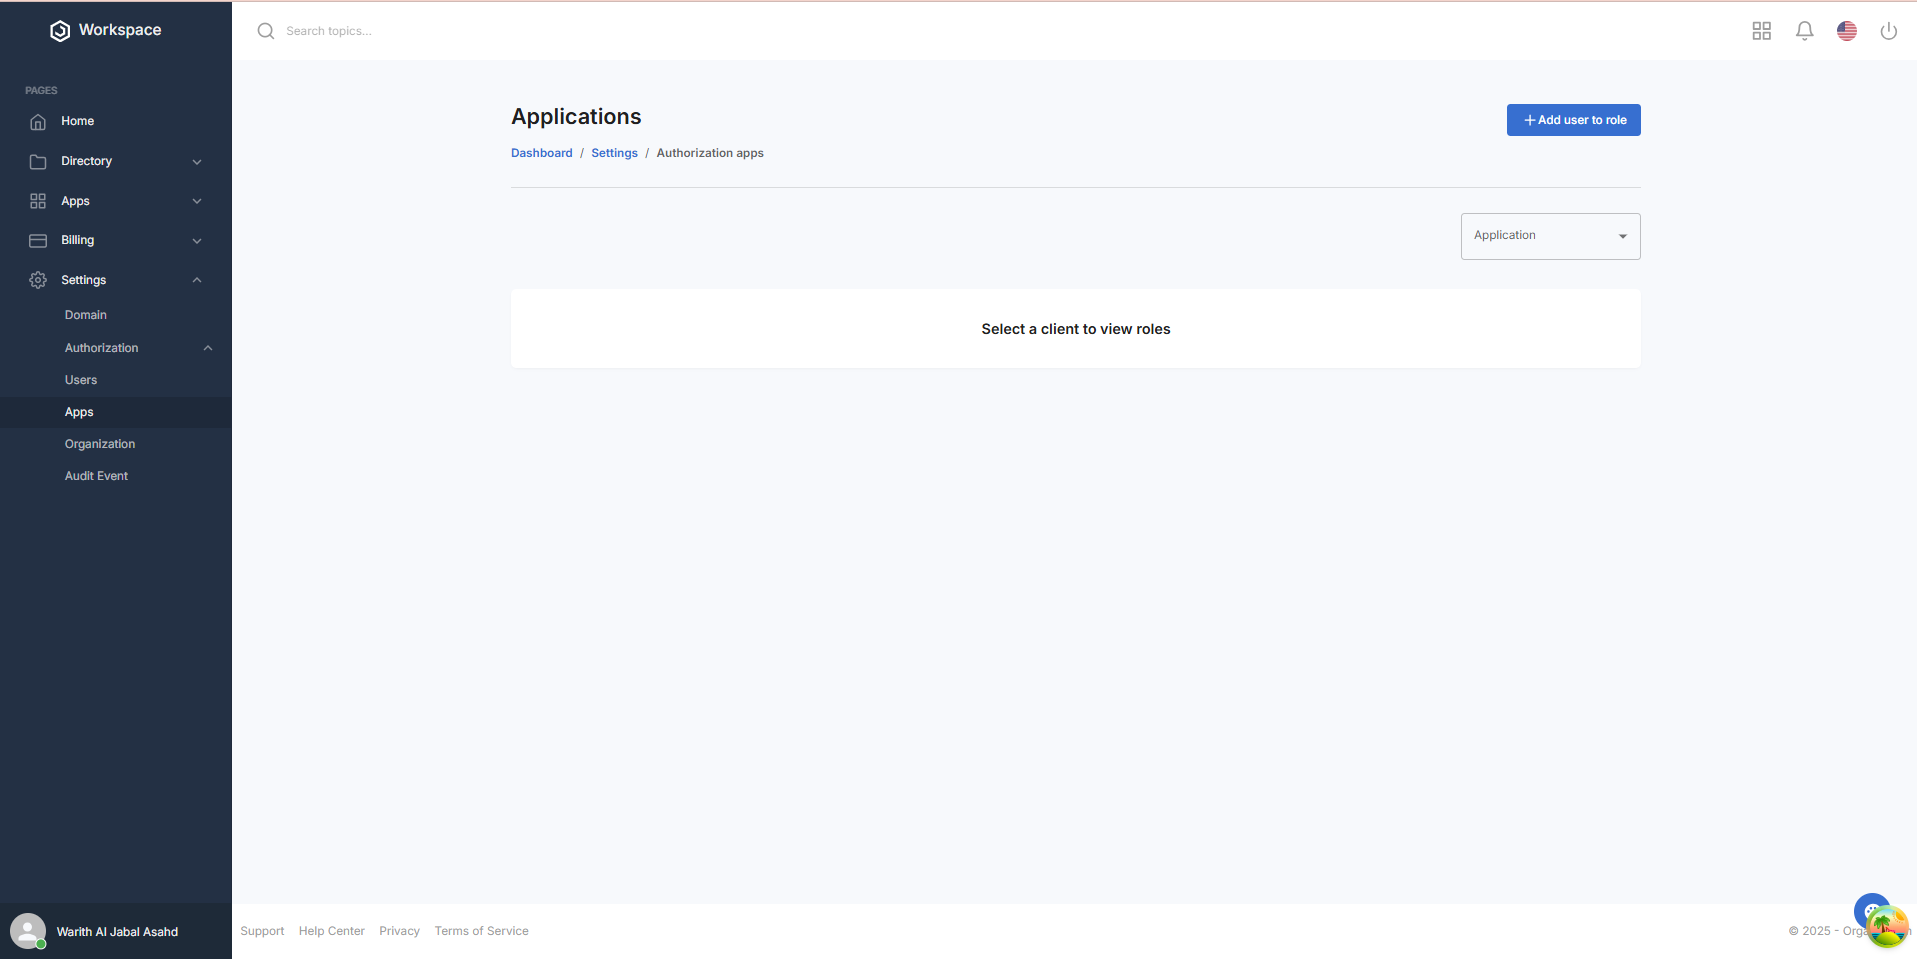
Step 2: View Roles for an Application
- On the App Authorization page, locate the Application dropdown in the top-right corner
- Select one of the following applications from the dropdown: Admin Console, Payroll Application, People Application

- A table will appear below with a Role column, a Description column for the role, an Add button column, and a View Users button column
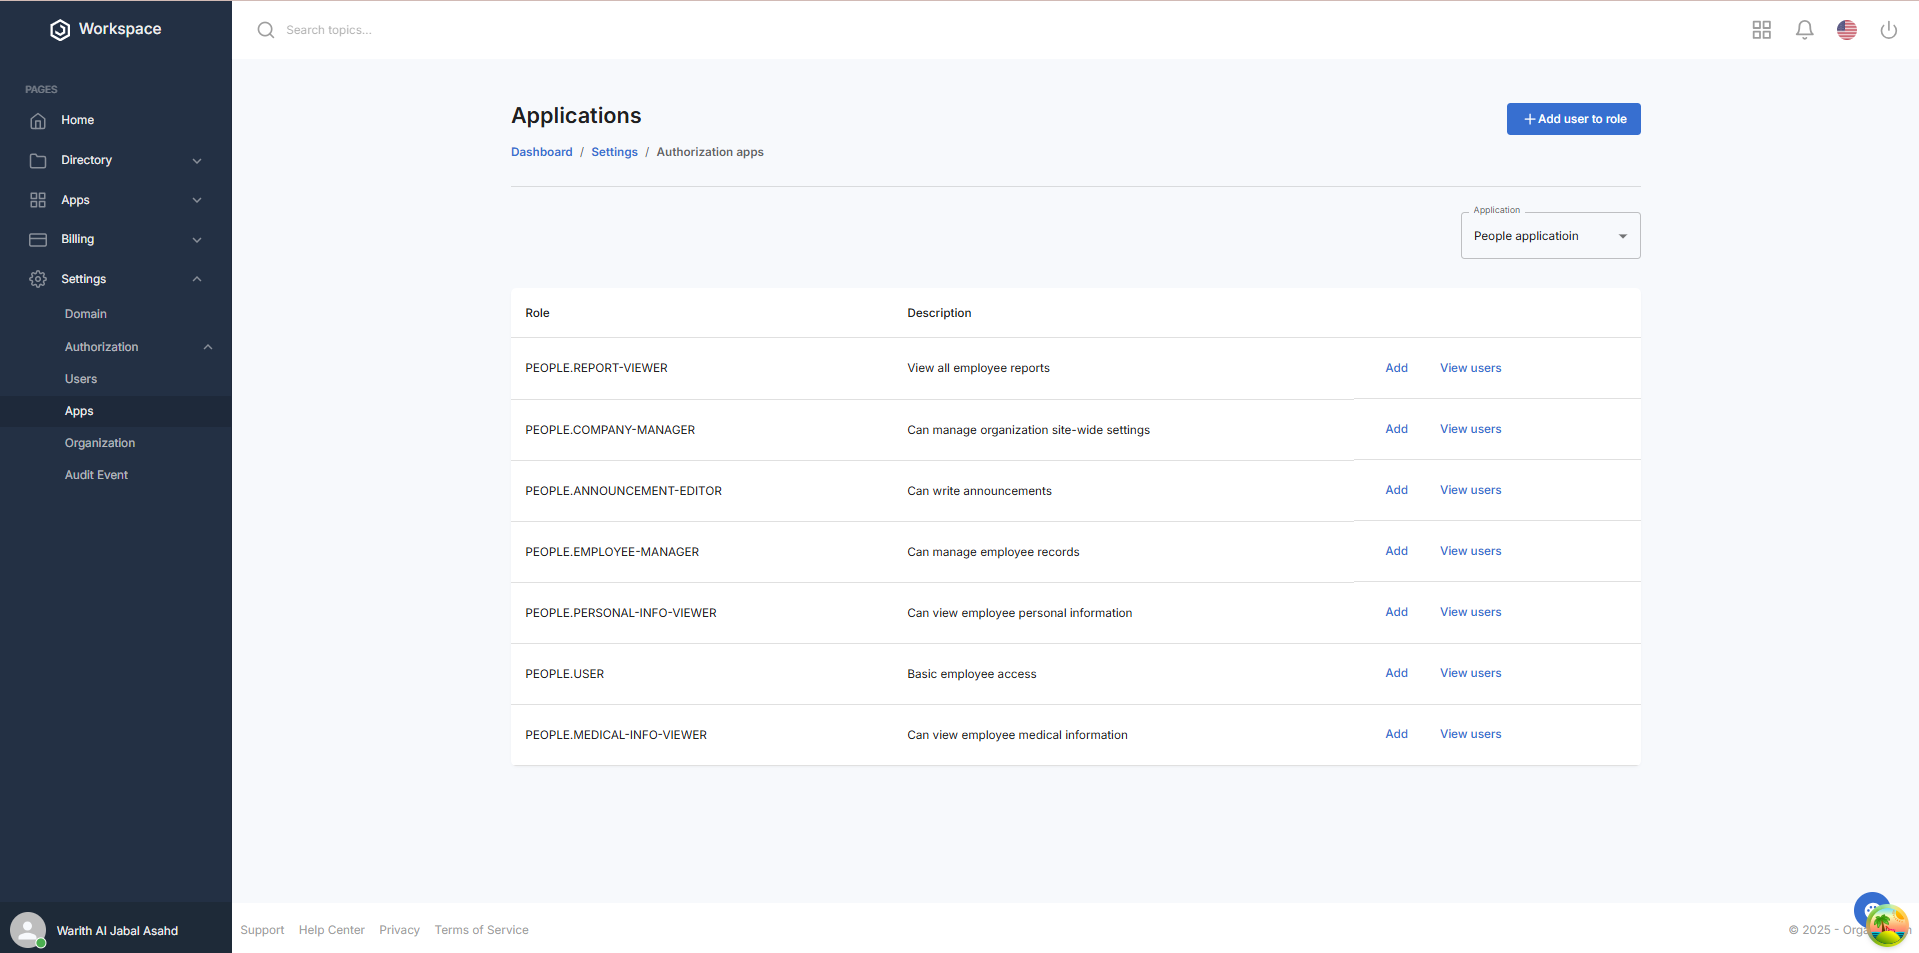
Step 3: Assign a User to a Role
- In the Add button column, click the blue "Add" button on the same row as the role you want to assign 2.The Add User to Roles dialog will open with the Client (application) pre-selected from the application dropdown and the Role pre-selected from the role row where the Add button was clicked.
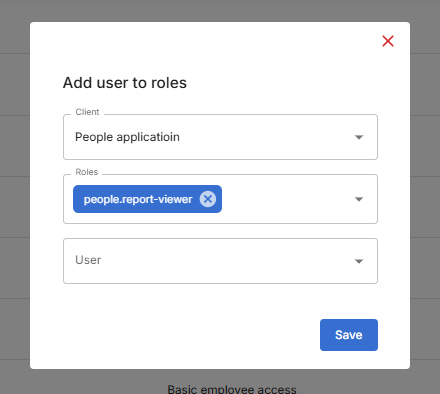
- In the dialog, fill in or modify the following fields:
- Client: The application is pre-selected (e.g., People Application)
- Role: The selected role is pre-filled, but you can add more roles or remove existing ones from the dropdown
- User: Select the user to assign the role to from the dropdown
- Click the blue Save button at the bottom of the dialog
- A notification will pop up saying "User Assigned Successfully"
- The dialog will close automatically upon successful assignment
Step 4: View and Remove Users Assigned to a role via Role Table
- In the View Users button column, click the blue "View Users" button on the same row as the role you want to review
- A full-screen dialog will open with a heading indicating the selected role (e.g., "REPORT-VIEWER role users")
- The dialog displays a table with the following columns:
- Name and Email: The user’s name and email
- Added On: The date the user was added to the role
- Remove (X): A button to remove the user from the role
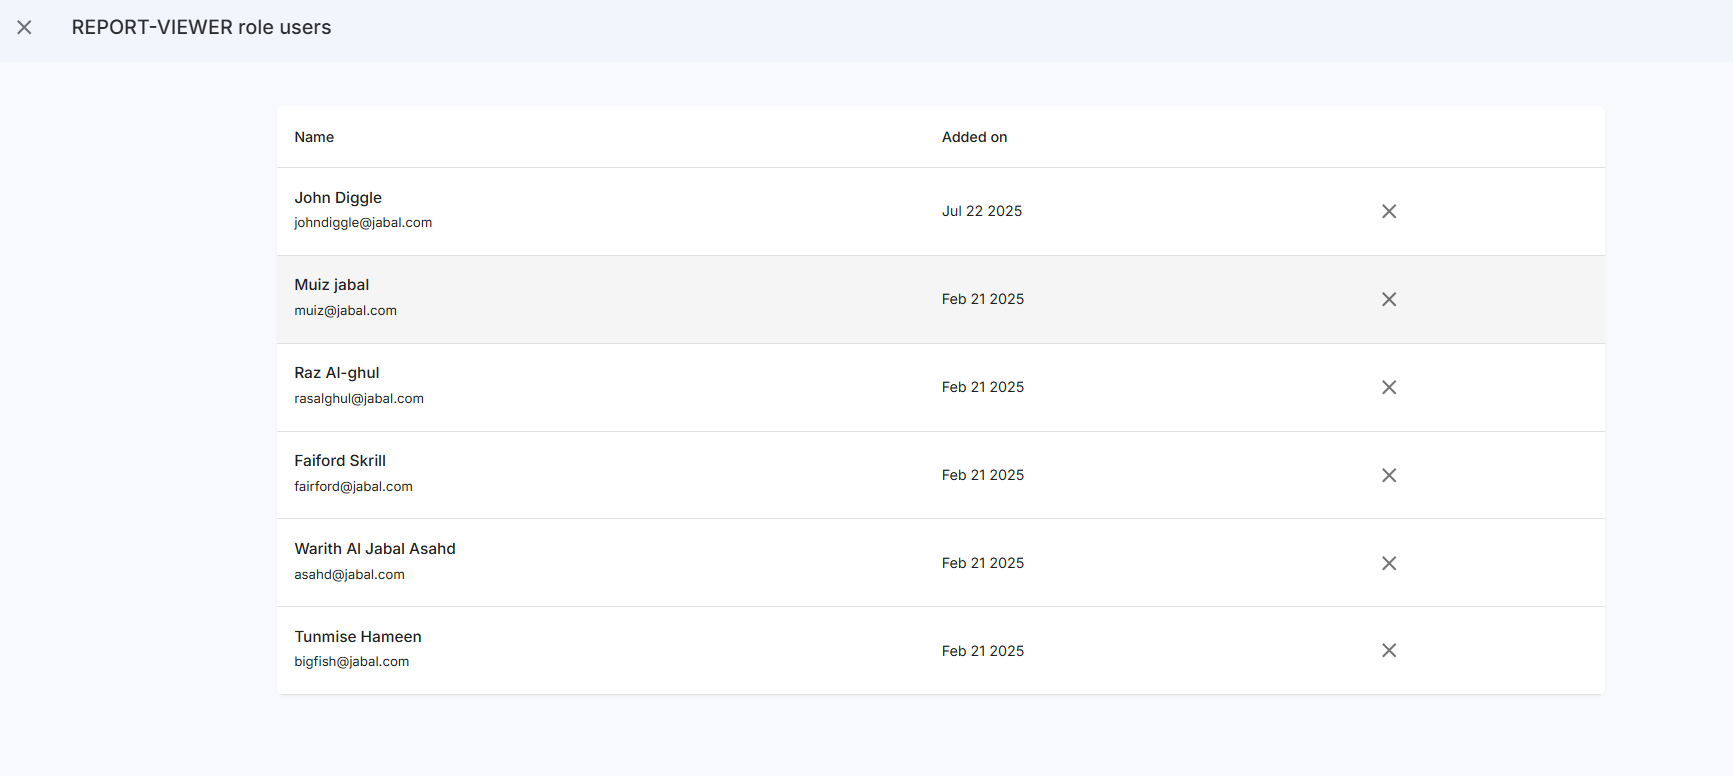
- To remove a user from the role, click the X button
- A confirmation dialog will appear to confirm the removal
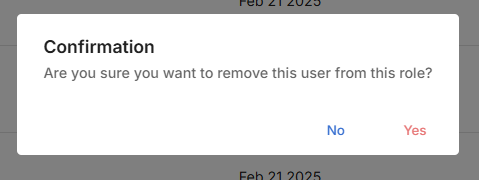
- Click "Yes" in the dialog to remove the user
- A notification will pop up saying "User Removed Successfully"
Step 5: Assign a User to a Role via Add User to Role Button
- On the App Authorization page, locate the "+ Add User to Role" button in the top-right corner
- Click the + Add User to Role button to open the Add User to Roles dialog For detailed steps on assigning a role using this dialog, refer to the User Authorization documentation
Step 6: Verify Role Assignment or Removal
- Return to the App Authorization page
- Select the application from the Application dropdown again
- Verify the roles table reflects the updated assignments (users added) or removals (users no longer listed in the View Users dialog)
Next Steps
After assigning or removing a role, you may want to:
- Verify the user’s access to the selected application
- Notify the user of their updated role or permissions
- Review role assignments for accuracy and compliance