How to Create an Organizational Unit
Overview
Learn how to create a new organizational unit in the Organogram Workspace Admin platform and structure your organization's hierarchy.
Prerequisites
- Administrative access to the Organogram Workspace Admin platform
- Permissions to manage organizational units
- Basic information for the organizational unit (name, description, and optional parent unit)
- For units after the first, knowledge of the desired parent unit (if applicable)
When You Need This
- Structuring your organization’s hierarchy (e.g., departments, teams, or divisions)
- Adding new departments or teams to the system
- Defining reporting structures by assigning parent units
- Maintaining accurate organizational records for compliance and auditing
Step-by-Step Instructions
Step 1: Access the Organizational Unit Management Section
- Log into your Organogram Workspace Admin platform at
admin.organogram.app
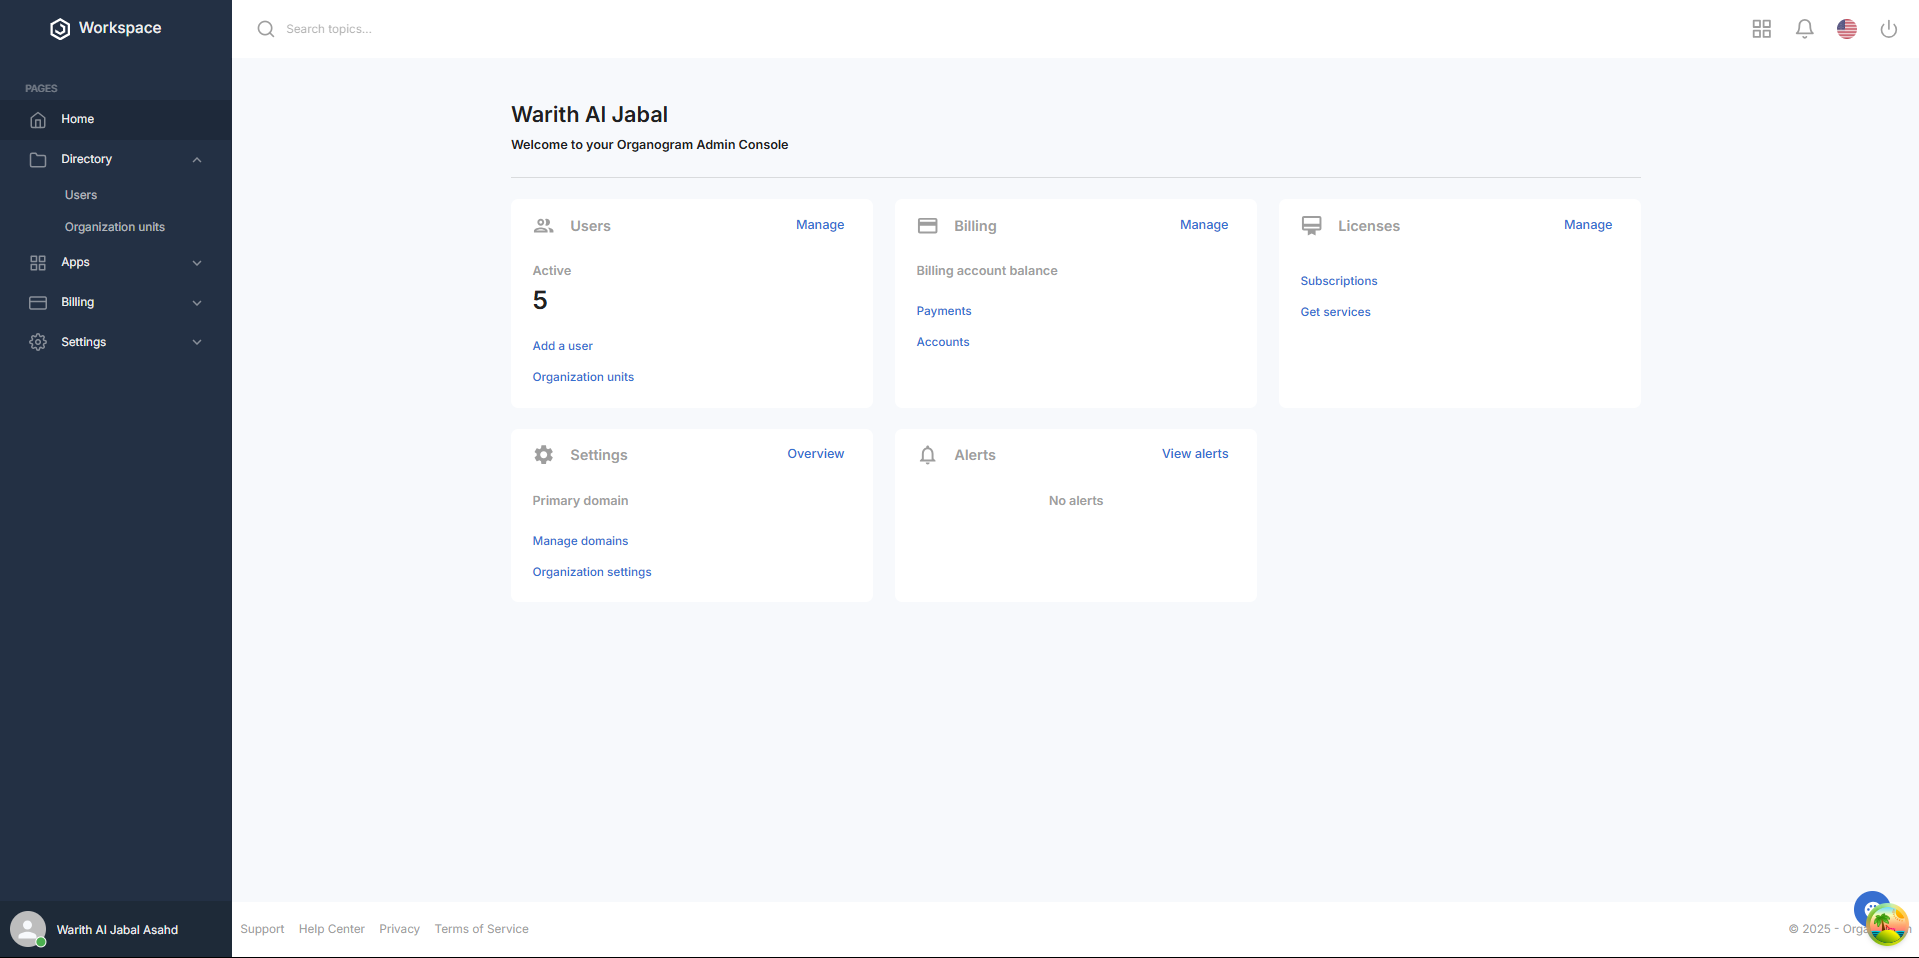
- In the left sidebar, Click Directory > "Organizational Units" to navigate to the organizational unit list page
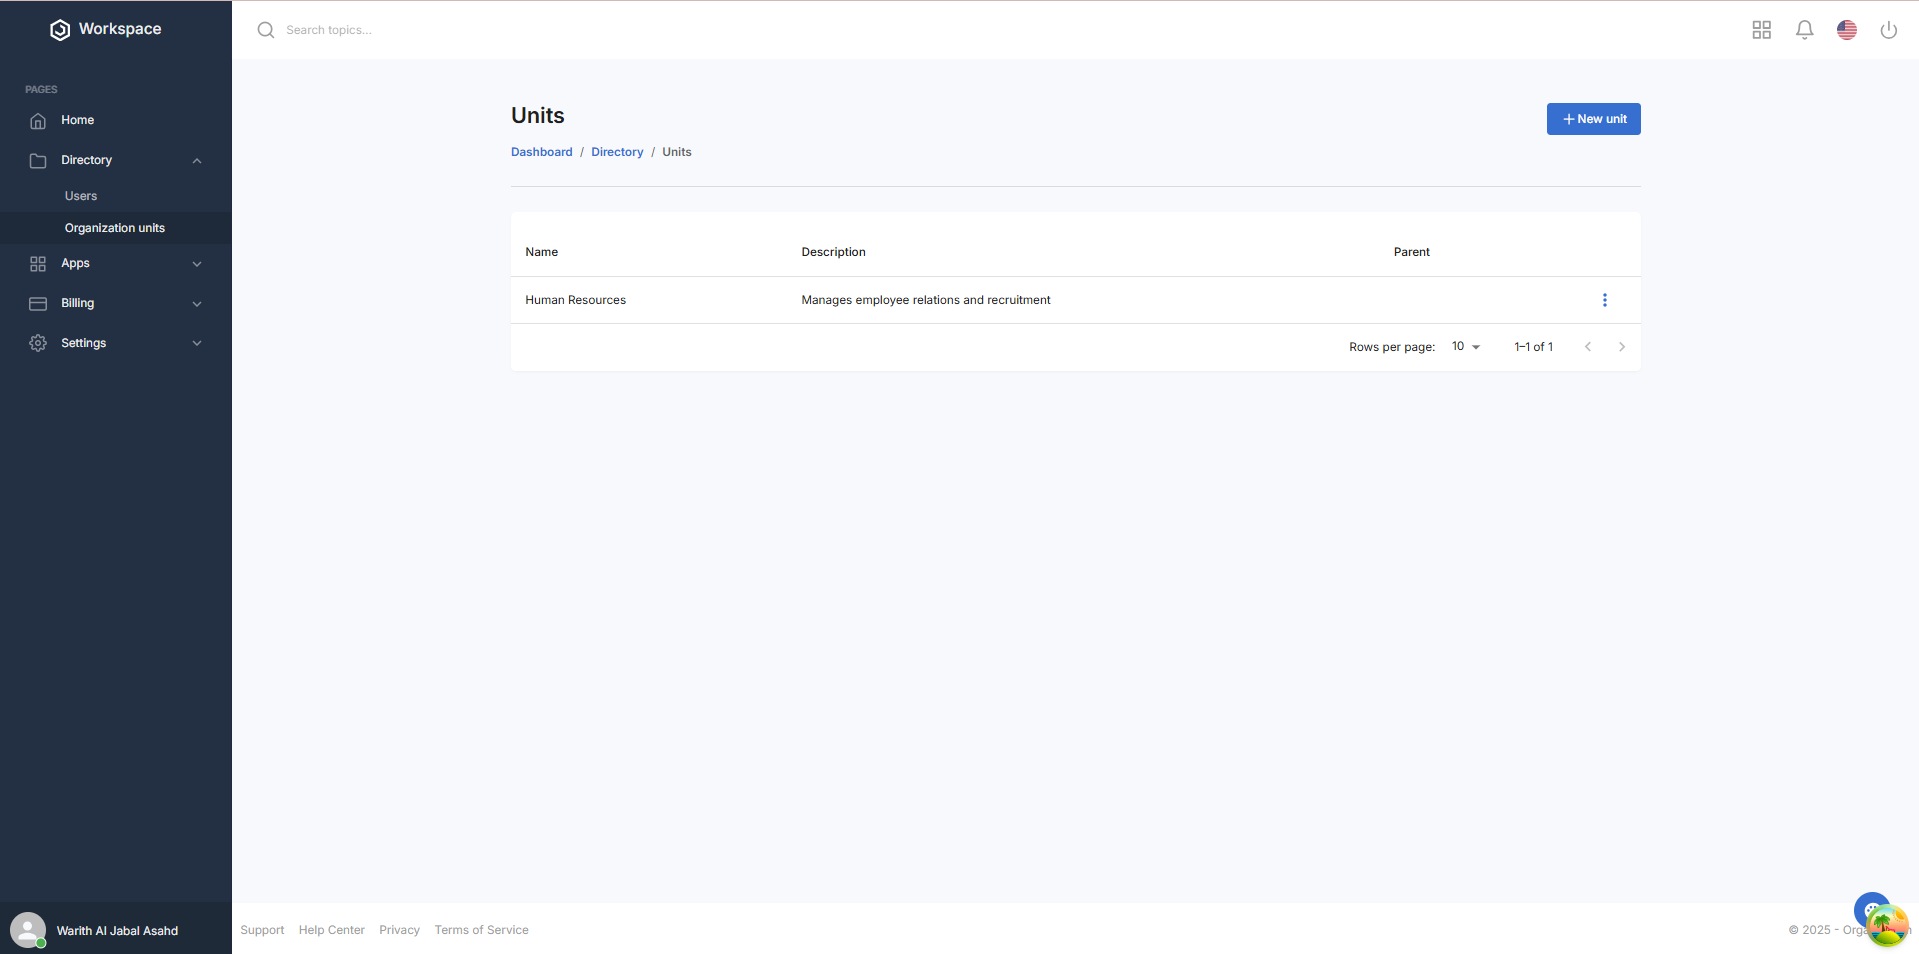
Step 2: Navigate to Add New Unit
- On the Organizational Units page, view the current list of units
- In the top-right corner, locate the "+ New Unit" button

3.Click on "+ New Unit" to open the organizational unit creation form
Step 3: Fill in the Organizational Unit Information
- The "Create Unit" dialog box will appear with the following fields:
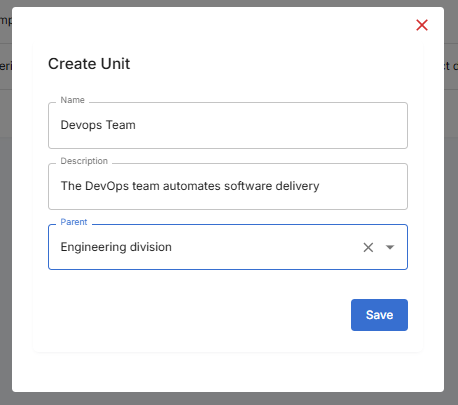
Required Information:
- Name: Enter the name of the organizational unit (e.g., "Human Resources", "Marketing Team", "Devops Team")
- Description: Provide a brief description of the unit’s purpose or function (e.g., "Manages employee relations and recruitment")
- Parent Unit: Select a parent unit from the dropdown (if applicable) Note: For the first organizational unit, the Parent Unit dropdown will be empty, as no parent units exist. For subsequent units, select an existing unit (e.g., the first created unit) as the parent, if desired.
Step 4: Complete the Form
- Fill in all required fields carefully
- Ensure the unit name is unique and descriptive
- Verify the description accurately reflects the unit’s role
- For subsequent units, ensure the selected parent unit aligns with the intended hierarchy.
Step 5: Save the Organizational Unit
- Click the "Save" button at the bottom of the dialog
- A notification will pop up saying "Unit Created Successfully"
- The system will process the information and create the unit profile
- The dialog will close automatically upon successful creation
Step 6: Verify Organizational Unit Creation
- You'll be returned to the main Organizational Units page The new unit should now appear in the unit list
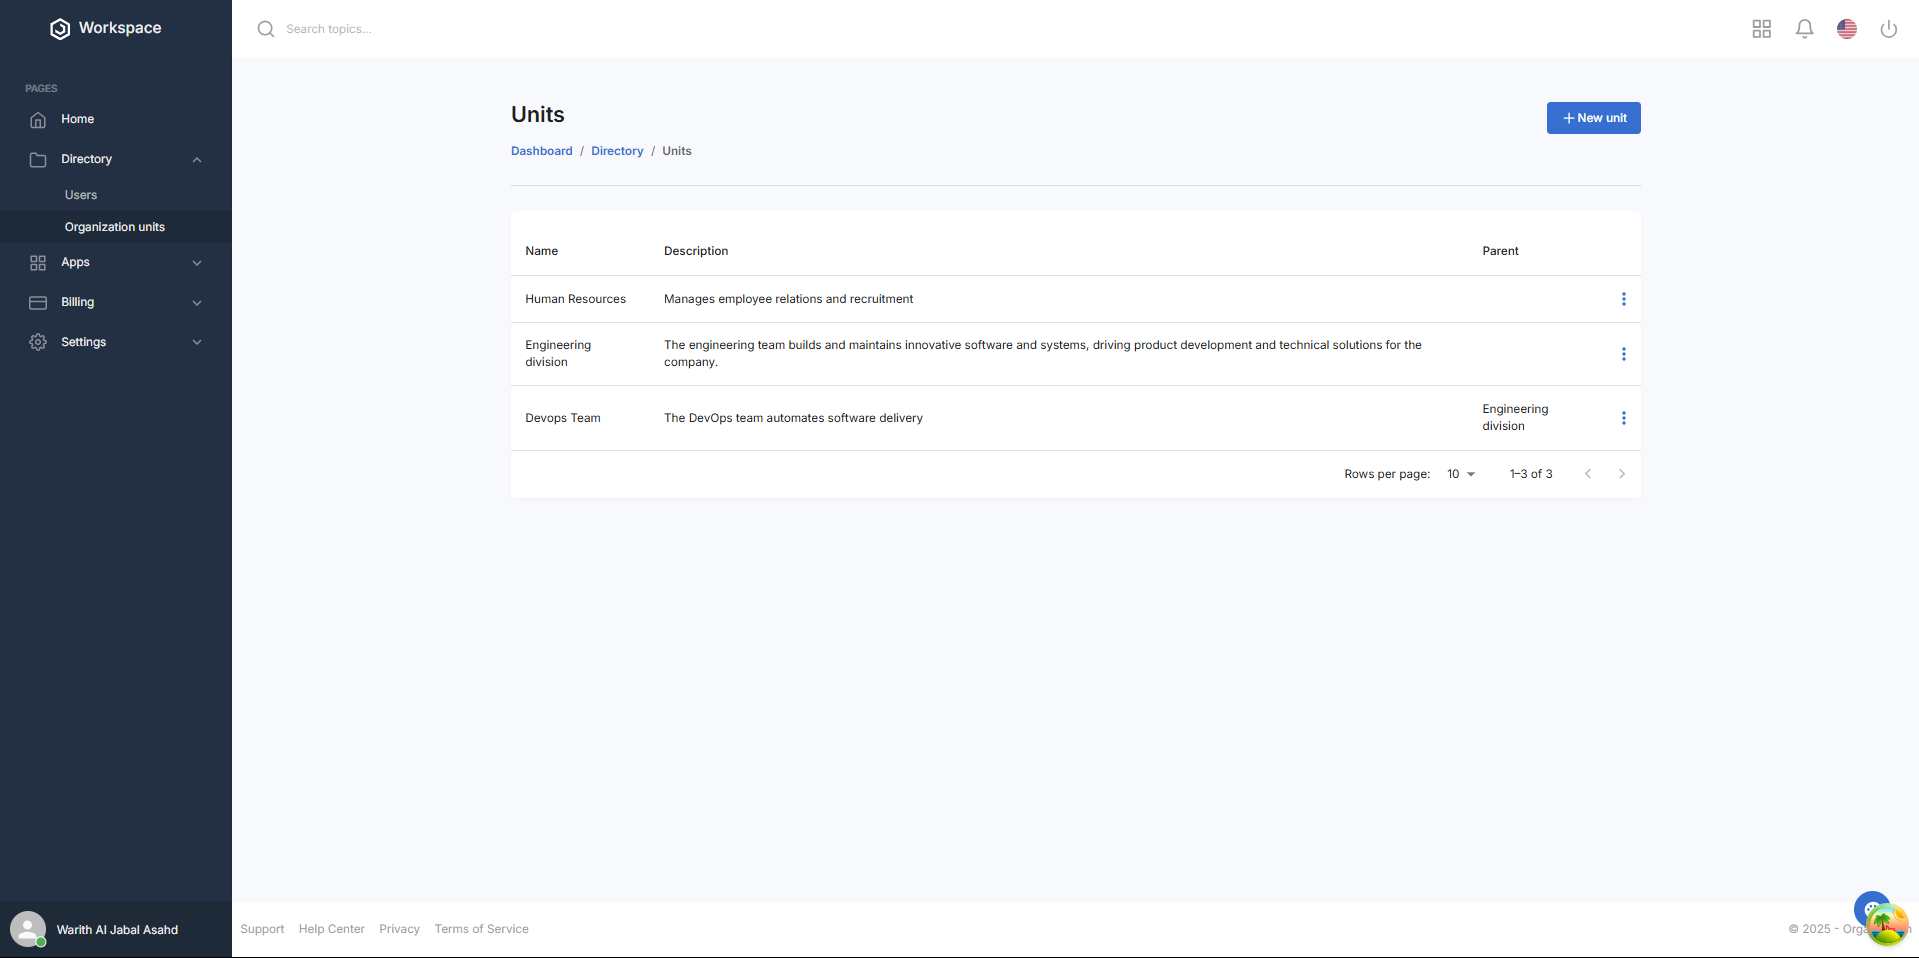
Successful Creation Confirmation:
- Unit table displays with name and description
- Parent Unit shows the selected parent (or "None" for the first unit)
- Add button remains available for creating additional units
What You'll See After Adding:
- The unit count in your system will increase
- If a parent unit was selected, the hierarchy will reflect the relationship
Next Steps After adding an organizational unit, you may want to:
- Update the organizational hierarchy as needed
- Review the unit’s details for accuracy
Related Tasks