How to Add and Manage Subscriptions
Overview
This guide walks you through how to add, view, and manage subscriptions for the Organogram Workspace Admin application. You'll learn how to navigate to the subscription page, activate or deactivate plans, and switch between different service tiers.
Prerequisites
- Admin access to the Organogram Workspace Admin platform
- Existing login credentials
- Basic understanding of license and app access in the platform
When You Need This
- To subscribe to new workspace plans
- To manage current subscription plans
- To deactivate or reactivate existing subscriptions
Step-by-Step Instructions
Step 1: Access the Subscriptions Page
- Log into your Organogram Workspace Admin platform at
admin.organogram.app
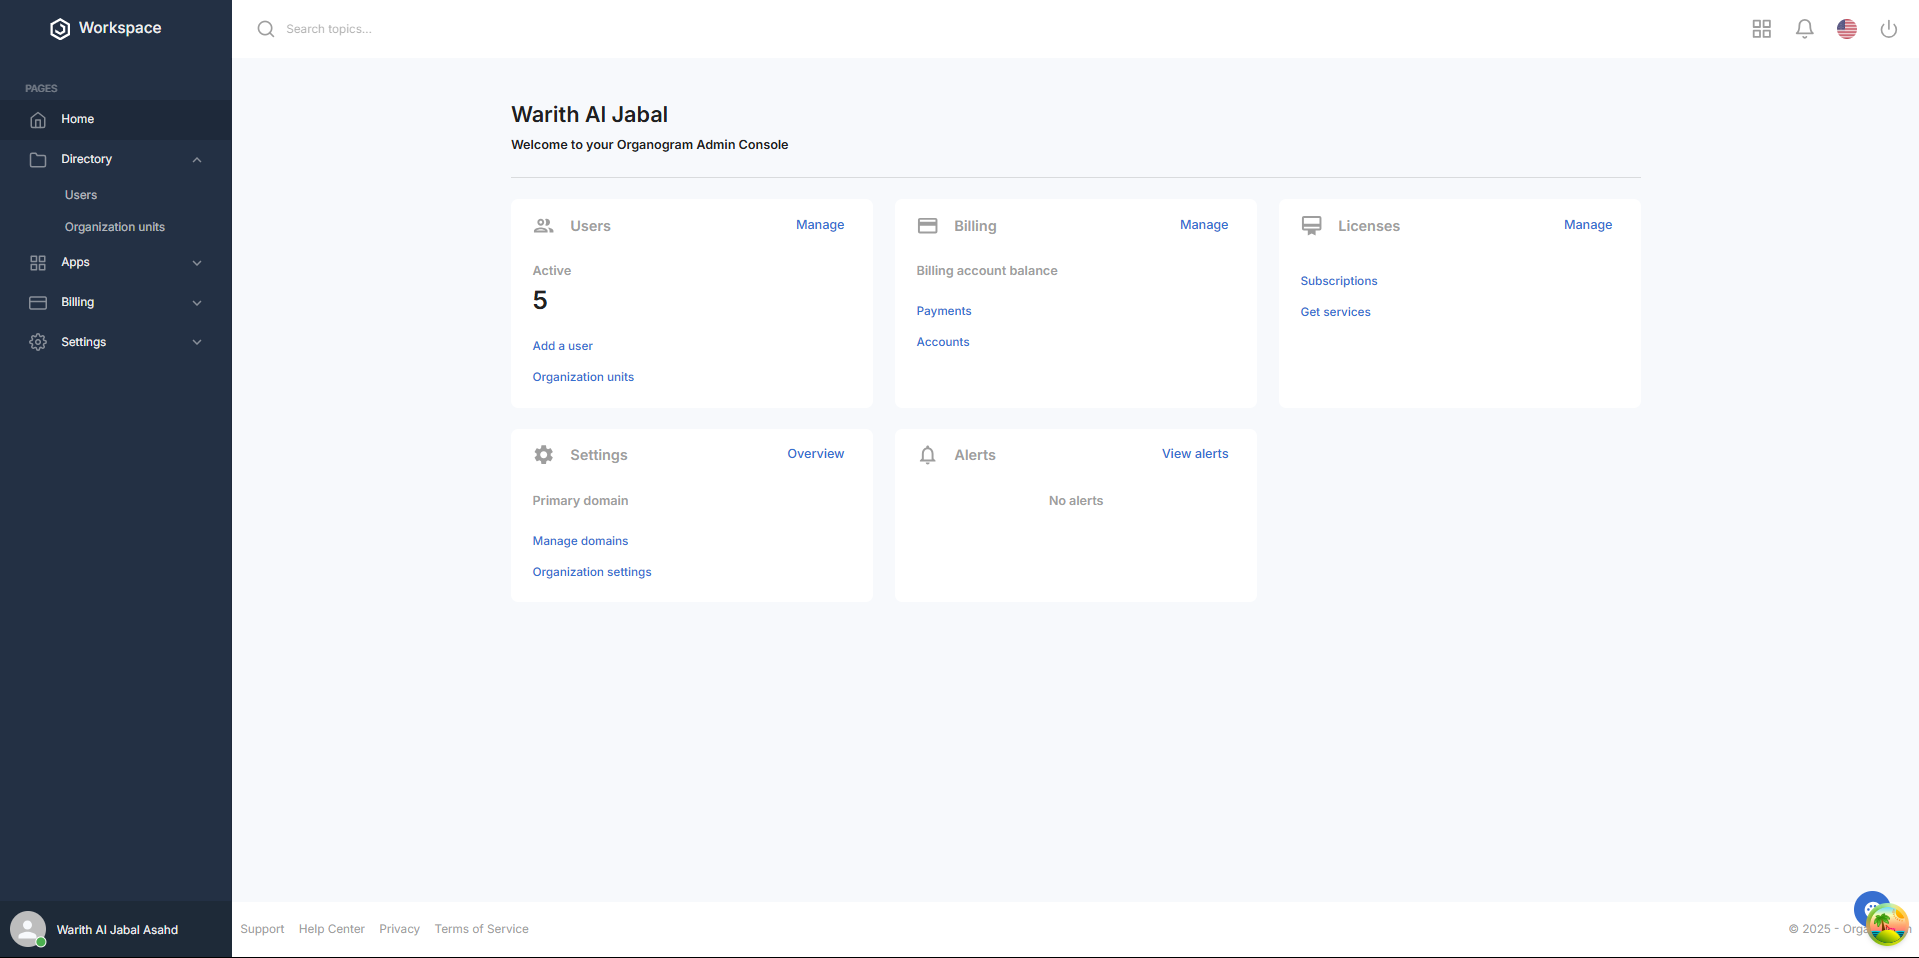
- In the left sidebar, click on the Apps section to expand its menu.
- Under Apps, select Workspace.
- Then click on Subscriptions.
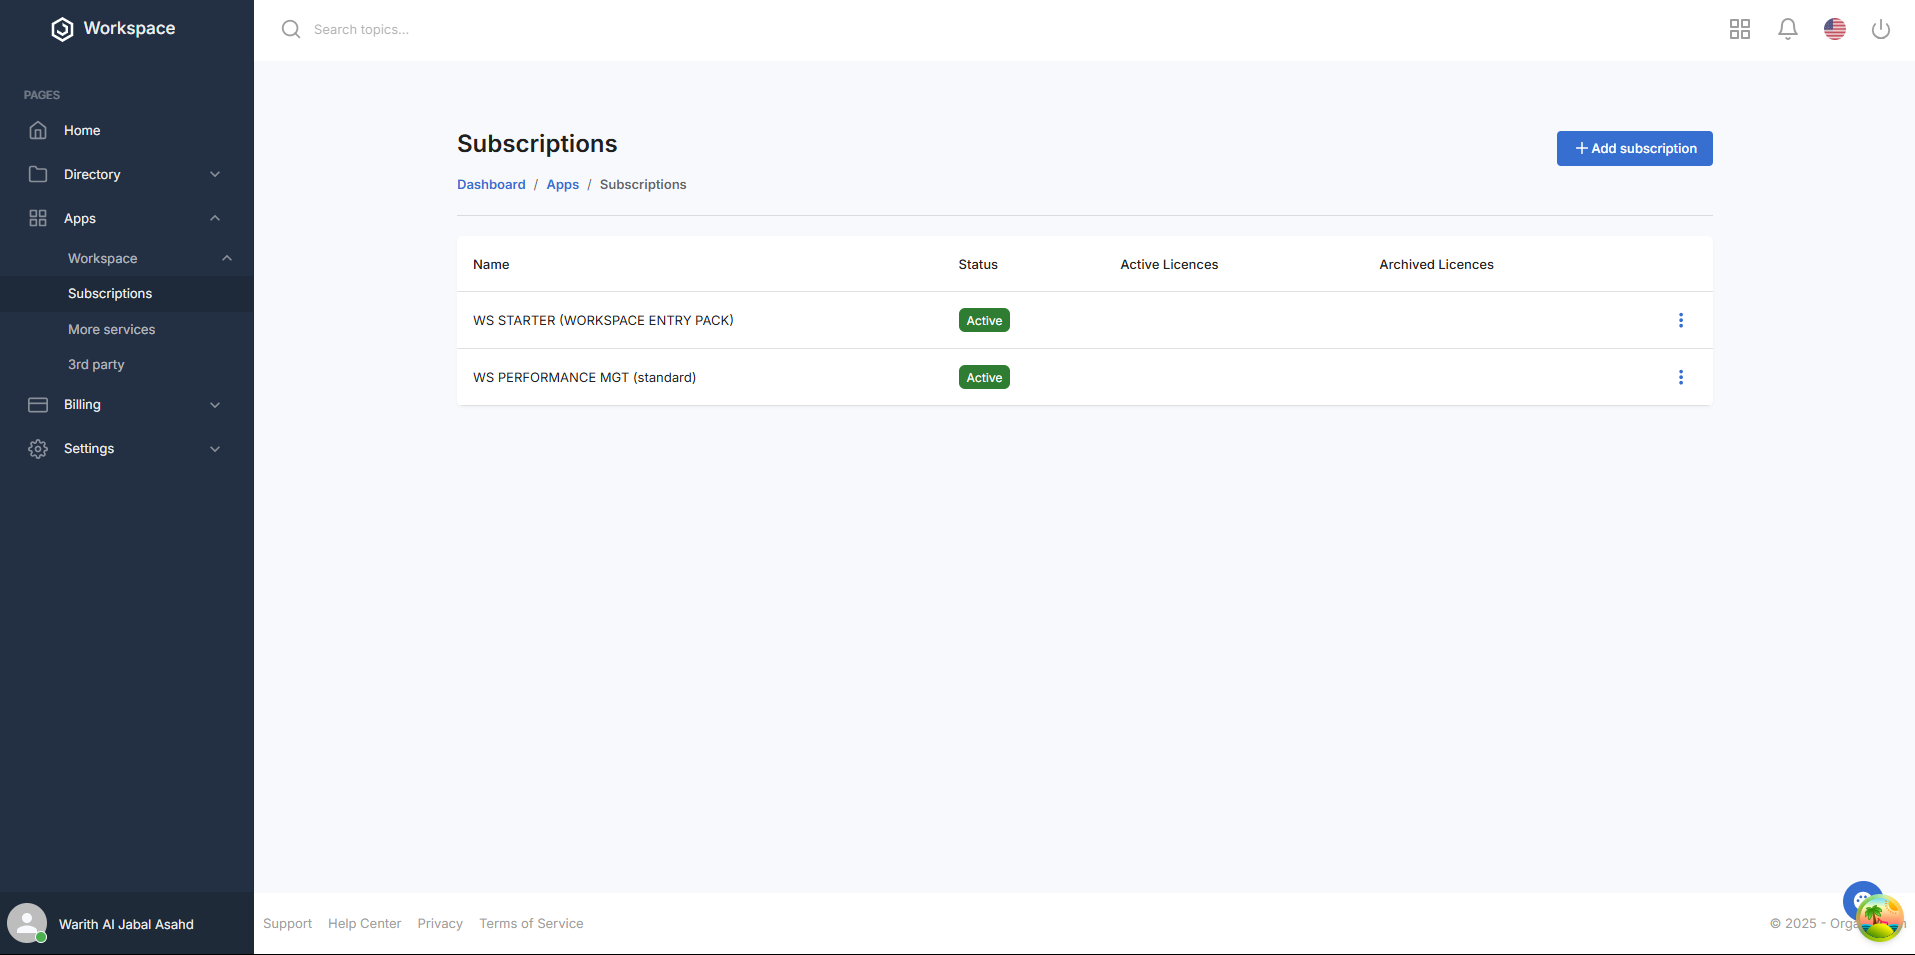
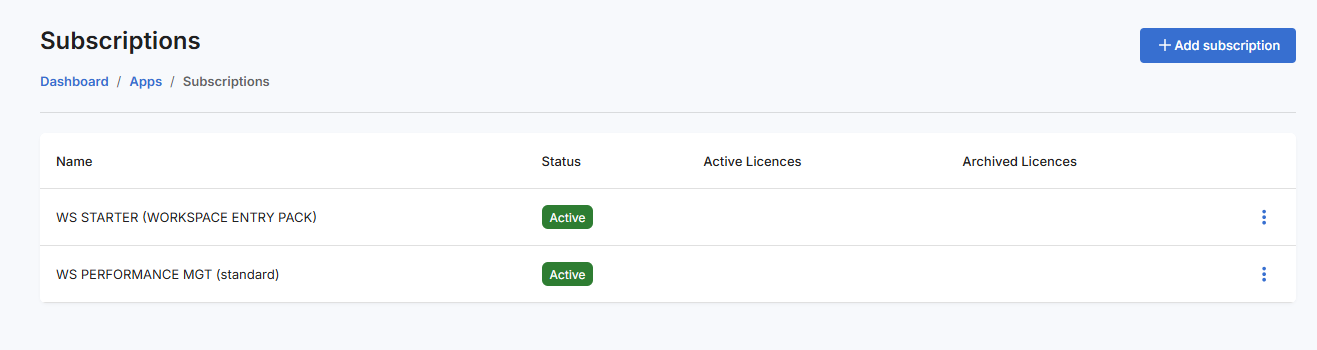
Step 2: Understand the Subscriptions Page
On the Subscriptions page:
-
You will see two default subscriptions:
- WS STARTER (WORKSPACE ENTRY PACK)
- WS PERFORMANCE MGT (standard)
These are marked as Active by default.
-
The subscription table also includes two columns:
- Active Licenses
- Archived Licenses
These sections will initially be empty until a license is activated or archived.
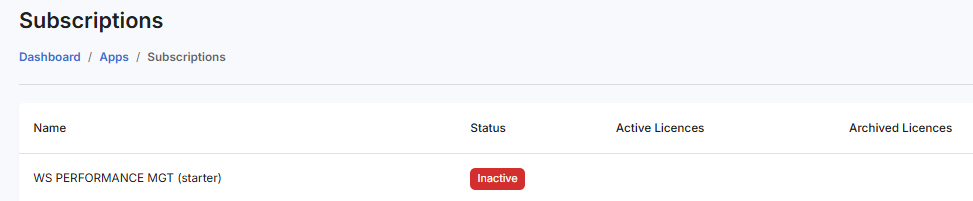
Step 3: View, Deactivate, or Reactivate a Subscription
Each subscription row includes a three-dot menu with the following options:

-
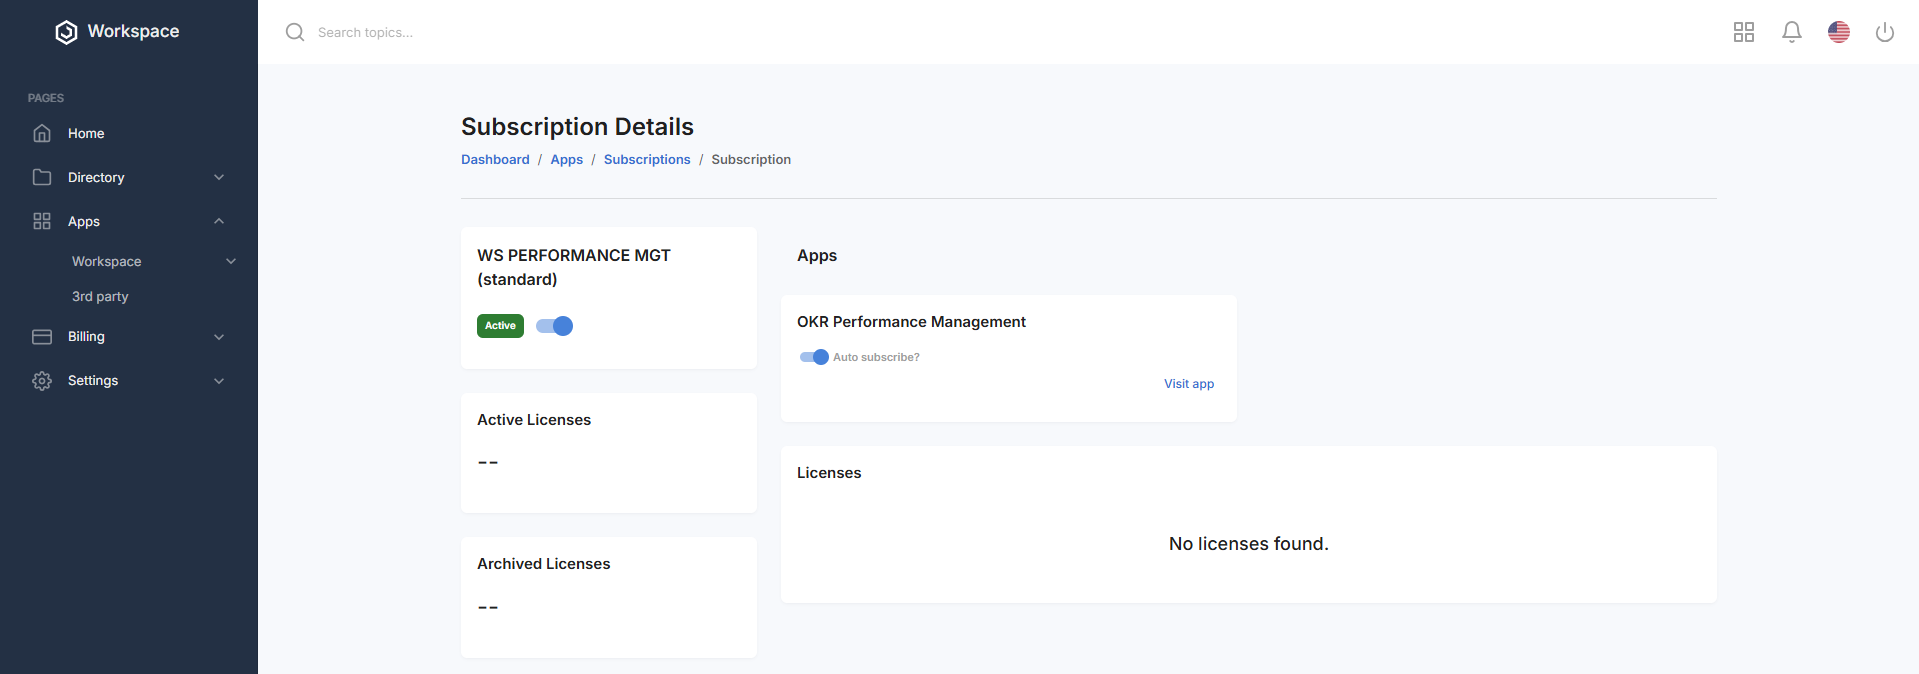
View Details
- Takes you to the Subscription Details Page to view full subscription information.
-
Deactivate Subscription
- Clicking this opens a confirmation dialog.
- If you confirm by clicking Yes, a toast notification appears saying:
"Subscription status updated successfully"
- The status of the subscription updates to Inactive in the table.
To reactivate a subscription:
- Click the three-dot icon on the inactive subscription row.
- Select Activate.
- Confirm the prompt to see a toast message:
"Subscription status updated successfully"
- The subscription status changes back to Active.
Alternatively, on the Subscription Details Page, you can use the toggle on the subscription card to deactivate or reactivate the subscription.
Step 4: Add a New Subscription
- On the Subscriptions page, click the "+ Add Subscription" button at the top-right corner.
- You’ll be redirected to the More Services page which has two categories:
- Organogram Workspace
- Organogram Workspace Add-ons
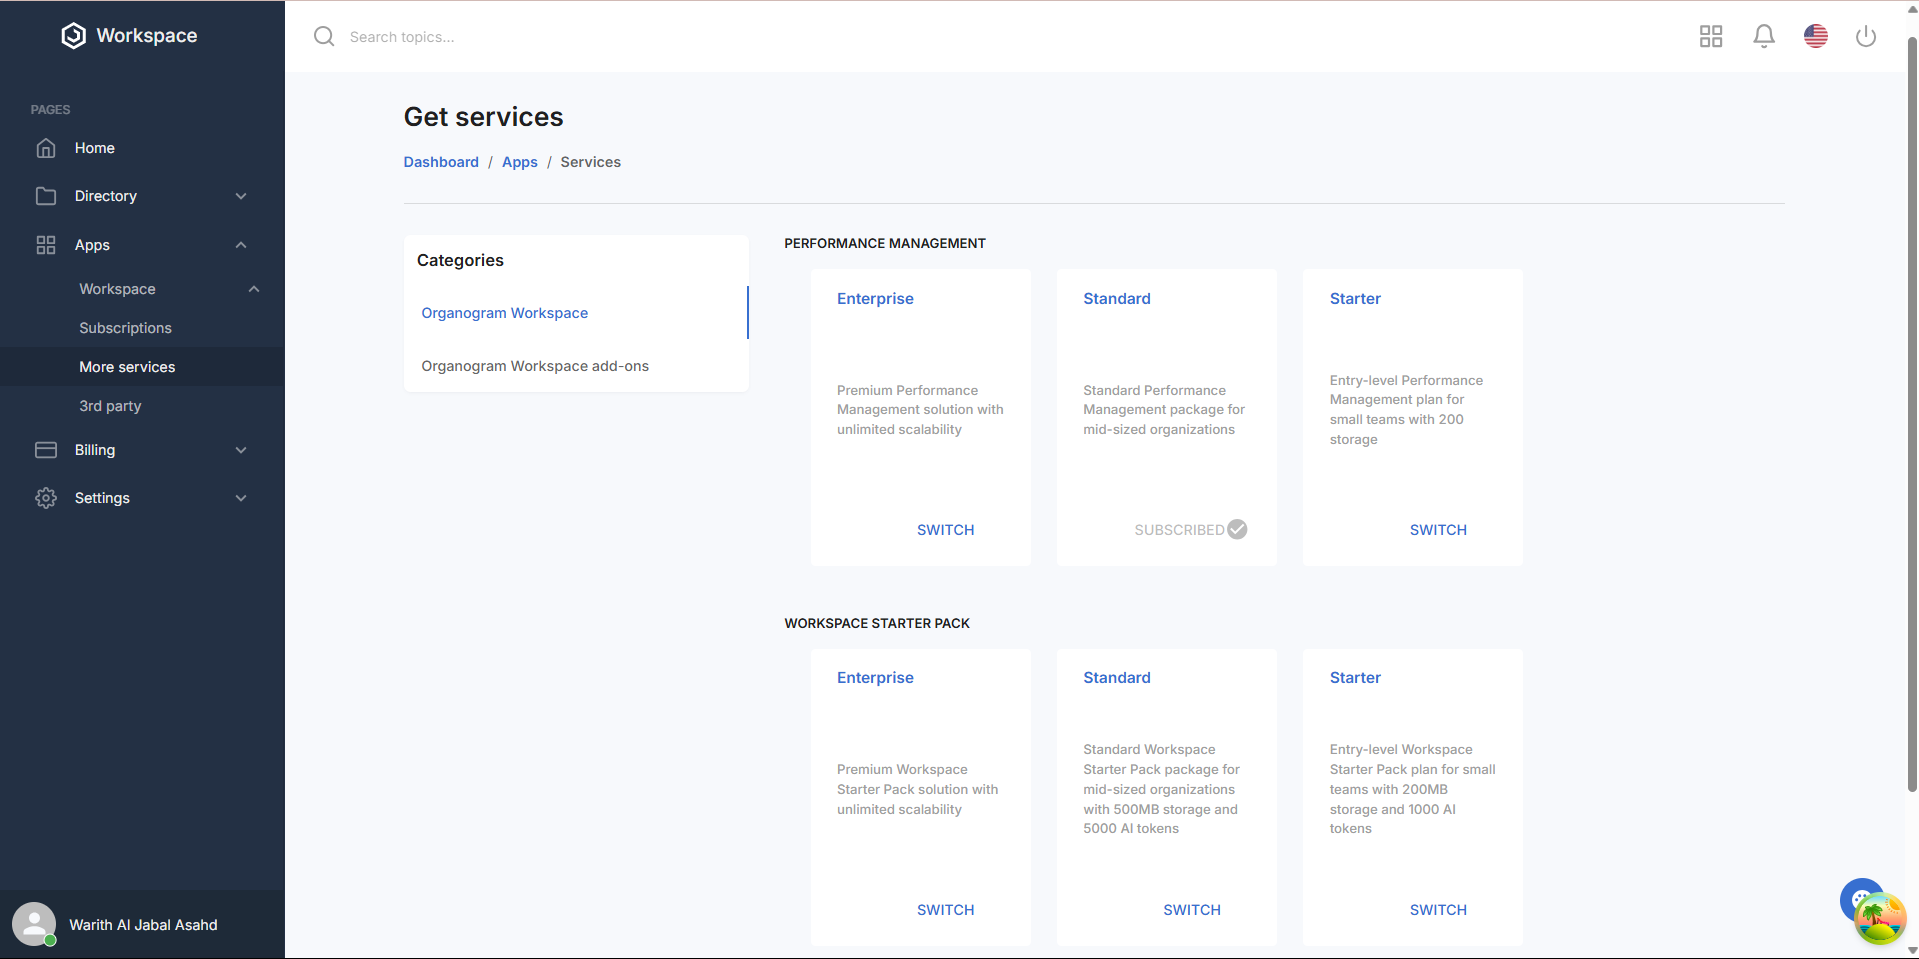
Step 5: Browse and Select Plans
On the More Services page, each category — Organogram Workspace and Organogram Workspace Add-ons — offers two types of subscription services:
- Performance Management
- Workspace Starter Pack
Each service type contains three plans: Enterprise, Standard, and Starter.
🔹 Performance Management Plans
-
Enterprise
Premium Performance Management solution with unlimited scalability -
Standard
Standard Performance Management package for mid-sized organizations -
Starter
Entry-level Performance Management plan for small teams with 200MB storage
🔹 Workspace Starter Pack Plans
-
Enterprise
Premium Workspace Starter Pack with unlimited scalability -
Standard
Standard Workspace Starter Pack with 500MB storage and 5000 AI tokens -
Starter
Entry-level Starter Pack with 200MB storage and 1000 AI tokens
Step 6: Subscribe to a Plan
Each plan card has a Switch button.
- Click the Switch button for your desired plan.
- You’ll be taken to that plan’s details page, showing detailed features and pricing.
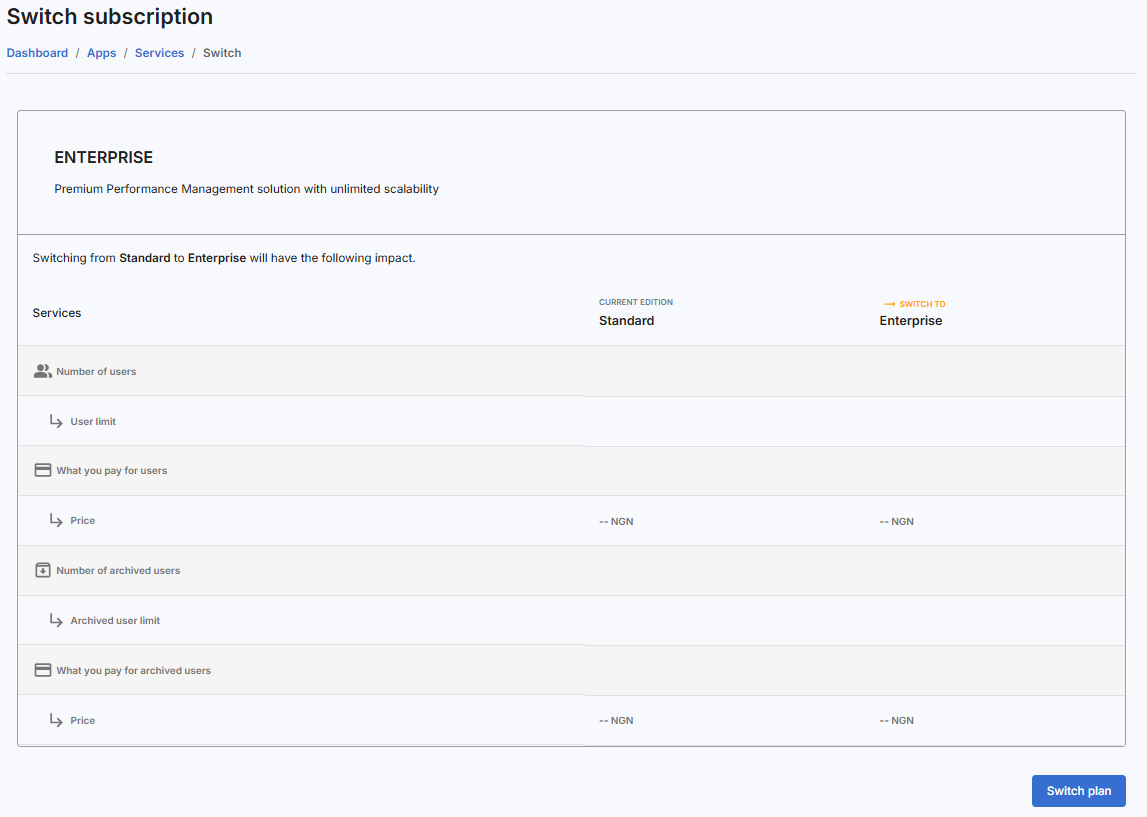
- On that page, click the Switch Plan button.
- A confirmation dialog will appear confirming:
"Plan switched successfully"
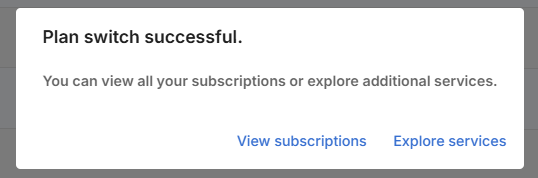
You’ll then see two buttons in the dialog:
- View Subscriptions → redirects you back to the Subscriptions page
- Explore Services → redirects you back to the More Services page
Once the switch is complete:
- The plan card will now show a "Subscribed" label with a tick icon
indicating that the user has subscribed to that plan.

Step 7: Manage App Subscriptions from the Subscription Details Page
On the Subscription Details Page, you’ll also see an Apps card below the main subscription card.

- This card lists the app(s) associated with the subscription.
- Each app has a toggle button to control automatic subscription.
- When the toggle is clicked, a toast notification appears:
"Auto subscription status updated"
What You'll See After Subscribing
- The plan card will update to show a "Subscribed" label and a tick icon, confirming your active subscription.
- Subscriptions can be managed or deactivated at any time through the table menu or details page.
Next Steps
After managing your subscriptions, you may want to:
- Assign users to newly activated plans
- Monitor subscription usage
- Explore additional services or plan upgrades