Edit User Information
Overview
This guide walks you through the process of editing an existing user’s details in the Organogram Workspace Admin platform.
Prerequisites
- Access to the Organogram's workspace Admin platform
- User's basic information (title, first name, last name, gender, phone number, username, alternate email, organization unit and staff ID)
Step-by-Step Instructions
Step 1: Access the User Management Section
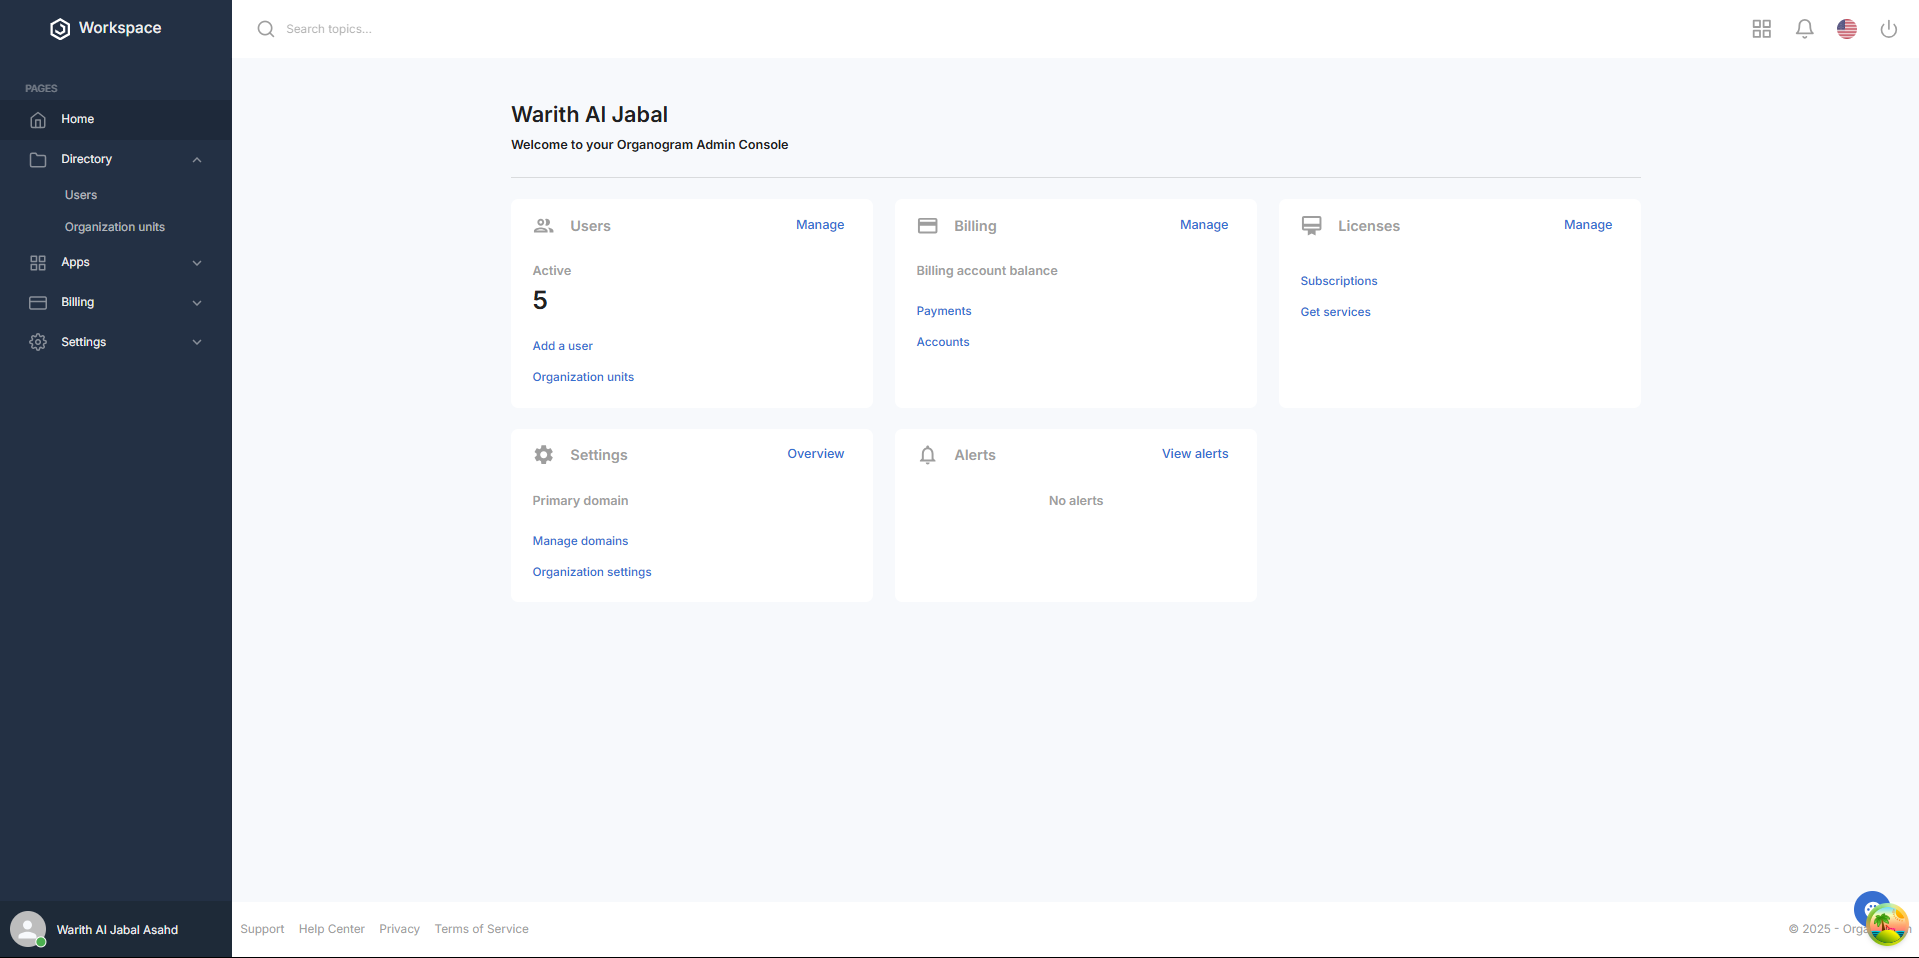
- Log into your Organogram Workspace Admin platform at
admin.organogram.app

- On the left sidebar, look for the Directory section.
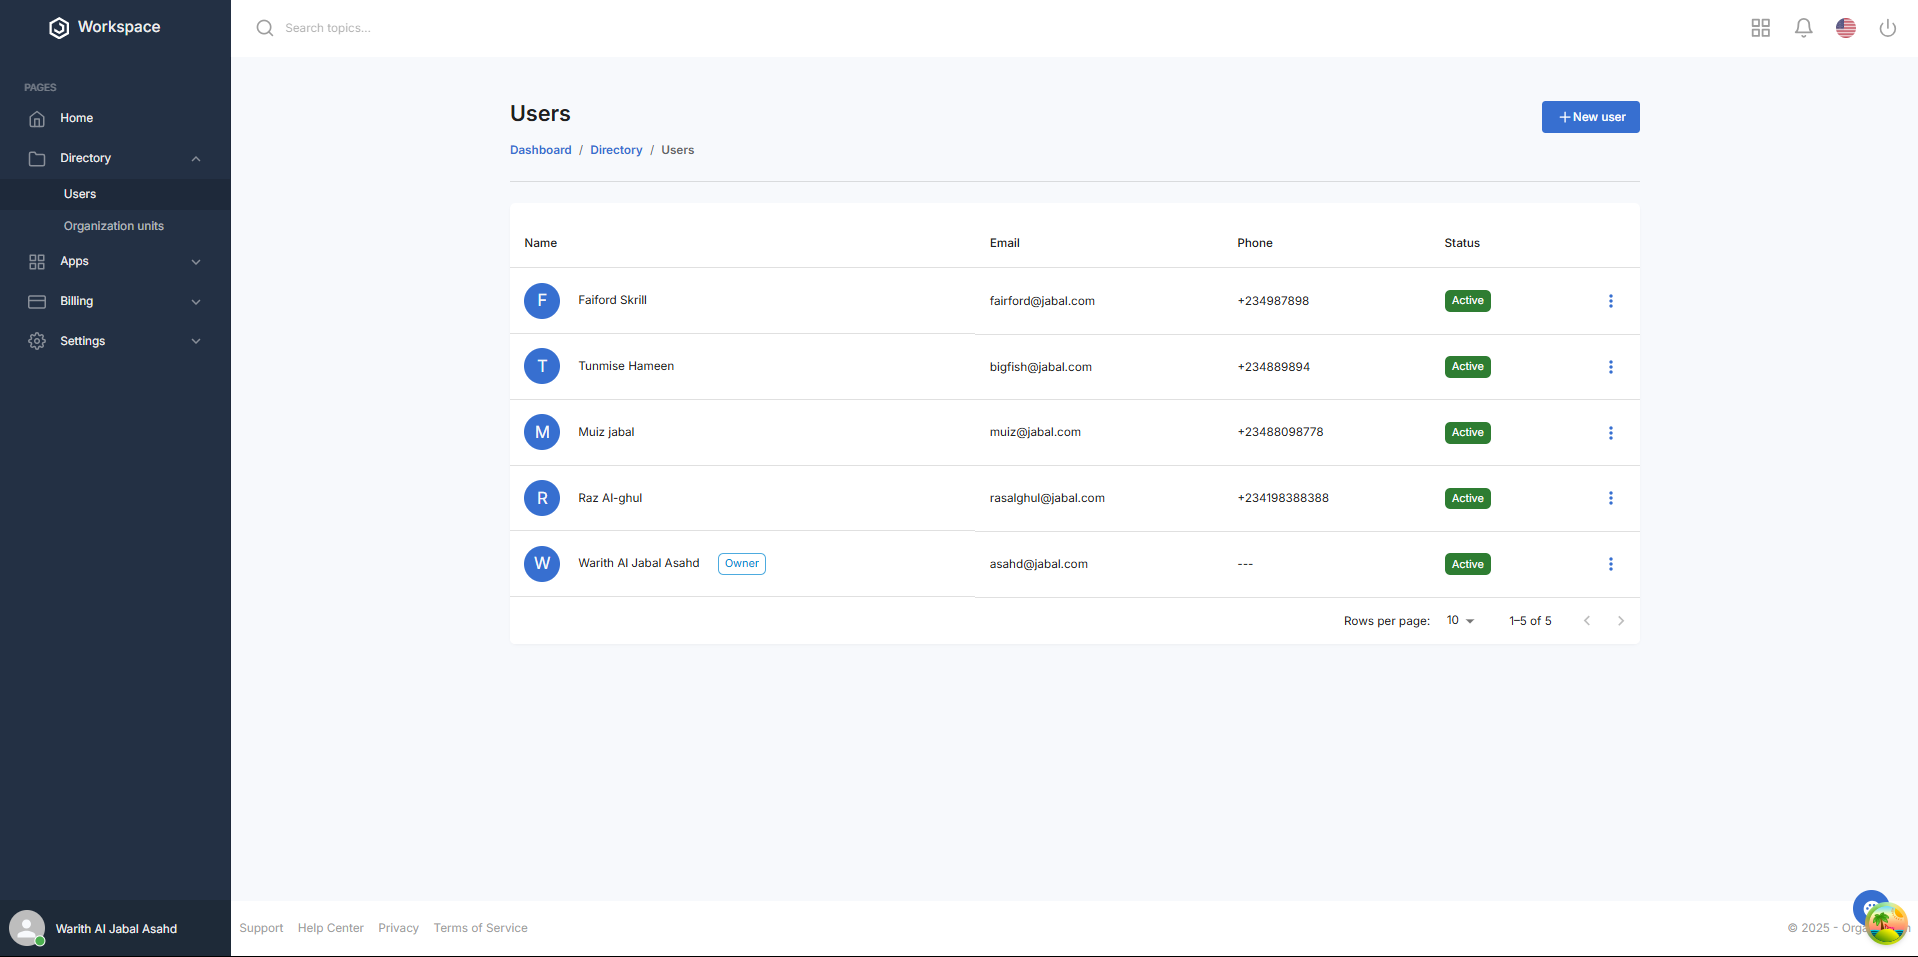
- Click on "Users" under the Directory section which would navigate to the user list page.

Step 2: Locate the User
- On the Users page, you'll see the current user list
- Browse the list to find the user you need to edit
- Click the three-dot menu (⋮) on the right side of the user’s row to open the menu
- Select Edit from the dropdown menu to open the user edit form
Step 3: Edit User Information
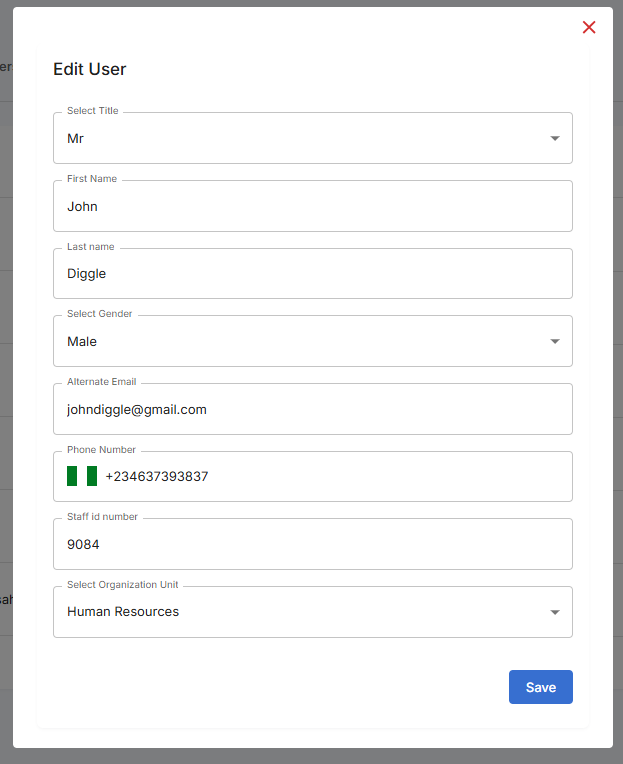
The Edit User dialog box will appear with the following fields pre-filled with the user’s current details:

Editable Fields:
- Title: Select the user’s title from the dropdown (e.g., Mr, Mrs, Miss)
- First Name: Update the user’s first name
- Last Name: Update the user’s last name
- Gender: Select the user’s gender
- Phone Number: Update the user’s phone number with the correct country code
- Alternate Email: Update the alternate email address for the user
- Staff ID: Update the unique staff identifier for the employee
- Organizational Unit: Select the user’s organizational unit from the dropdown (e.g., reassign from "Human Resources" to "Operations"). Note: Ensure the selected unit aligns with the intended organizational hierarchy
Step 5: Save the User
- Click the Save button at the bottom of the dialog
- A toast notification will pop up saying "User Updated Successfully"
- The system will process the changes and update the user’s profile
- The dialog will close automatically upon successful update
Step 6: Verify User Update
- You'll be returned to the main Users page
- The updated user should appear in the user list with the new details
Successful Update Confirmation:
- User table displays with updated name, email, and other details
- Status remains active
- Phone number, staff ID, and organizational unit appear in the respective columns
- Add button remains available for creating additional users
What You'll See After Editing
- The updated user will appear in the user directory with the new details
- Their status will remain "Active" by default
- The user’s organizational unit will reflect any changes in the hierarchy
Next Steps After editing a user’s details, you may want to:
- Verify the user’s role and permissions
- Notify the user of their updated details
- Review the organizational hierarchy for accuracy
Related Tasks
