
How to Manage Organizational Units
Overview
This guide explains how to create, edit, and delete organizational units in the Organogram Workspace Admin platform. It covers structuring your organization’s hierarchy, updating existing units, and maintaining an accurate organizational record.
Prerequisites
- Administrative access to the Organogram Workspace Admin platform
- Permissions to manage organizational units
- Basic information about the organizational unit (name, description, optional parent unit)
- For editing or deletion, knowledge of the specific unit and desired updates
When You Need This
- Structuring your organization’s hierarchy (e.g., departments, teams, or divisions)
- Adding new departments or teams to the system
- Updating or reorganizing units to reflect organizational changes
- Removing obsolete or redundant organizational units
- Maintaining accurate records for compliance and auditing
Managing Organizational Units
Step 1: Access the Organizational Unit Management Section
-
Log into your Organogram Workspace Admin platform at
admin.organogram.app.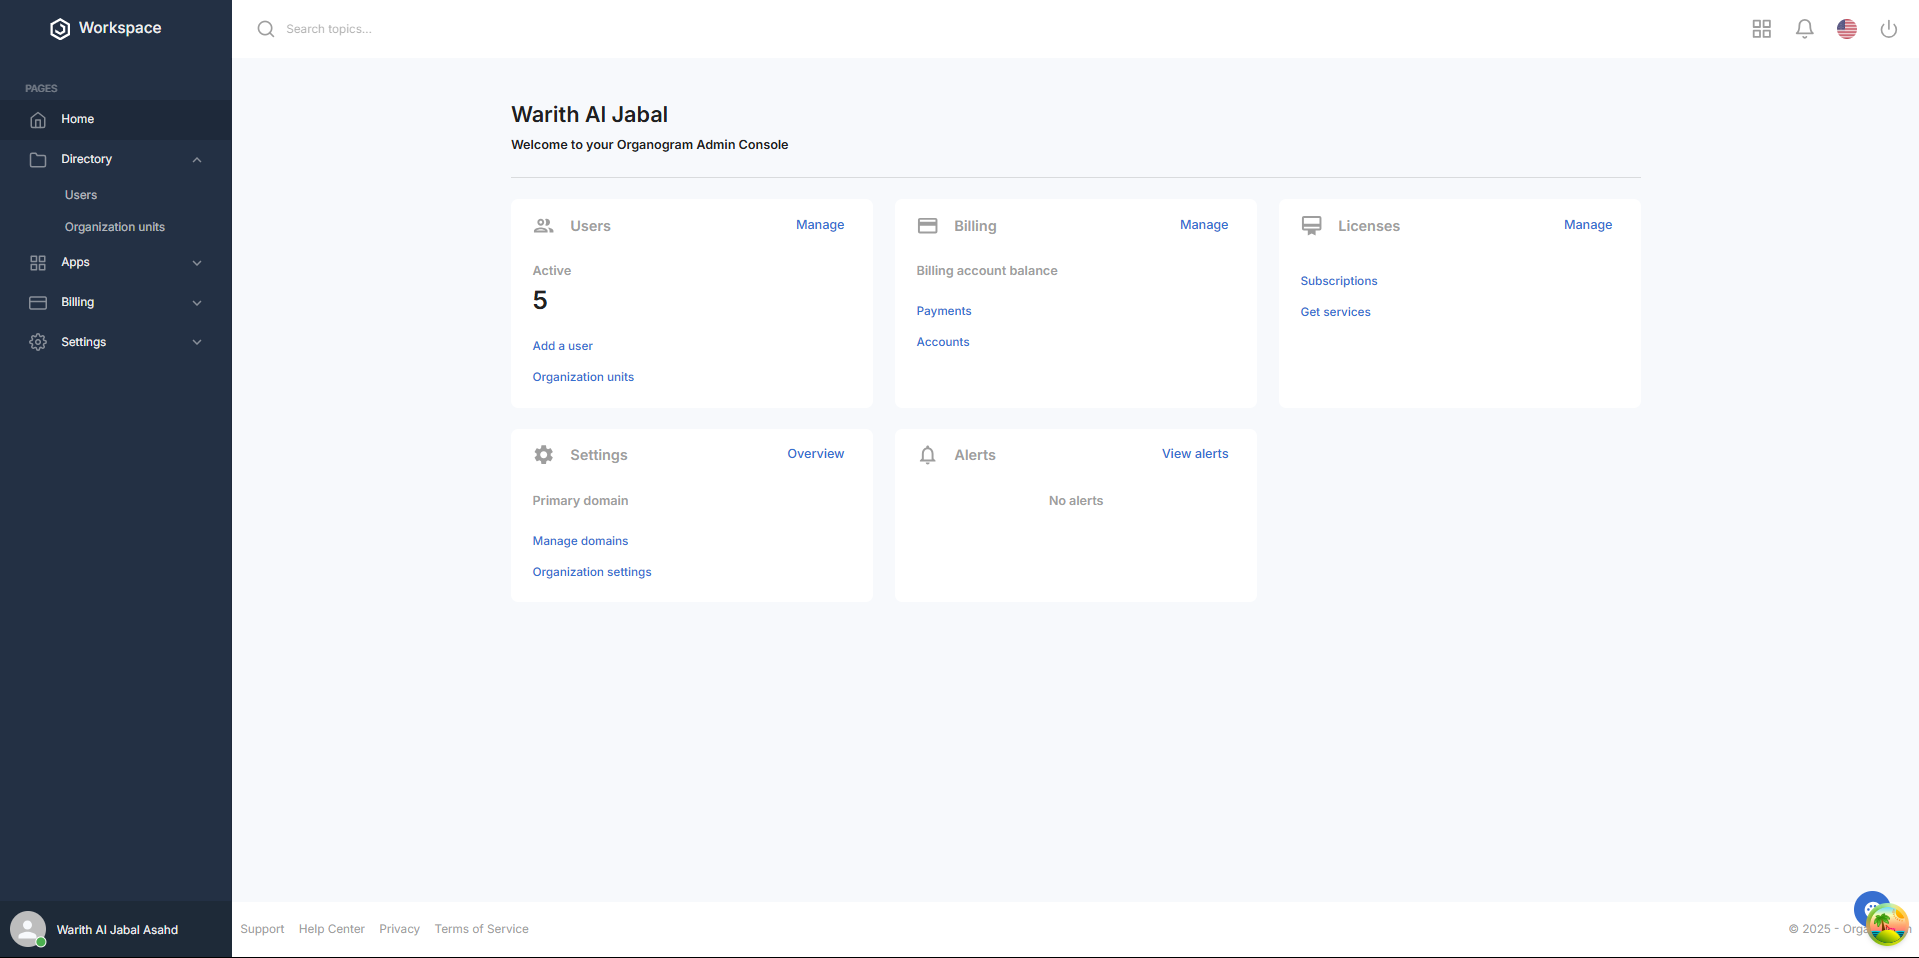
-
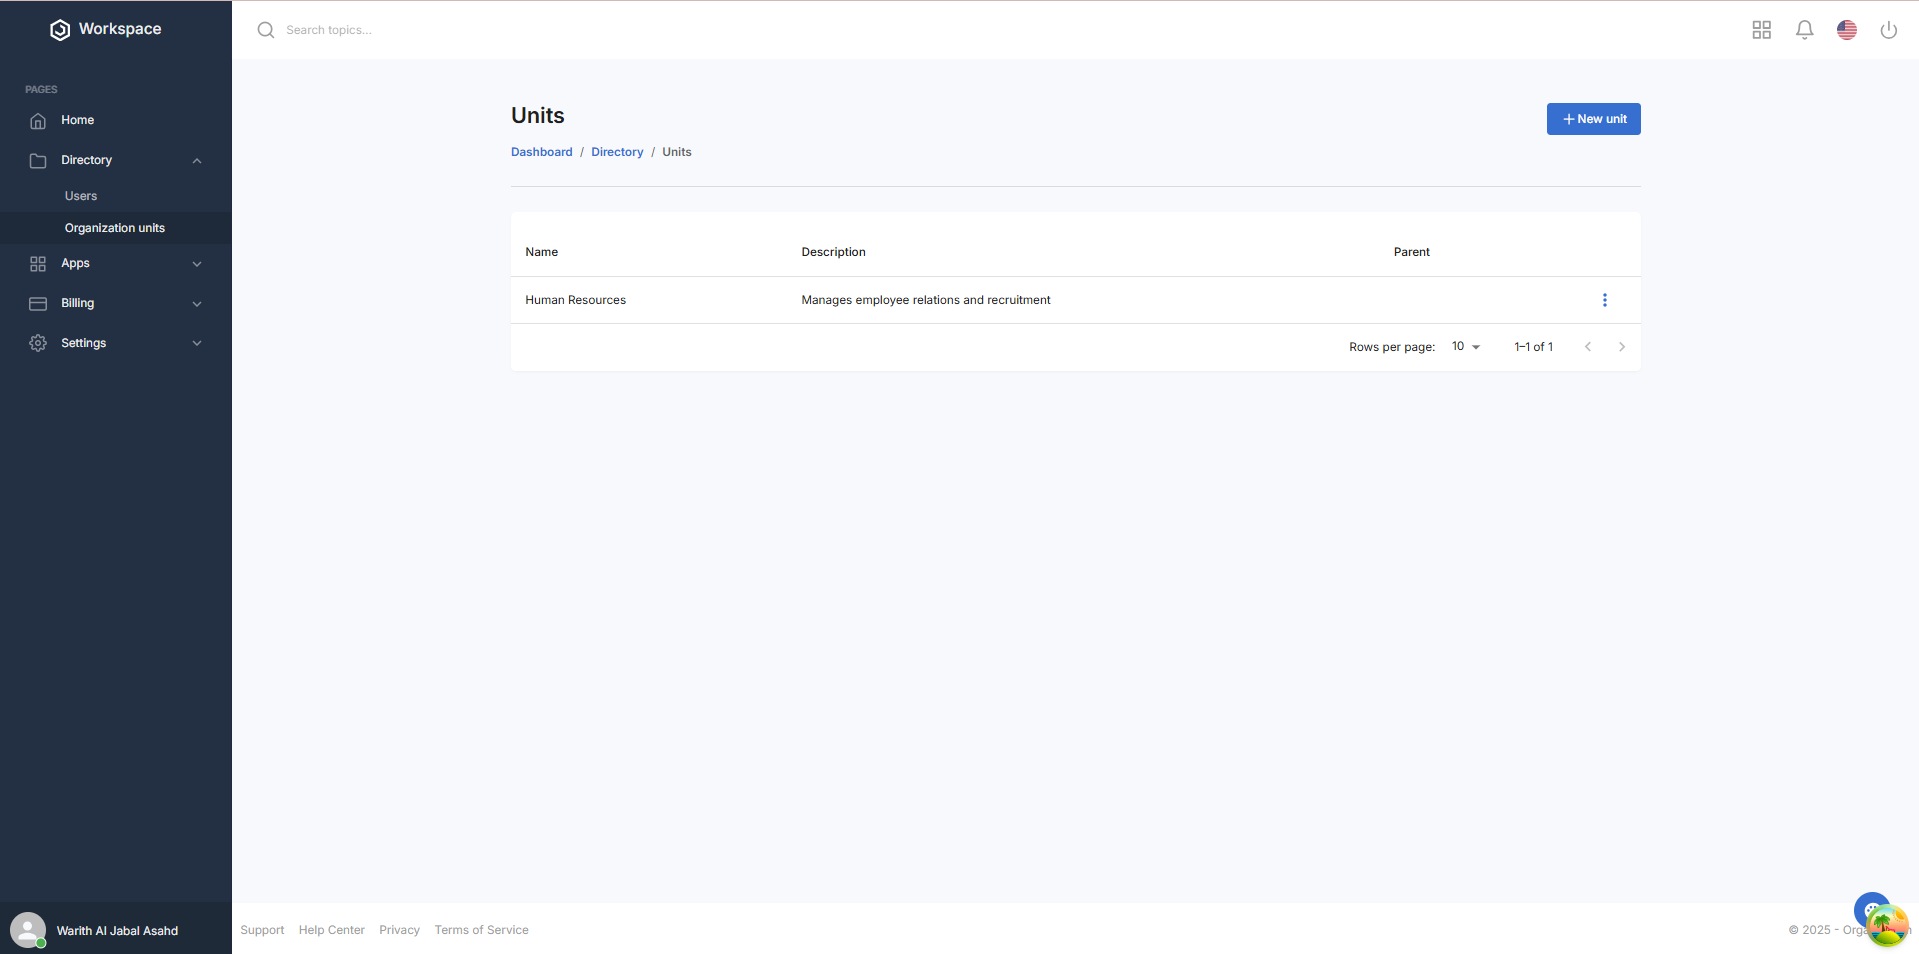
In the left sidebar, click Directory > "Organizational Units" to navigate to the organizational unit list page.
Creating an Organizational Unit
Step 2: Navigate to Add New Unit
-
On the Organizational Units page, view the current list of units.
-
In the top-right corner, locate the "+ New Unit" button.

-
Click on "+ New Unit" to open the organizational unit creation form.
Step 3: Fill in the Organizational Unit Information
-
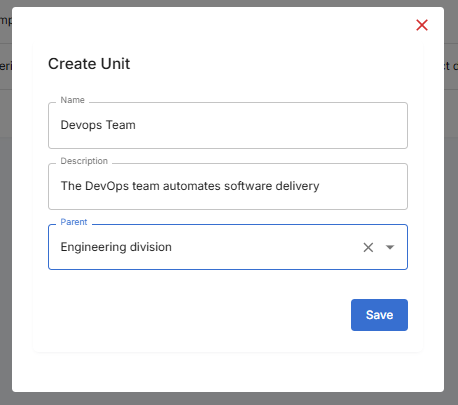
The "Create Unit" dialog box will appear with the following fields:
Required Information:
- Name: Enter the name of the organizational unit (e.g., "Human Resources", "Marketing Team").
- Description: Provide a brief description of the unit’s purpose or function.
- Parent Unit: Select a parent unit from the dropdown (if applicable).
Note: For the first organizational unit, the Parent Unit dropdown will be empty. For subsequent units, select an existing unit as the parent, if desired.
Step 4: Complete the Form
- Fill in all required fields carefully.
- Ensure the unit name is unique and descriptive.
- Verify the description accurately reflects the unit’s role.
- For subsequent units, ensure the selected parent aligns with the intended hierarchy.
Step 5: Save the Organizational Unit
- Click the "Save" button at the bottom of the dialog.
- A notification will pop up saying "Unit Created Successfully".
- The system will process the information and create the unit profile.
- The dialog will close automatically upon successful creation.
Step 6: Verify Organizational Unit Creation
-
You’ll be returned to the main Organizational Units page.
-
The new unit should now appear in the unit list.
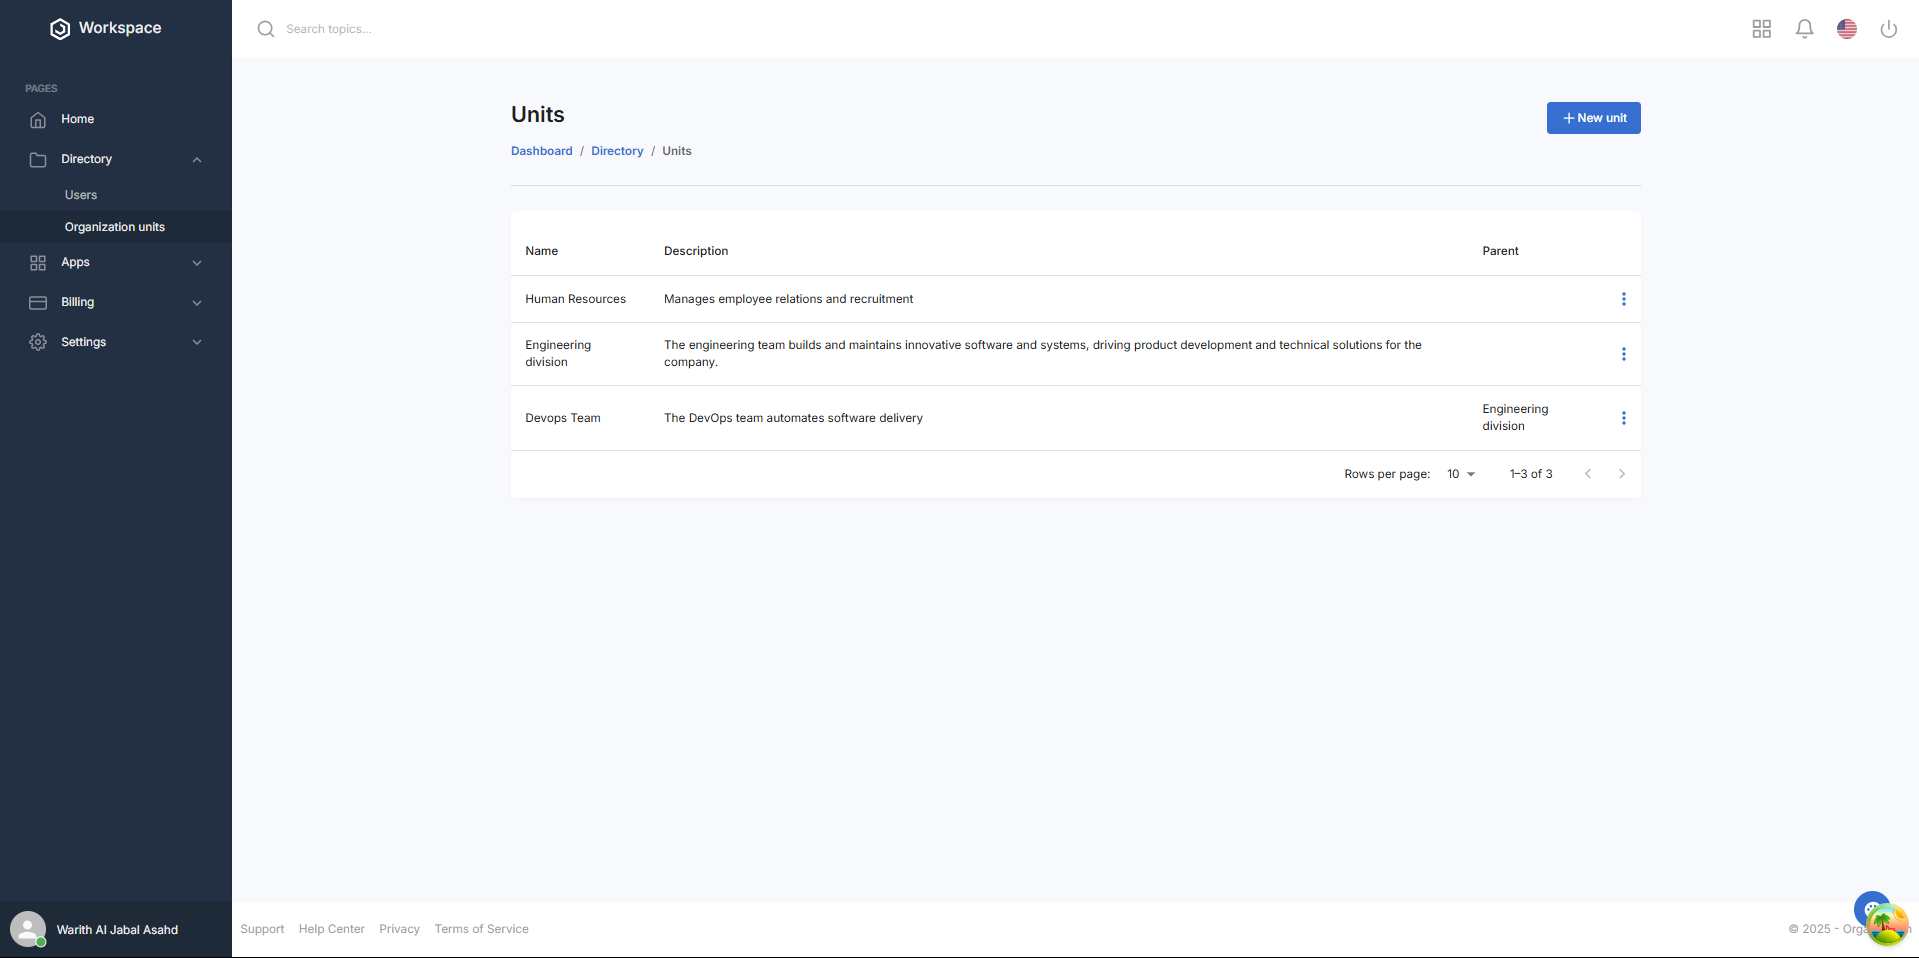
Successful Creation Confirmation:
- Unit table displays with name and description.
- Parent Unit shows the selected parent (or "None" for the first unit).
- Add button remains available for creating additional units.
Next Steps
- Update the organizational hierarchy as needed.
- Review the unit’s details for accuracy.
Editing an Organizational Unit
Step 1: Locate the Organizational Unit
-
On the Organizational Units page, find the unit you need to edit.
-
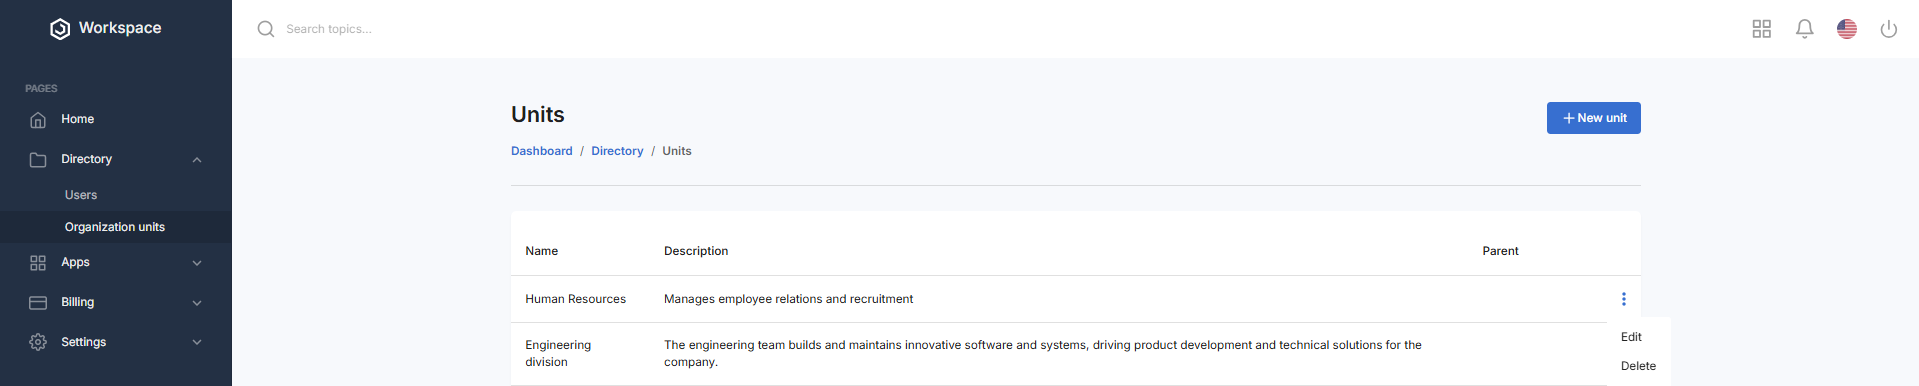
Click the three-dot menu (⋮) on the right side of the unit’s row and select "Edit".
-
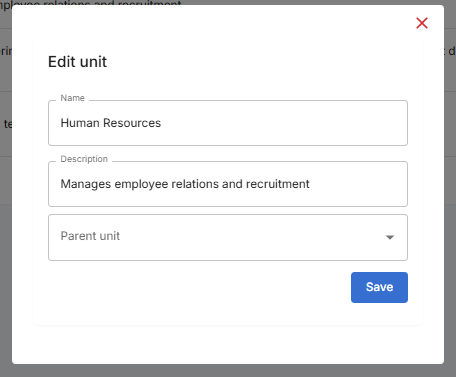
The "Edit Unit" dialog box will appear.
Step 2: Update Organizational Unit Information
Editable Fields:
- Name: Modify the name of the unit (e.g., "Human Resources" → "HR Department").
- Description: Update the description to reflect the unit’s purpose.
- Parent Unit: Select a new parent unit from the dropdown, if applicable.
Note: For the first unit, the dropdown may be empty if no parent is needed. For other units, select a parent that aligns with the hierarchy.
Step 3: Complete the Form
- Make the necessary changes carefully.
- Ensure the name follows your organization’s naming convention.
- Verify the description accurately reflects the unit’s function.
- Confirm any parent unit changes align with the hierarchy.
Step 4: Save the Changes
- Click the "Save" button at the bottom of the dialog.
- A notification will appear: "Organizational Unit Successfully Updated".
- The dialog will close automatically upon success.
Step 5: Verify Organizational Unit Update
- You’ll be returned to the main Organizational Units page.
- The updated unit will appear with the new details.
What You’ll See After Updating
- Updated name and description.
- Updated parent unit, if changed.
- Updated position in the hierarchy.
Next Steps
- Verify user assignments to the updated unit.
- Notify relevant team members.
- Review hierarchy for accuracy.
Deleting an Organizational Unit
Step 1: Locate the Organizational Unit
-
On the Organizational Units page, find the unit you want to delete.
-
Click the three-dot menu (⋮) and select "Delete".
Step 2: Confirm Deletion
-
Ensure the correct unit is selected.
-
A confirmation dialog will appear warning about deletion.

-
Click the red "Yes" button to confirm.
Step 3: Verify Unit Deletion
- A notification will pop up saying "Unit Successfully Deleted".
- The system will process the deletion and remove the unit.
- You’ll be returned to the main Organizational Units page.
What You’ll See After Deleting
- The unit will be removed from the directory.
- Unit count will decrease.
- Any affected child units or user assignments will update based on hierarchy rules.
Next Steps
- Verify user assignments for affected units.
- Notify relevant team members.
- Review the hierarchy for accuracy.