How to Manage Pay Schedules
Overview
This guide explains how to create, configure, edit, manage, and run pay schedules in the Payroll Workspace. You will learn how to define a new pay schedule, set its frequency, configure tax systems, add pay items, assign employees, enable mixins (such as bonuses, claims, and loans), and finally process the schedule to run payroll. The Pay Schedule feature ensures that payroll runs consistently and accurately across your organization.
Prerequisites
- Access to the Payroll workspace platform
- Admin or authorized permissions to manage payroll data
When You Need This
- Creating a new payroll schedule for employees
- Updating an existing pay schedule’s frequency or tax configuration
- Assigning employees to a specific pay schedule
- Configuring pay items, tax rules, and mixins for payroll processing
- Running payroll for a defined schedule and period
Step-by-Step Instructions
Step 1: Access the Pay Schedules Page
- Log into your Organogram Payroll workspace at
payroll.organogram.app. - From the left-hand sidebar, click Payroll.
- Under the Payroll section, select Pay Schedules.
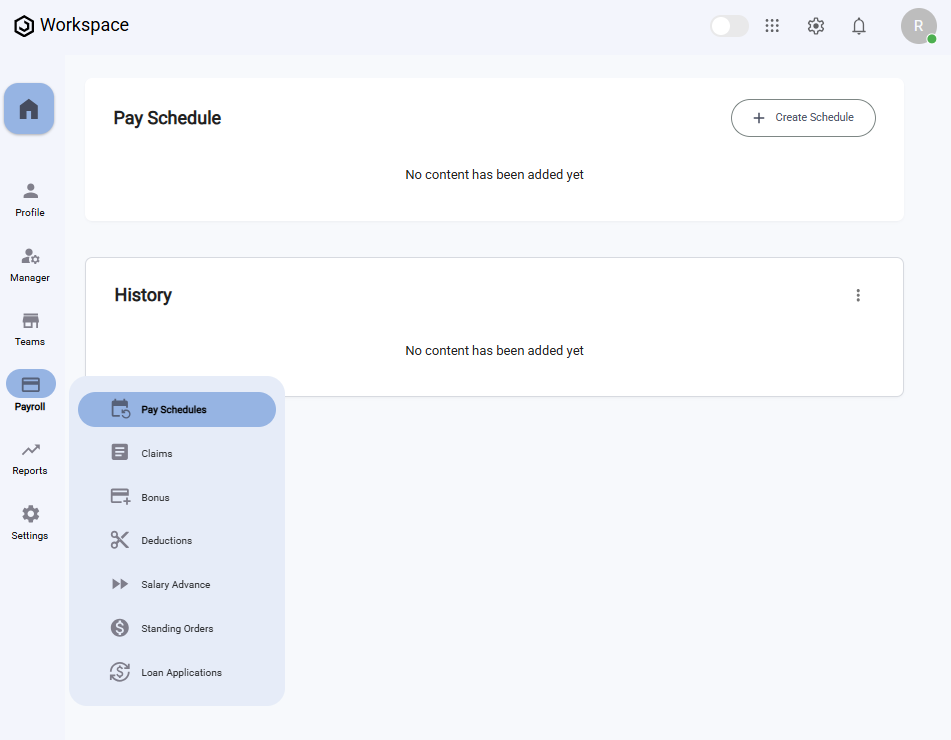
Step 2: Create a New Pay Schedule
- On the Pay Schedule page, click the "+ Create Schedule" button.
- The Create Pay Schedule Form will appear.

Fill in the following fields:
- Name – Enter the name of the pay schedule.
- Frequency – Select from the dropdown: Daily, Weekly, Monthly, Quarterly, Annually.
- After entering the details, click "Configure".
- A toast notification will appear: "Pay schedule created successfully".
- Another notification will appear: "Redirecting to configure pay schedule", and you will be redirected to the Schedule Step Page.
Step 3: Understand the Schedule Step Page
The Schedule Step Page displays the structure and components of your newly created pay schedule.
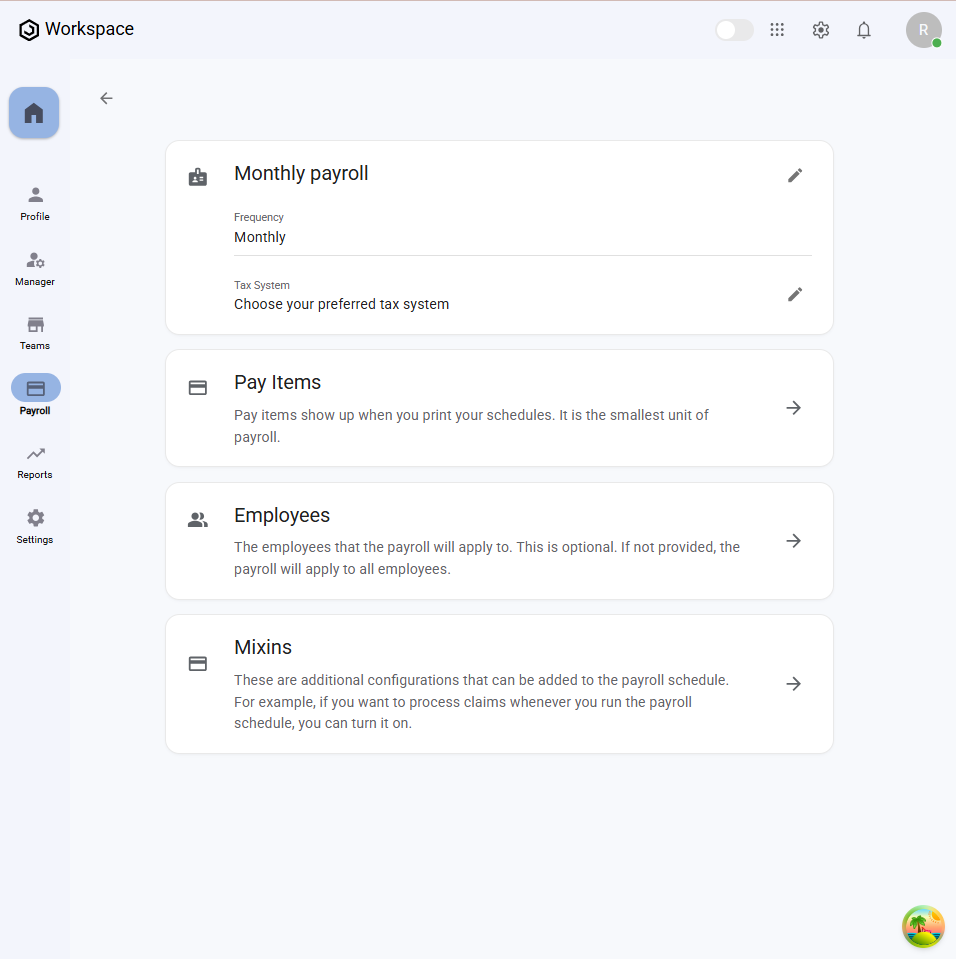
The page contains several cards:
- Pay Schedule — Displays the pay schedule name and frequency. Includes:
- Edit icon to update basic details (name and frequency).
- Edit icon for configuring the Tax System (options: No Tax, Nigeria). If Nigeria is selected, detailed Nigerian tax configuration options are displayed.
- Pay Items — Manage all pay items linked to this schedule.
- Employees — Shows assigned employees with a right arrow to configure employees.
- Mixins — Configure additional payroll components like bonuses, loans, and deductions.
Step 4: Edit a Pay Schedule
- On the Schedule Step Page, click the Edit icon on the Monthly Payroll card.
- The Edit Pay Schedule Form will appear with the existing details pre-filled.
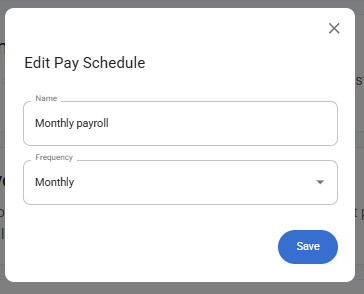
- Update the fields as needed (e.g., name, frequency).
- Click "Save".
- You’ll see a notification: "Pay schedule basics updated successfully".
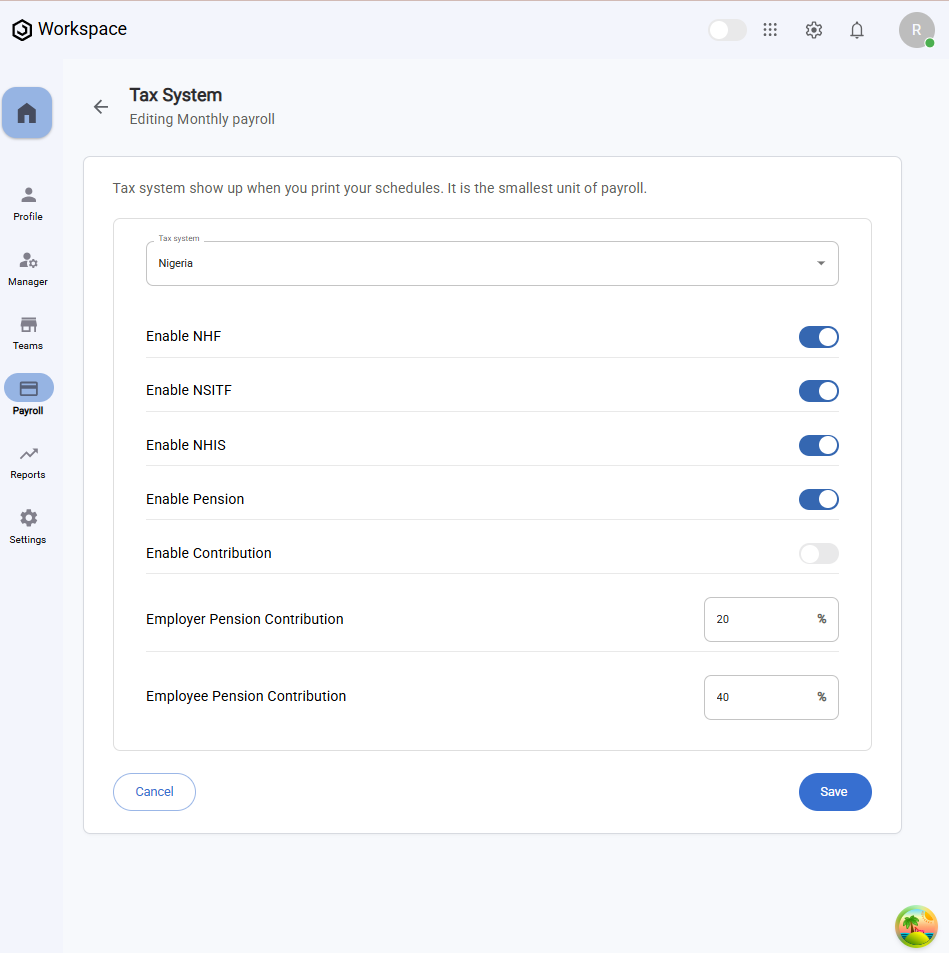
Editing Tax System
- On the same card, click the Edit icon next to Tax System.
- You’ll be taken to the Tax System Configuration Page.
- From the dropdown, select either:
- No Tax
- Nigeria (displays Nigeria-specific configuration settings).
- Configure the selected tax system and click "Save".
- A notification will appear: "Tax system configured successfully".
Step 5: Configure Pay Items
- On the Schedule Step Page, click the right arrow icon on the Pay Items card.
- You’ll be taken to the Pay Items Page.
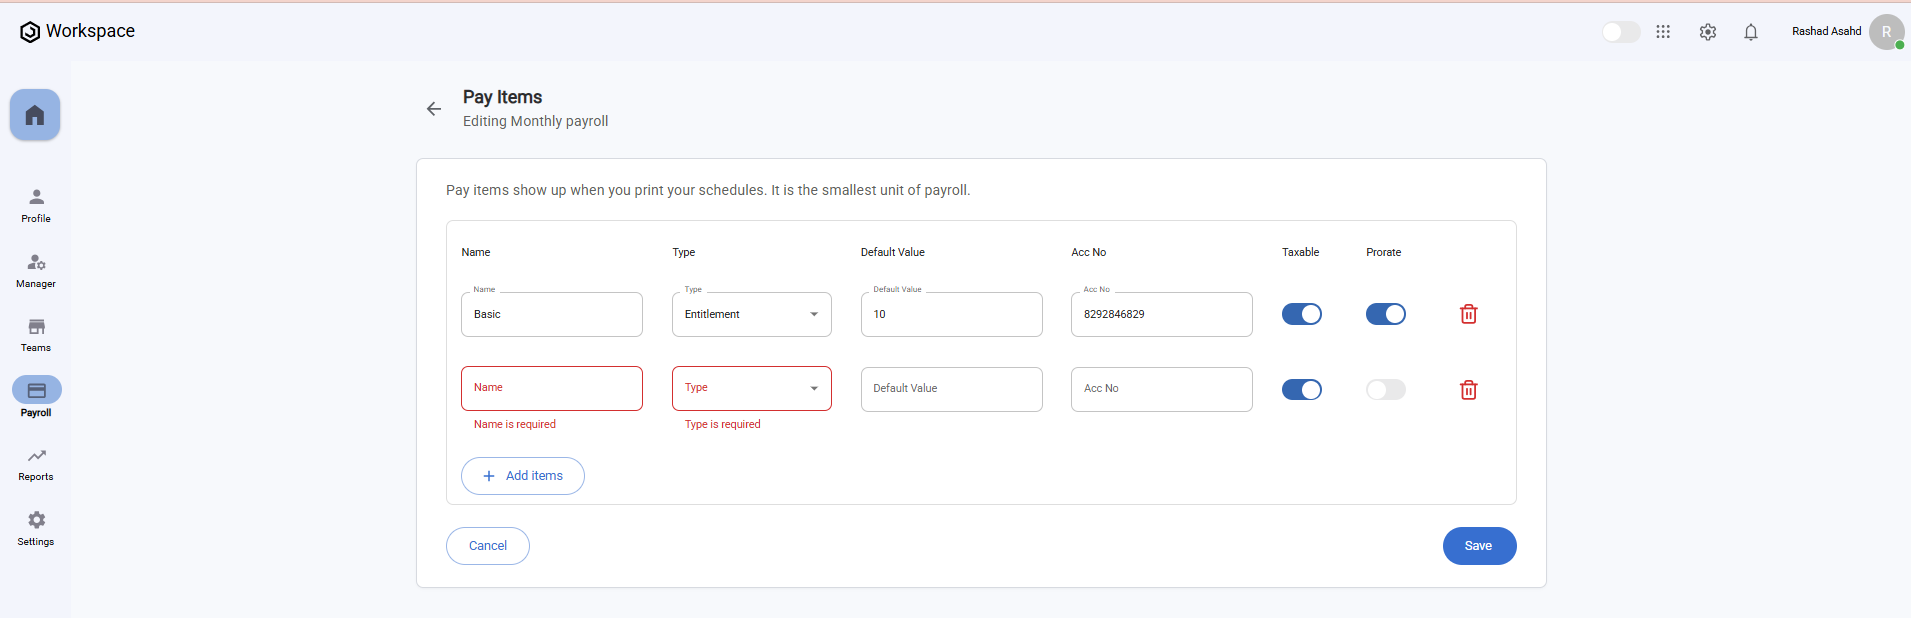
Add or Modify Pay Items
-
Enter details for each pay item:
- Name – e.g., “Housing Allowance.”
- Type – Select Entitlement or Deduction.
- Default Value – Numeric value to be applied.
- Account Number – Input the acccount number.
- Taxable Toggle – Enabled by default, but can be disabled.
- Prorate Toggle – Enable if the pay item should be prorated.
-
Actions:
- + Add Items – Add more pay items.
- Delete Icon – Remove unwanted pay items.
- After adding/modifying pay items, click Save.
- You’ll see a notification: "Pay items configured successfully".
- The new pay items will be automatically assigned to existing employees.
- Back on the Schedule Step Page, the Pay Items card now shows the number of configured items.
Step 6: Assign Employees to the Pay Schedule
- On the Schedule Step Page, click the right arrow icon on the Employees card.
- You’ll be taken to the Employee Configuration Page.
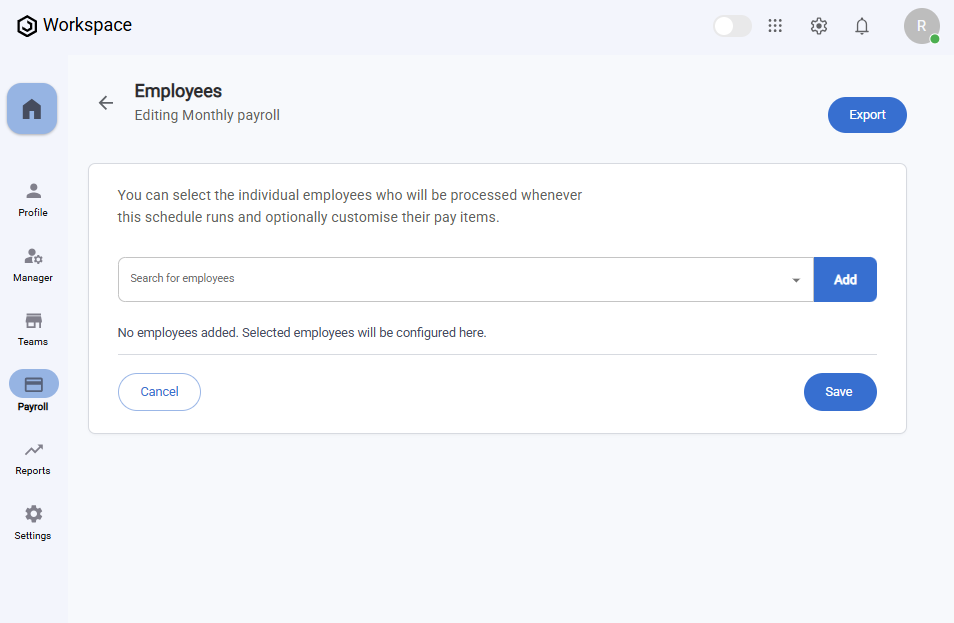
- Use the Search for employees dropdown to select an employee.
- Click Add.
- A notification will appear: "Employee added to pay schedule successfully".
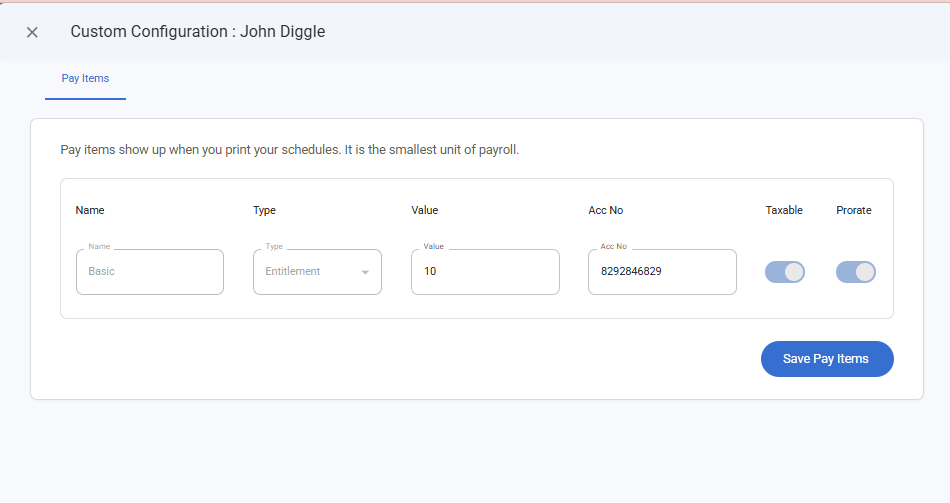
- You’ll be redirected to a Custom Configuration Page for that employee’s pay schedule.
- Configure the employee’s pay items, then click Save Pay Items.
- A notification will appear: "Pay items saved successfully".
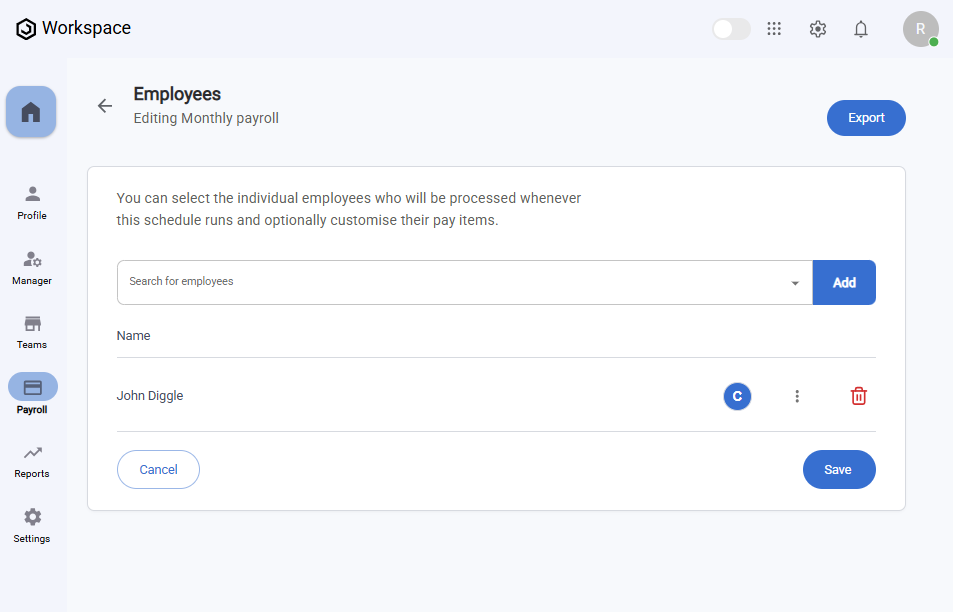
The configured employee now appears on the Employee Configuration Page with:
- Delete button — to remove the employee from the schedule.
- Three-dot menu icon (⋮) — Configure Pay Items which when selected, opens a full screen custom configuration dialog that shows the employee configuration.
- After configuring the pay schedule for that employee, the newly configured employee now shows on the Employee Configuration Page.
Step 7: Configure Mixins
- On the Schedule Step Page, click the right arrow icon on the Mixins card.
- You’ll be taken to the Mixins Configuration Page.
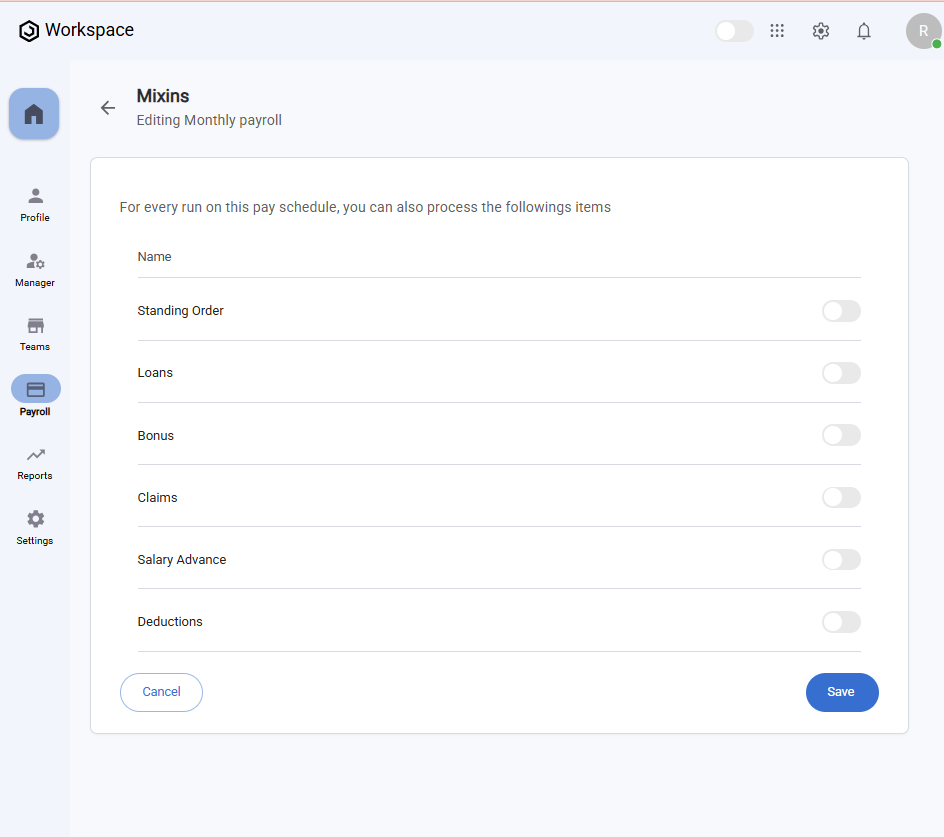
-
Available mixins include:
- Standing Order
- Loans
- Bonus
- Claims
- Salary Advance
- Deductions
-
Toggle ON the mixins you want to configure.
-
Click Save.
-
A notification will appear: "Pay mixins configured successfully".
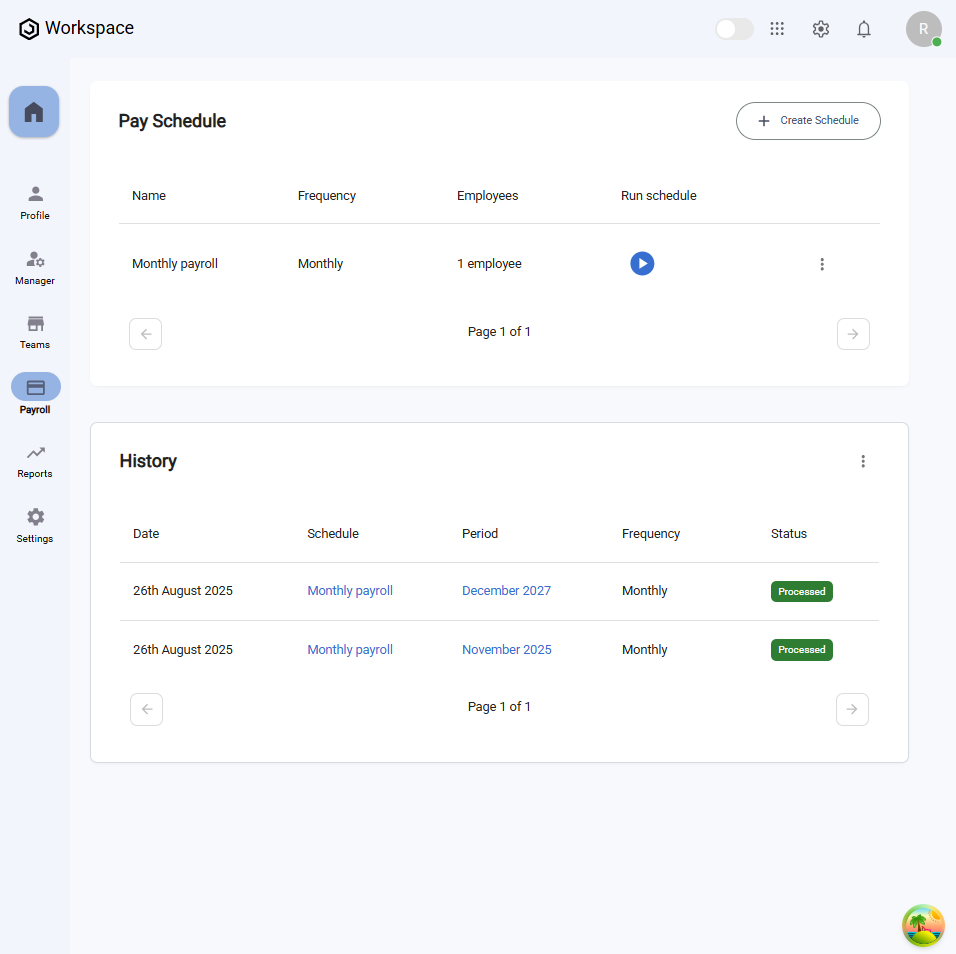
Step 8: Run a Pay Schedule
After completely configuring a pay schedule, it will now appear on the Pay Schedule Page.
- Locate your pay schedule on the Pay Schedule table.
- Under the Run Schedule column, click the Play button ▶️.
- A Select Period Form will pop up.

- Choose the Month and Year for which you want to run the payroll.
- Click Process.
- You’ll see a notification:
- "Schedule ran for (Month, Year)".
- Followed by: "Payroll run for (Month, Year) has been processed successfully".
View Payroll Run History
After processing, the History card under the Pay Schedule card will display a table with the following columns:
- Date – When the schedule was processed.
- Schedule – The name of the pay schedule.
- Period – The selected month and year.
- Status – Displays Processed.
Step 9: Manage Pay Schedules
On the Pay Schedule Card in the Pay Schedule Page:
- Click the Three-dot menu icon (⋮).
- Edit — Takes you to the Schedule Step Page where you can update details.
- Delete — Opens a confirmation dialog.
When Delete is clicked:
- A confirmation dialog will pop up asking if you’re sure.
- Click Yes to delete the pay schedule.
- The pay schedule will be permanently removed.
Summary
By completing these steps, you have successfully:
- Created and configured a new pay schedule
- Defined pay frequency and tax systems
- Added pay items
- Assigned employees
- Enabled and configured mixins
- Processed and ran payroll for the selected period
- Viewed payroll run history
- Edited or deleted pay schedules when necessary
This ensures payroll runs accurately and consistently for the selected group of employees.