How to Manage Employee Salary Advances
Overview
This guide explains how to create, view, edit, approve/decline, and delete employee salary advances within the Payroll Workspace. You’ll learn how to request a salary advance for an employee, update its details, and manage it from the Salary Advance page.
Prerequisites
- Access to the Payroll workspace platform
- Admin or authorized permissions to manage payroll data
When You Need This
- Providing employees with an advance on their salary before the scheduled payday
- Updating the details of an existing salary advance (e.g., amount or remarks)
- Reviewing employee salary advances in detail
- Approving or declining employee salary advances
- Removing advances that are no longer applicable
Step-by-Step Instructions
Step 1: Access the Salary Advance Page
- Log into your Organogram Payroll workspace at
payroll.organogram.app. - From the left-hand sidebar, click "Payroll".
- Under the Payroll section, select "Salary Advance".
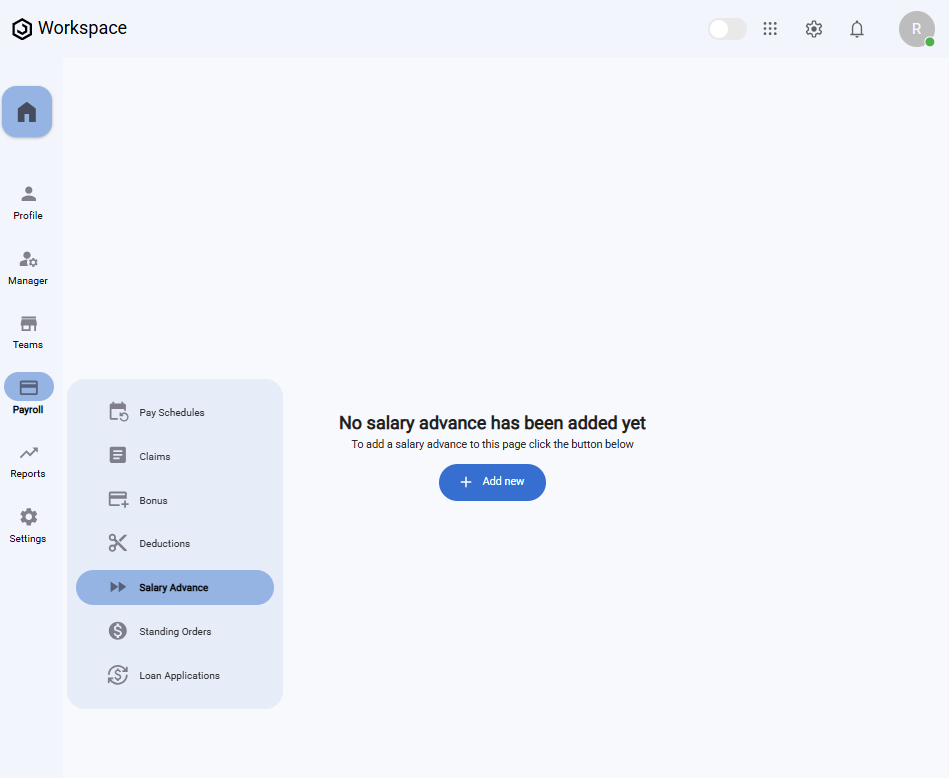
On the Salary Advance page, you’ll find:
- A dropdown at the top to select an Employee.
- A "Add New" button to create a new salary advance.
- A message that says "No content found" if no salary advances exist.
Step 2: Create a New Salary Advance
- On the Salary Advance page, click the "Add New" button.
- The "Add Salary Advance" form will appear.
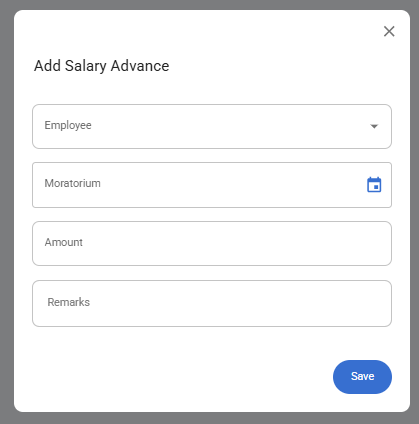
Fill in the following fields:
- Employee – Select the employee from the dropdown list (pulled from the Payroll workspace).
- Moratorium – Select the repayment start date using the datepicker.
- Amount – Enter the advance amount requested.
- Remarks – Provide any additional notes or comments related to the advance.
- After filling in the information, click the "Save" button.
- A notification will appear: "Salary advance created successfully".
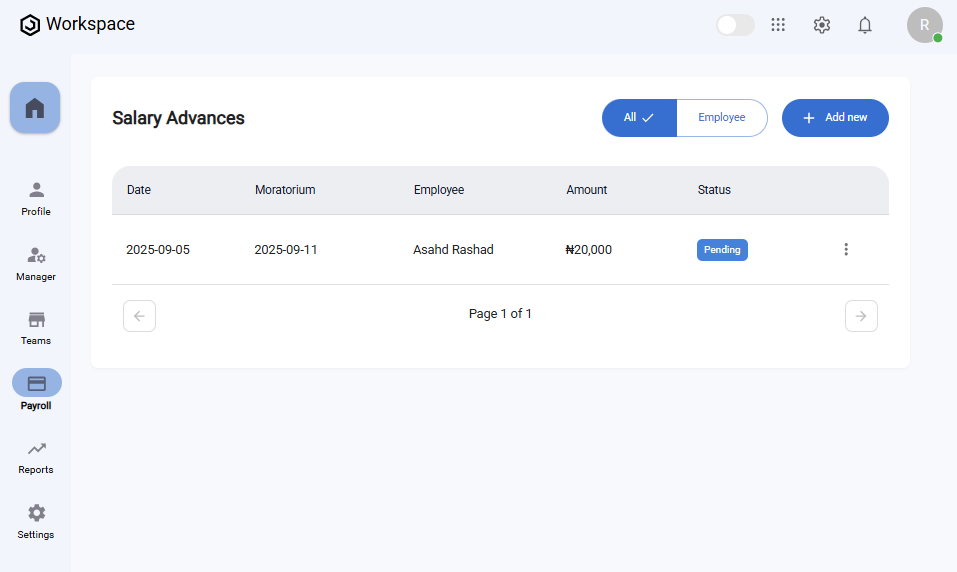
- The newly added salary advance will now display in the Salary Advance Table, with its Status showing as Pending.
Step 3: View or Approve/Decline a Salary Advance
- Locate the salary advance you wish to view in the Salary Advance Table.
- Click the three-dot menu icon (⋮) on the right-hand side of the row.
- From this menu, you can:
-
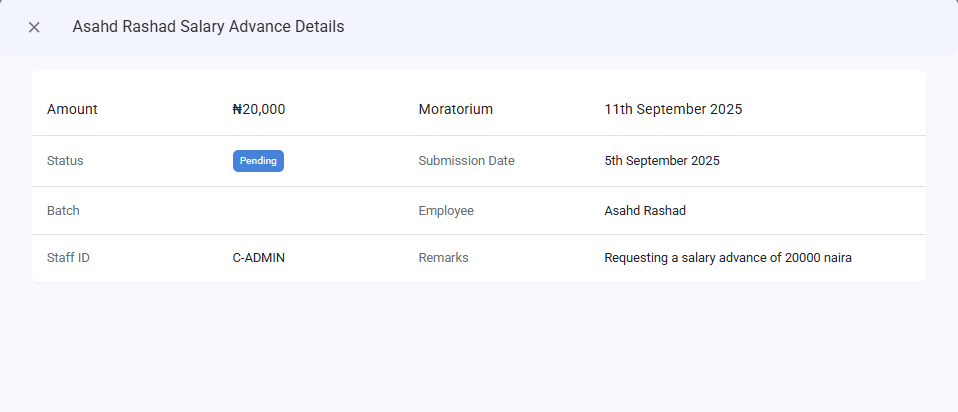
View – Open a full-screen details dialog displaying:
- Employee
- Moratorium
- Submission Date
- Batch
- Amount
- Remarks
- Status
-
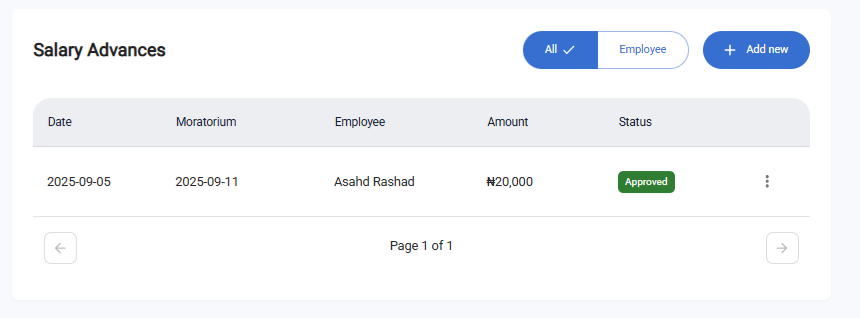
Approve – Change the status of the salary advance to Approved. A notification will appear: "Status updated successfully".
-
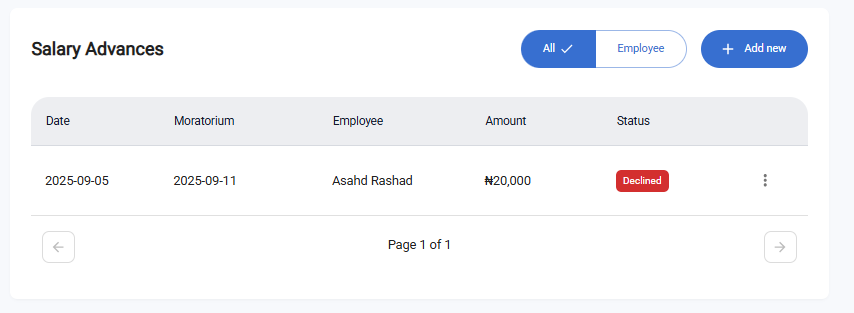
Decline – Change the status of the salary advance to Declined. A notification will appear: "Status updated successfully".
-
Step 4: Edit an Employee Salary Advance
- Locate the salary advance you wish to edit in the Salary Advance Table.
- Click the three-dot menu icon (⋮) on the row.
- Select "Edit".
- The Edit Salary Advance form will appear, pre-filled with the current details.
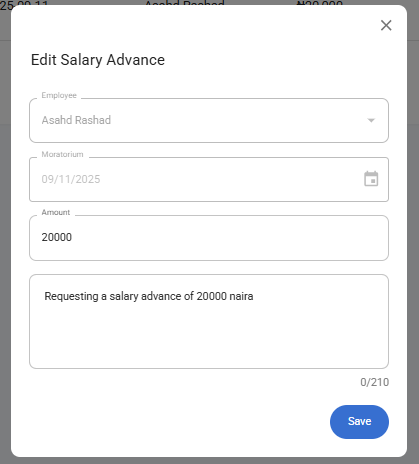
- Update the Amount and Remarks fields as needed.
- Click "Save".
- A confirmation notification will appear: "Salary advance updated successfully".
Note:
- The Employee and Moratorium fields cannot be changed during editing.
- Declined salary advances cannot be edited.
Step 5: Delete an Employee Salary Advance
- In the Salary Advance Table, click the three-dot menu icon (⋮) on the entry you want to remove.
- Select "Delete".
- A confirmation dialog will appear asking if you’re sure.
- Click "Yes" to confirm.
- The salary advance will be deleted, and a notification will appear: "Salary advance deleted successfully".
What You’ll See
- Newly created salary advances always start with the status Pending.
- Using the three-dot menu, administrators can change the status to Approved or Declined.
- Approved advances indicate successful approval, while Declined advances cannot be edited further.