How to Manage Positions
Overview
This guide explains how to create, edit, and delete positions within the Payroll Workspace. You’ll learn how to use the Settings page to define organizational roles, set reporting structures, and update or remove positions when necessary.
Prerequisites
- Access to the Payroll workspace platform
- Admin or authorized permissions to manage organizational settings
When You Need This
- Creating new positions for employees in your organization
- Defining reporting hierarchies between positions
- Updating position details such as descriptions or reporting lines
- Removing outdated or unused positions
Step-by-Step Instructions
Step 1: Access the Positions Page
- Log into your Organogram Payroll workspace at
payroll.organogram.app. - From the left-hand sidebar, click "Settings".
- Scroll down to the Positions Card, or use the dropdown navigator at the top of the Settings page to jump directly to Positions.

Step 2: Create a New Position
- On the Positions Card, click the "+ Add Position" button.
- A Create Position Form will appear.
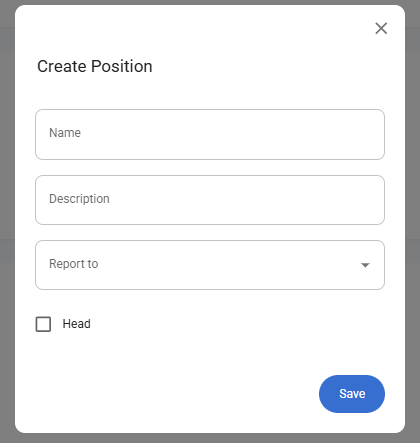
Fill in the following fields:
- Name – Enter the title of the position (e.g., Manager).
- Description – Enter a short summary of the position’s responsibilities.
- Reports To – Select from the dropdown which position this new role reports to.
- ⚠️ If this is the first position created, the dropdown will be empty.
- Head – Select the checkbox if this position is the head role.
- Click "Save".
- A notification will appear: "Position created successfully".
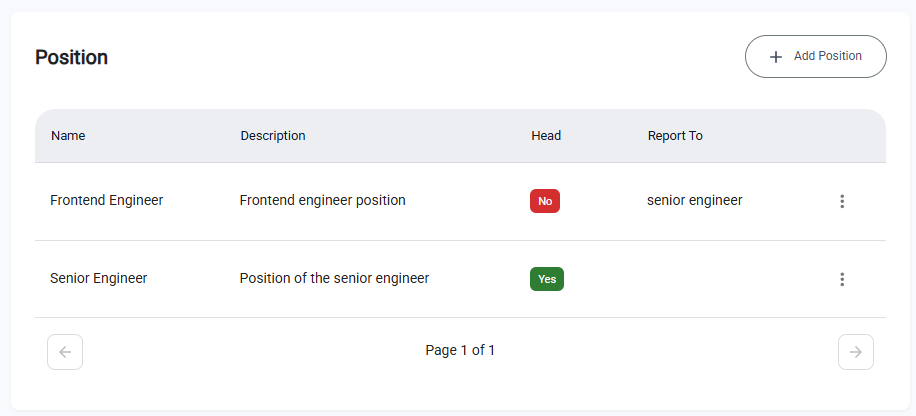
- The newly added position will now display in the Positions Table.
✅ After creating the first position, the Reports To dropdown will become available for subsequent positions, allowing you to build a reporting hierarchy.
Step 3: Edit an Existing Position
- In the Positions Table, locate the position you want to update.
- Click the three-dot menu icon (⋮) next to the position.
- Select "Edit".
- The Edit Position Form will appear, pre-filled with the current details.
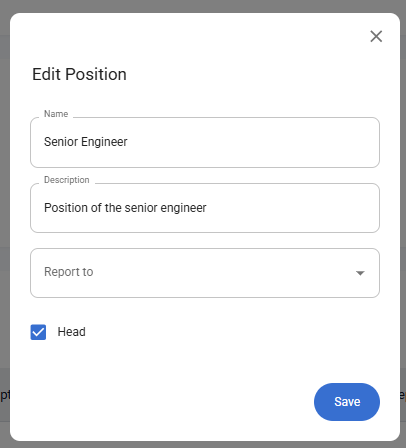
- Update the necessary fields such as Name, Description, or Reports To.
- Click "Save".
- A notification will appear: "Position updated successfully".
Step 4: Delete a Position
- In the Positions Table, find the position you want to remove.
- Click the three-dot menu icon (⋮) next to the position.
- Select "Delete".
- A confirmation dialog will appear.
- Click "Yes" to confirm.
- A notification will appear: "Position deleted successfully".
Notes
- The Reports To field helps build your organizational hierarchy.
- At least one Head position should exist to serve as the top of the hierarchy.
- Positions can be added, edited, or removed at any time as your organization evolves.