How to Add Employee Documents
Overview
This guide shows HR managers how to upload and manage employee documents in the Organogram HCM system. You'll learn to add important files like contracts, identification documents, and compliance paperwork to maintain complete employee records.
Prerequisites
- HR manager access to the Organogram workspace platform
- Permissions to edit employee information
- Employee must already exist in the system
- Digital copies of documents to upload (PDF, images, etc.)
When You Need This
- Storing employment contracts and agreements
- Uploading identification documents (passport, driver's license)
- Managing compliance and certification documents
- Organizing onboarding paperwork and forms
- Maintaining legal and HR documentation
- Creating digital employee file archives
Step-by-Step Instructions
Step 1: Access the Employee Directory
- Log into your Organogram workspace at
people.organogram.app - Click "Team" in the left sidebar
- Select "Employees" from the navigation menu
- You'll see the employee directory page
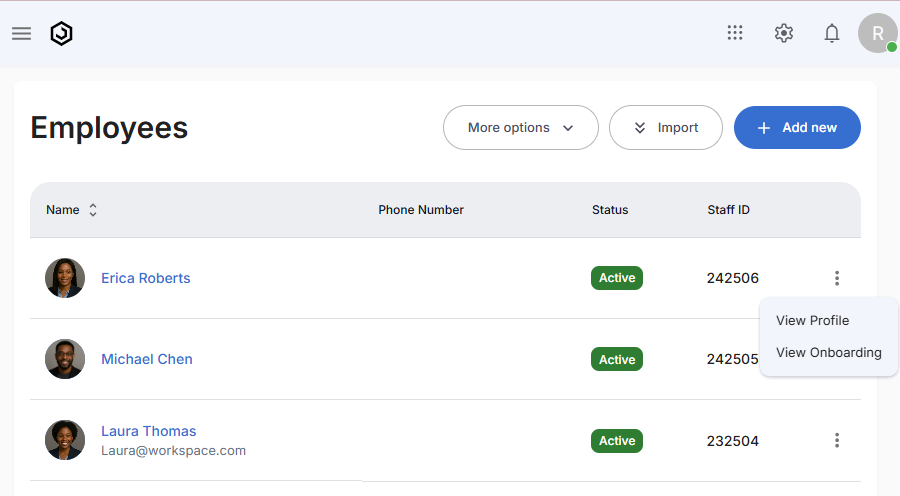
Step 2: Locate the Employee
- Browse the employee list to find the employee whose documents you need to manage
- Use the employee's name, photo, or Staff ID to identify them
- Note their current status and any existing document information
Step 3: Open Employee Profile
- Click the three-dot menu (⋮) on the right side of the employee's row
- Select "View Profile" from the dropdown menu
- The employee's detailed profile page will open
Step 4: Navigate to Documents Section
- Scroll down to locate the "Documents" section
- This section displays any existing employee documents
- Look for the "+ Add" button in the top-right corner of the section

Step 5: Access the Document Upload Form
- Click the "+ Add" button in the Documents section
- The "Add Document" form will appear
- You'll see fields for document information and file upload
Step 6: Fill in Document Information
The document form contains several fields for organizing and describing files:
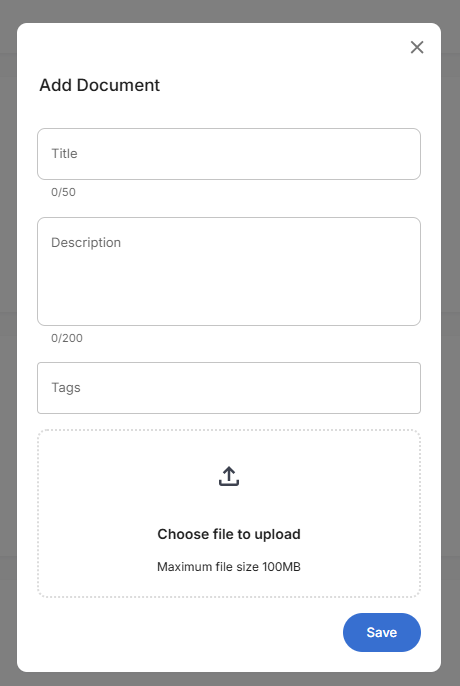
Document Details:
- Title - Descriptive name for the document (character limit: 50)
- Description - Detailed description of the document content (character limit: 200)
- Tags - Organizational tags for categorizing documents
- File Upload Area - Drag and drop or click to select files
Step 7: Enter Document Title and Description
Focus on providing clear, descriptive information:
Required Information:
- Title: Enter a clear document name (e.g., "Employment Contract")
- Description: Provide context about the document (e.g., "Signed employment agreement for full-time position")
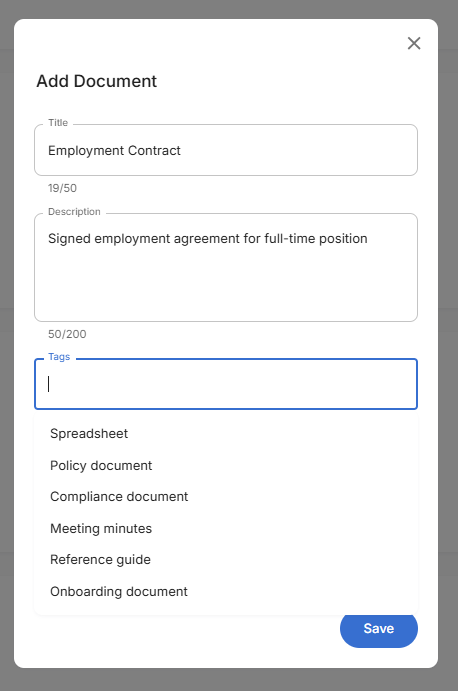
Step 8: Select Document Tags
Use tags to categorize and organize documents for easy retrieval:
Available Tag Categories:
- Spreadsheet - For Excel files and data documents
- Policy document - Company policies and procedures
- Compliance document - Regulatory and legal compliance files
- Meeting minutes - Records of meetings and discussions
- Reference guide - Training materials and reference documents
- Onboarding document - New hire paperwork and orientation materials
Tag Selection:
- Click in the Tags field
- Select appropriate categories from the dropdown
- Multiple tags can be selected for comprehensive organization
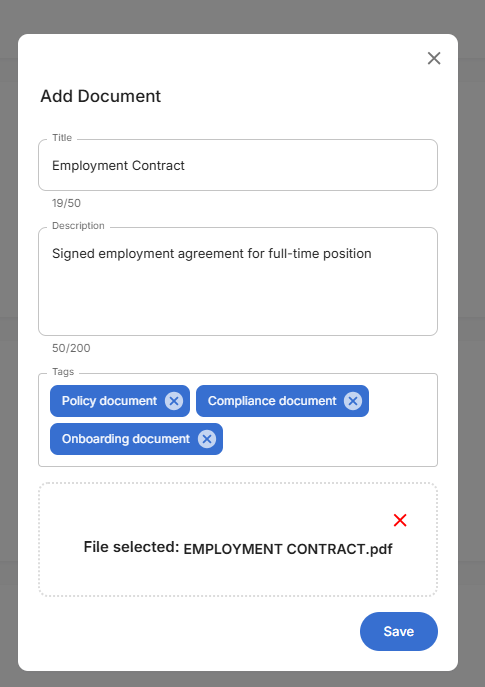
Step 9: Upload Document File
- Use the file upload area at the bottom of the form
- Choose file to upload by clicking or dragging files
- Maximum file size: 100MB per document
- Supported file types typically include PDF, DOC, DOCX, images, and spreadsheets
Step 10: Review and Save Document
- Verify all information is accurate and complete
- Check file upload is successful
- Review tags for proper categorization
- Click the blue "Save" button to upload the document
Step 11: Confirm Document Addition
- The form will close after successful upload
- Return to the employee profile Documents section
- Verify the new document appears in the document list
- Check that document information displays correctly
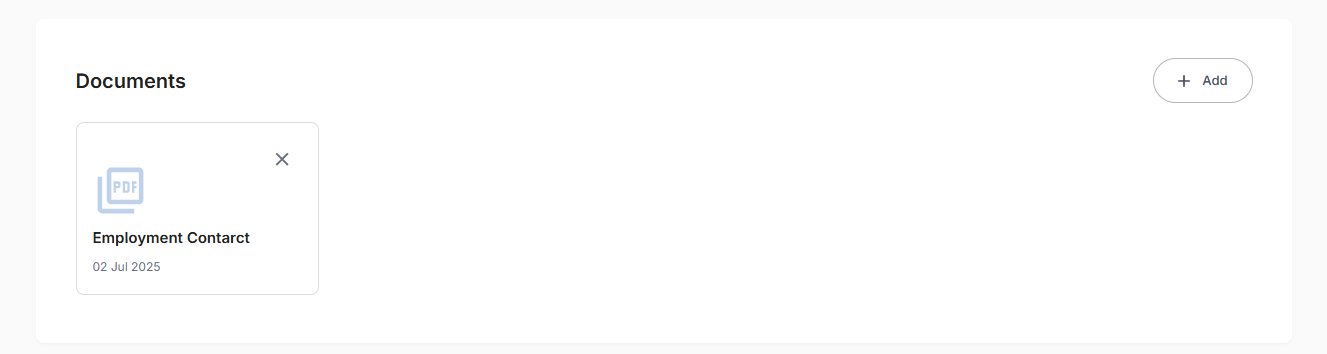
Successful Upload Confirmation:
- Document card displays with file type icon (PDF symbol)
- Document title shows the name you provided
- Upload date displays when the document was added
- Remove option (X button) available for document management
- Add button remains available for uploading additional documents
Related Tasks
After adding employee documents, you might also need to: