How to Manage Employee Terminations
Overview
This guide shows HR managers how to process employee terminations in the Organogram HCM system. You'll learn to record exit dates, document termination reasons, and maintain proper records for legal compliance and organizational tracking.
Prerequisites
- HR manager access to the Organogram workspace platform
- Permissions to manage employee terminations
- Employee must already exist in the system
- Proper authorization for termination processing
- Understanding of company termination policies and legal requirements
When You Need This
- Processing voluntary resignations and retirements
- Managing involuntary terminations and dismissals
- Recording end-of-contract separations
- Documenting termination reasons for legal protection
Step-by-Step Instructions
Step 1: Access the Terminations Module
- Log into your Organogram workspace at
people.organogram.app - Click "Team" in the left sidebar
- Select "Terminations" from the navigation menu
- You'll see the terminations management page
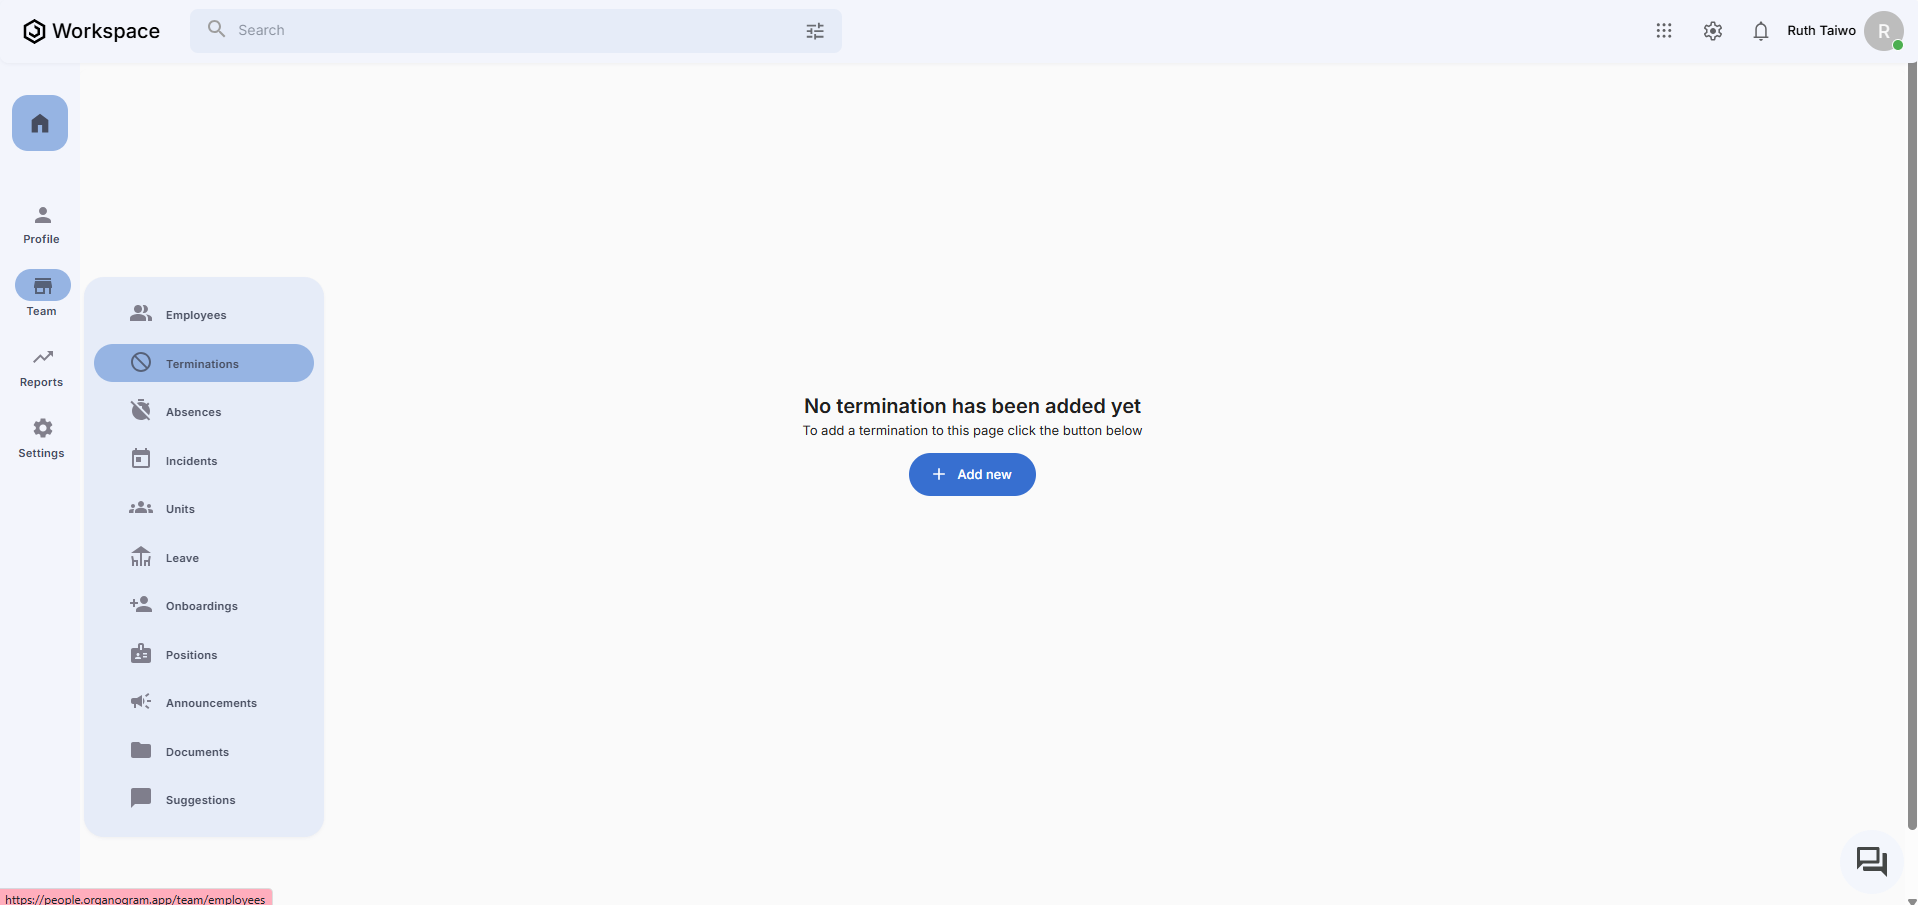
Step 2: Initiate New Termination
- Click the "Add new" button in the top-right corner
- The "Create Termination" form will appear
- You'll see fields for comprehensive termination documentation
Step 3: Complete Termination Information
The termination form contains essential fields for proper documentation:
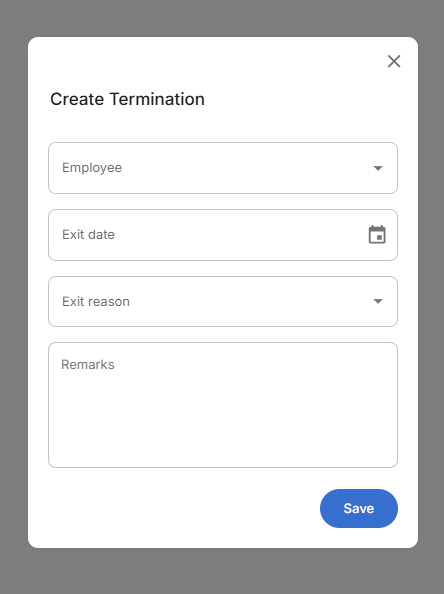
Required Termination Details:
- Employee - Select the employee being terminated (dropdown selection from active employees)
- Exit date - When the employee's last day of work occurs (calendar date picker)
- Exit reason - Category of termination (dropdown selection - Voluntary, For a cause, Involuntary, Others)
- Remarks - Additional context, circumstances, or documentation notes
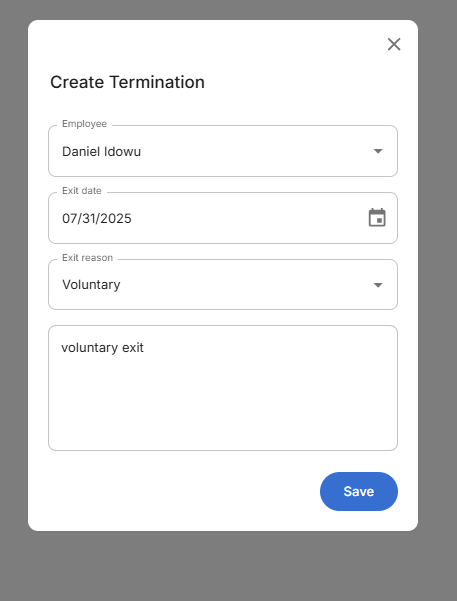
Step 4: Fill required fields
fill the termination parameters:
Step 5: Save Termination Record
- Review all entered information thoroughly
- Click the blue "Save" button to process the termination
- The system will validate dates and required information
- You'll see a success confirmation message
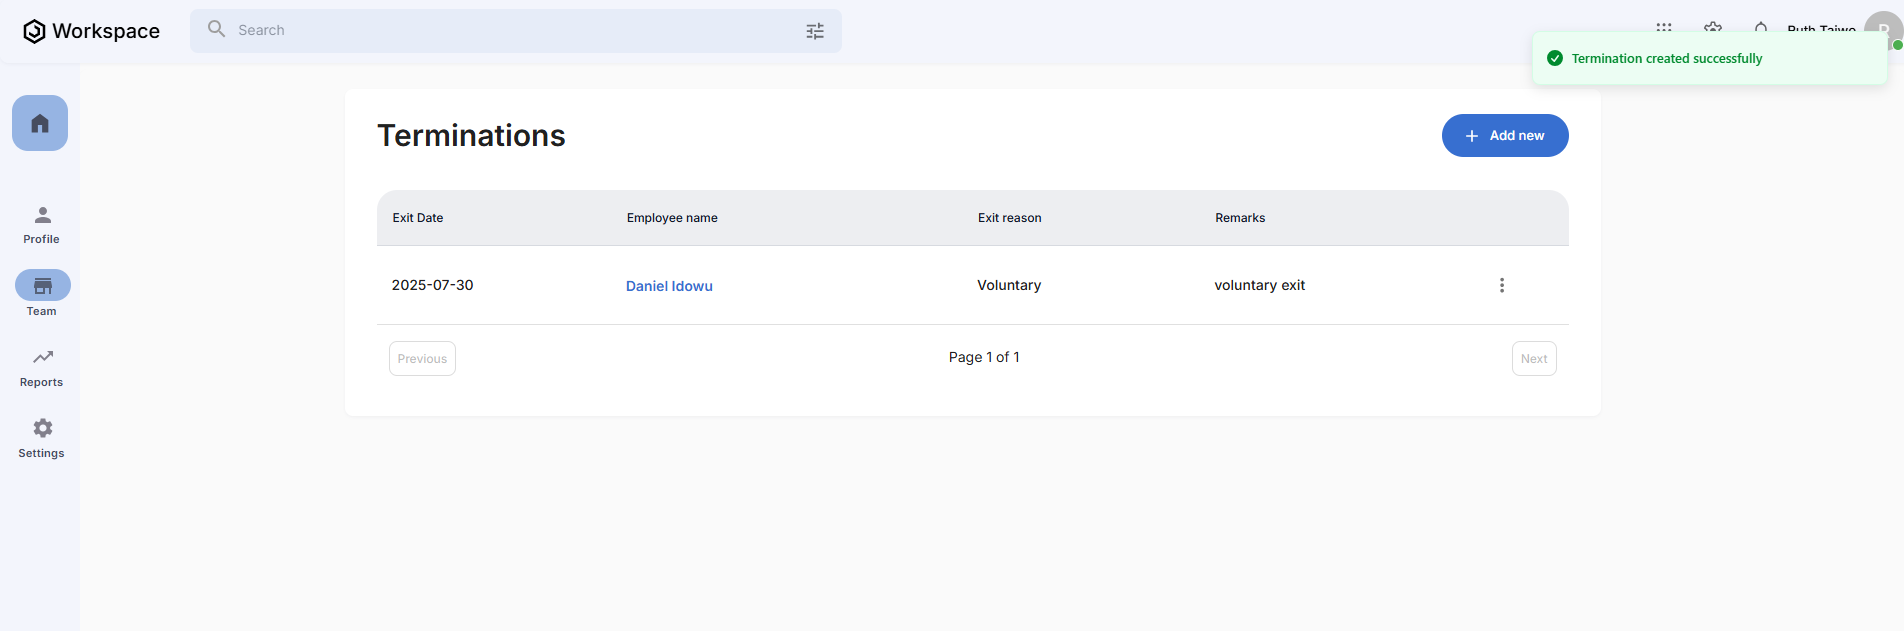
Step 6: Confirm Termination Processing
- The system displays "Termination created successfully" confirmation
- You're returned to the terminations management page
- Verify the new termination record appears in the terminations list
Related Tasks
After processing employee terminations, you might also need to: