manage-employee-leave-requests
Step-by-Step Instructions
1. Access the URL Management Section
- Log into your Organogram workspace at
people.organogram.app - Click "Settings" in the left sidebar
- Use the dropdown selector at the top of the page to navigate to the URL card,
or scroll to the bottom of the Settings page until you see the URL card.
How to Manage Employee Leave Requests
Overview
This guide shows HR managers how to create and manage employee leave requests in the Organogram HCM system. You'll learn to submit time-off requests, track leave balances, and monitor leave status for comprehensive workforce management.
Prerequisites
- HR manager access to the Organogram workspace platform
- Permissions to manage employee leave
- Employee must already exist in the system
- Leave types must be configured in the system
When You Need This
- Processing employee time-off requests
- Managing vacation and sick leave
- Tracking maternity and paternity leave
- Recording emergency or personal leave
- Monitoring leave balances and usage
Step-by-Step Instructions
Step 1: Access Employee Profile
- Log into your Organogram workspace at
people.organogram.app - Click "Team" in the left sidebar and select "Employees"
- Locate the employee and click the three-dot menu (⋮)
- Select "View Profile" from the dropdown menu
Step 2: Navigate to Leave Section
- Scroll down to locate the "Leave" section
- This section displays any existing leave requests and status
- Click the "Add" button to create new leave requests

Step 3: Access the Leave Request Form
- Click the "Add" button in the Leave section
- The "Request Time off" dialog will appear
- You'll see fields for leave details and duration

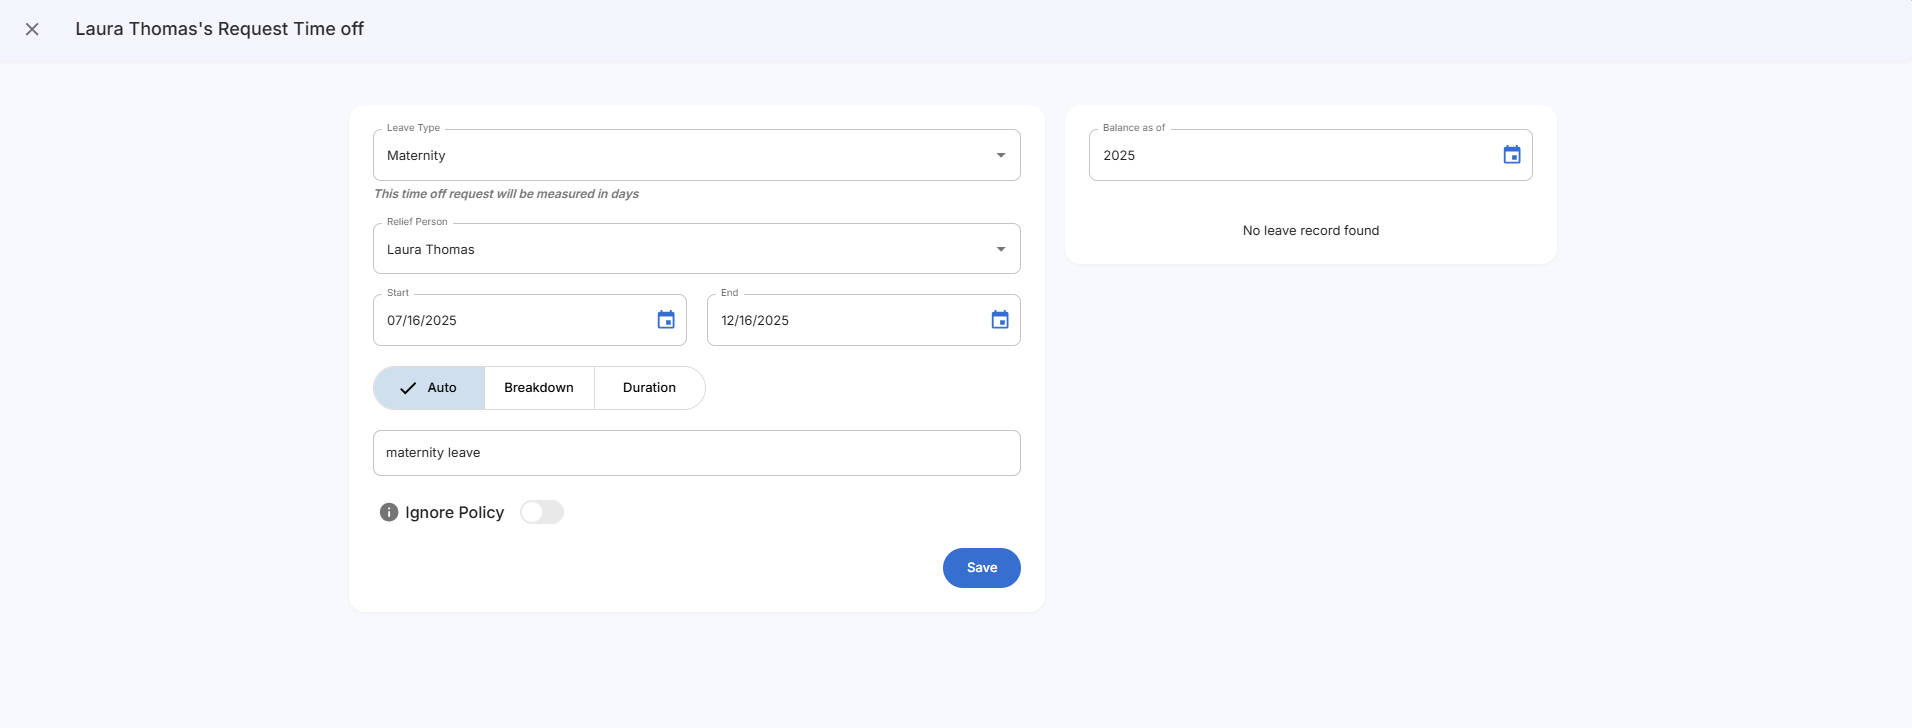
Step 4: Complete Leave Request Information
Fill in the essential leave details:
Fields:
- Leave Type - Select from available leave types (dropdown)
- Relief Person - Choose who will cover duties (dropdown)
- Start - Leave start date
- End - Leave end date
- Balance as of - Year for leave balance reference
Duration Options:
- Auto - System calculates duration automatically
- Breakdown - Manual entry of specific days
- Duration - Custom duration entry
Step 5: Add Leave Request Details
Complete additional information:
Additional Fields:
- Remark - Reason or notes about the leave request
- Ignore Policy - Toggle to bypass leave policy restrictions
Step 6: Select Leave Type and Relief Person
Configure the leave request specifics:
System Features:
- Duration measurement - Shows "This time off request will be measured in days"
- Auto calculation - System automatically calculates leave duration
- Balance checking - Displays current leave balance status
Step 7: Review and Save Leave Request
- Verify all information is accurate and complete
- Check dates for correct leave period
- Confirm leave type matches the request
- Review relief person assignment
- Click the blue "Save" button to submit the request
Step 8: Monitor Leave Status
After creating the request, view the leave interface:

Leave Request Display:
- Date - Leave start date
- Leave Type - Type of leave requested
- Duration - Number of days/hours
- Status - Current leave status
- Three-dot menu (⋮) for editing or managing requests