How to Edit Employee Address
Overview
This guide shows HR managers how to update an employee's residential address information in the Organogram HCM system. You'll learn to access employee profiles and modify address details as needed for HR records.
Prerequisites
- HR manager access to the Organogram workspace platform
- Permissions to edit employee information
- Employee must already exist in the system
When You Need This
- Employee has moved to a new residence
- Incorrect address was entered during onboarding
- Address formatting needs to be standardized
- Employee reports address change to HR
Step-by-Step Instructions
Step 1: Access the Employee Directory
- Log into your Organogram workspace at
people.organogram.app - Click "Team" in the left sidebar
- Select "Employees" from the navigation menu
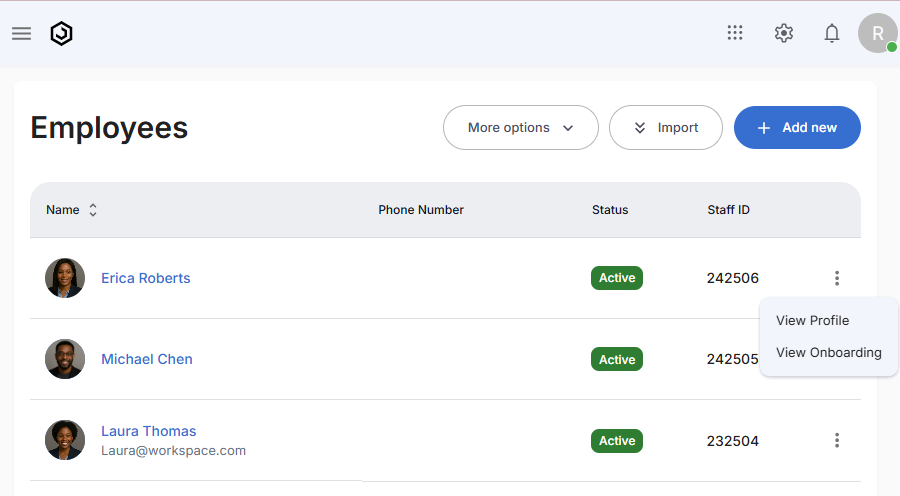
- You'll see the employee directory page
Step 2: Locate the Employee
- Browse the employee list to find the employee whose address you need to update
- Use the employee's name, photo, or Staff ID to identify them
- Note their current status (should be "Active" for address updates)
Step 3: Open Employee Profile
- Click the three-dot menu (⋮) on the right side of the employee's row
- Select "View Profile" from the dropdown menu
- The employee's detailed profile page will open
Step 4: Navigate to Address Section
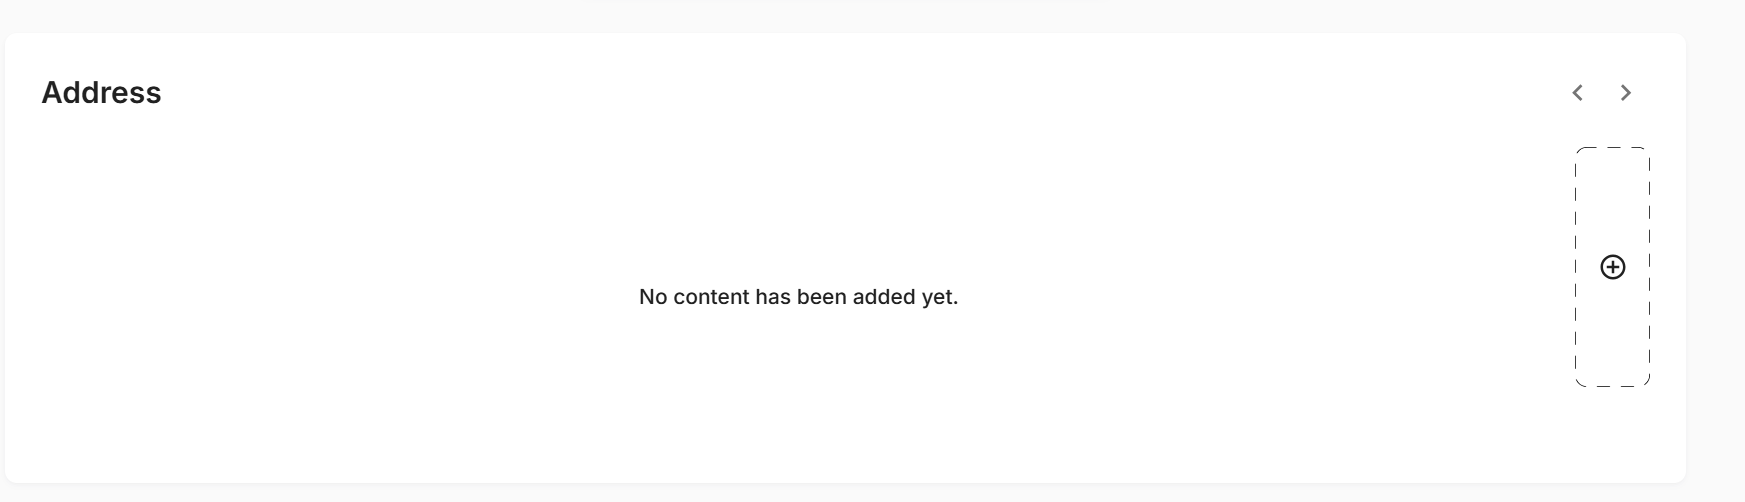
- Scroll down to locate the "Address" section
- This section will show any existing address information
- Look for the edit options in this section
Step 5: Add or Edit Address
If the employee already has an address:
- Click the three-dot menu (⋮) next to the existing address
- Select "Edit" from the dropdown options
- The address edit form will appear
If no address exists:
- Click the "+" button in the Address section
- The "Add Address" form will appear
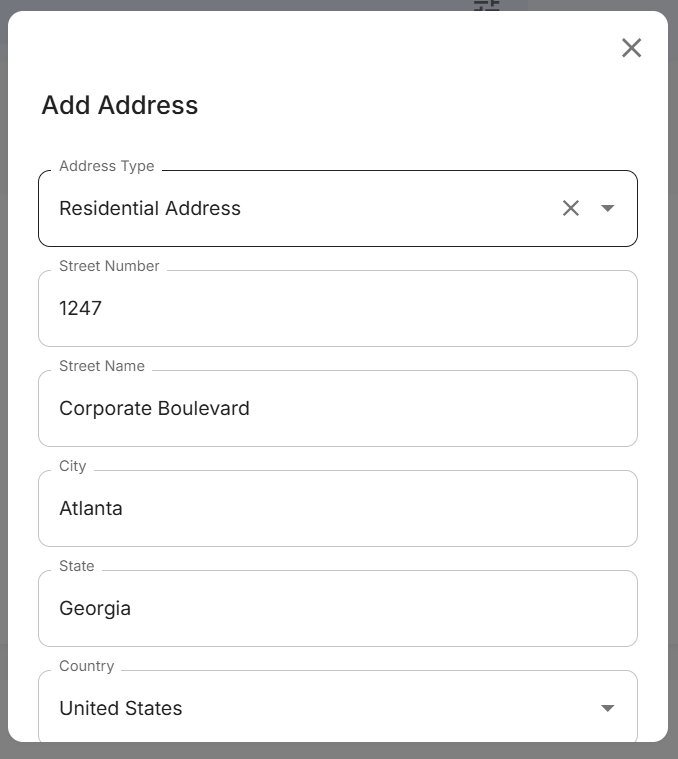
Step 6: Complete the Address Form
The address form contains multiple fields to capture comprehensive address information:
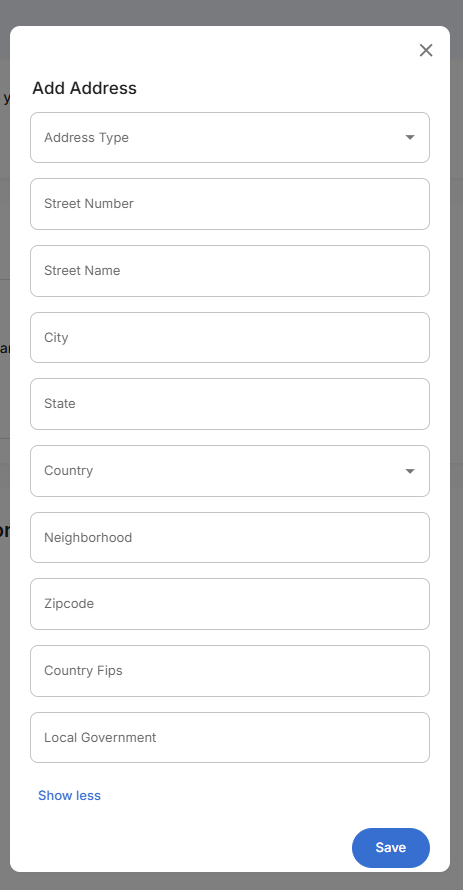
Fill in the required address information:
Core Address Fields:
- Address Type - Select "Residential Address" from dropdown
- Street Number - Enter house/building number (e.g., "1247")
- Street Name - Enter street name (e.g., "Corporate Boulevard")
- City - Enter city name (e.g., "Atlanta")
- State - Enter state or province (e.g., "Georgia")
- Country - Select country from dropdown (e.g., "United States")
Additional Location Details: Click to expand additional fields if needed, or use "Show less" to collapse them:
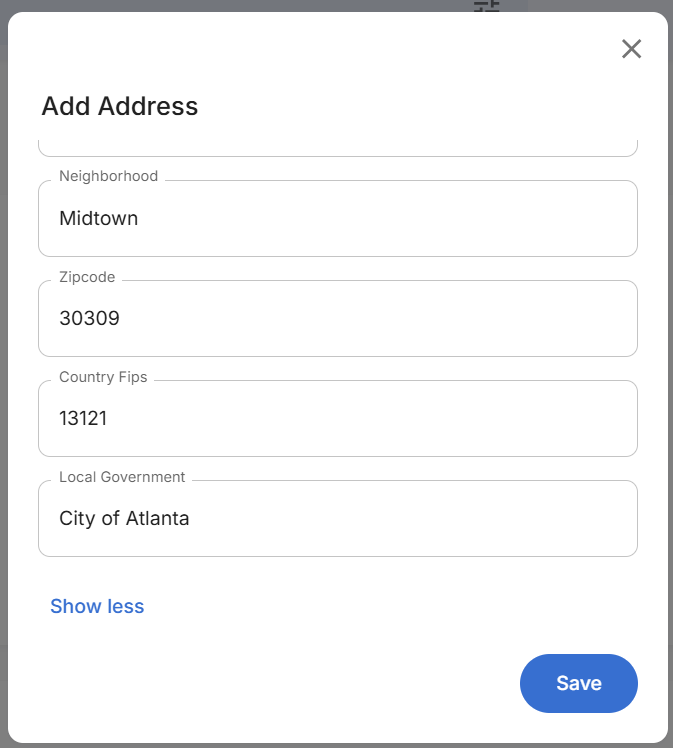
Optional Fields:
- Neighborhood - Local area name (e.g., "Midtown")
- Zipcode - Postal code (e.g., "30309")
- Country Fips - FIPS code for location (e.g., "13121")
- Local Government - Administrative area (e.g., "City of Atlanta")
Step 7: Verify Address Information
- Double-check spelling of street names and city
- Confirm postal code matches the city and state
- Verify country and address type are correctly selected
- Ensure completeness - all required fields are filled
- Use "Show less" link if you need to collapse optional fields
Step 8: Save Address Changes
- Review all entered information for accuracy
- Click the blue "Save" button at the bottom of the form
- The system will validate the address format
- The form will close and you'll return to the employee profile
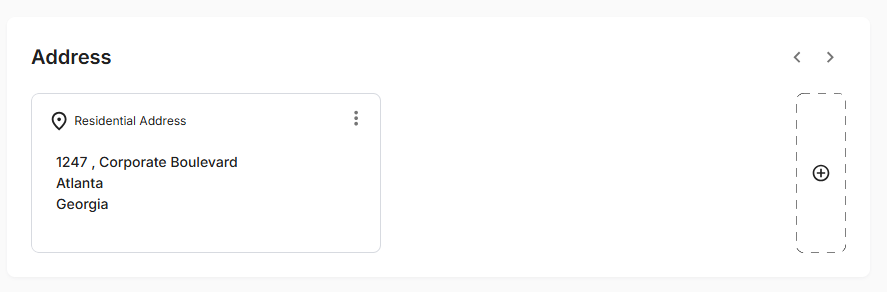
Step 9: Confirm Address Update
- Verify the new address appears correctly in the Address section
- The address will display in a formatted card showing:
- Address type (e.g., "Residential Address")
- Complete formatted address with neighborhood
- Three-dot menu for future edits
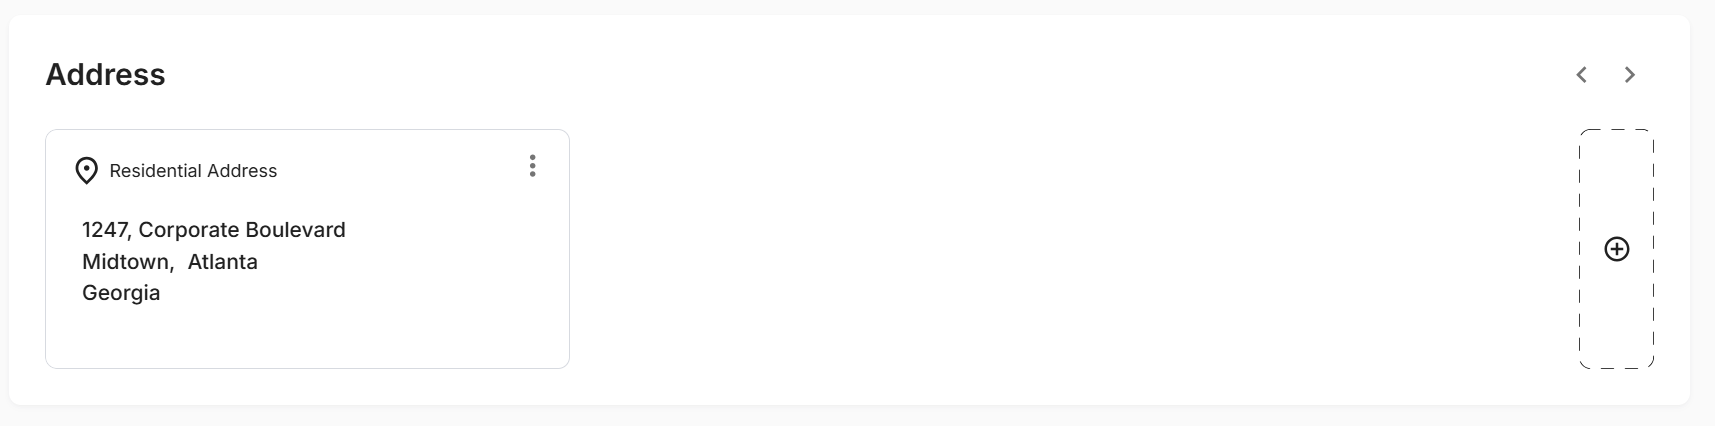
The saved address will show the complete information in a clean, formatted layout including the neighborhood and proper address structure.
What You Can Edit
Address Information:
- Street address and house numbers
- City, state, and postal codes
- Country information
- Address type (residential, mailing, etc.)
- Secondary address lines (apartment, suite)