How to Add Employee Next of Kin
Overview
This guide shows HR managers how to add and manage employee next of kin information in the Organogram HCM system. You'll learn to record emergency contact details, family relationships, and address information that are essential for employee safety and legal compliance.
Prerequisites
- HR manager access to the Organogram workspace platform
- Permissions to edit employee information
- Employee must already exist in the system
- Next of kin contact information from the employee
When You Need This
- Recording emergency contact information for workplace safety
- Maintaining legal compliance for employee records
- Managing insurance beneficiary information
- Handling family-related employment matters
- Processing emergency notifications and communications
- Organizing employee support during critical situations
Step-by-Step Instructions
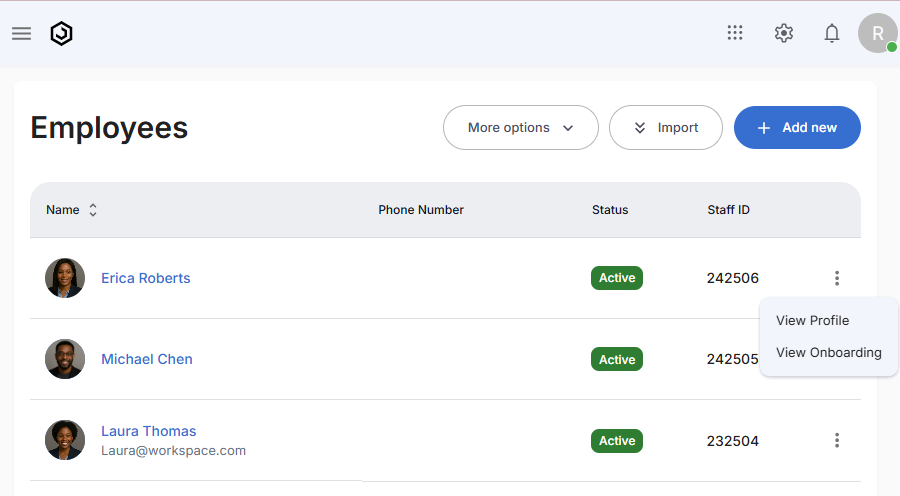
Step 1: Access Employee Profile
- Log into your Organogram workspace at
people.organogram.app - Click "Team" in the left sidebar and select "Employees"
- Locate the employee and click the three-dot menu (⋮)
- Select "View Profile" from the dropdown menu
Step 2: Navigate to Next of Kin Section
- Scroll down to locate the "Next of Kin" section
- This section displays any existing family or emergency contact information
- Look for the "+ Add" button in the top-right corner of the section

Step 3: Access the Next of Kin Form
- Click the "+ Add" button in the Next of Kin section
- The "Create Next Of Kin" form will appear
- You'll see fields for personal information and address details
Step 4: Enter Next of Kin Information
The form contains fields for comprehensive next of kin details:
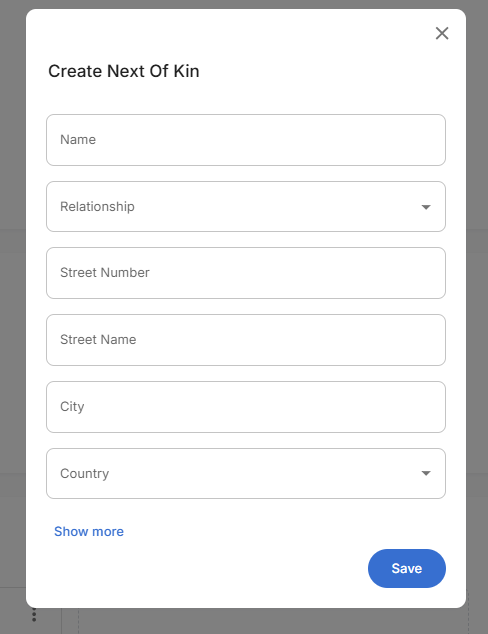
Essential Information:
- Name - Full name of the next of kin emergency contact
- Relationship - Family relationship type (dropdown selection from spouse, parent, child, sibling)
- Street Number - House or building number for physical address
- Street Name - Street or road name for complete address
- City - City of residence for emergency contact location
- Country - Country selection (dropdown with geographic options)
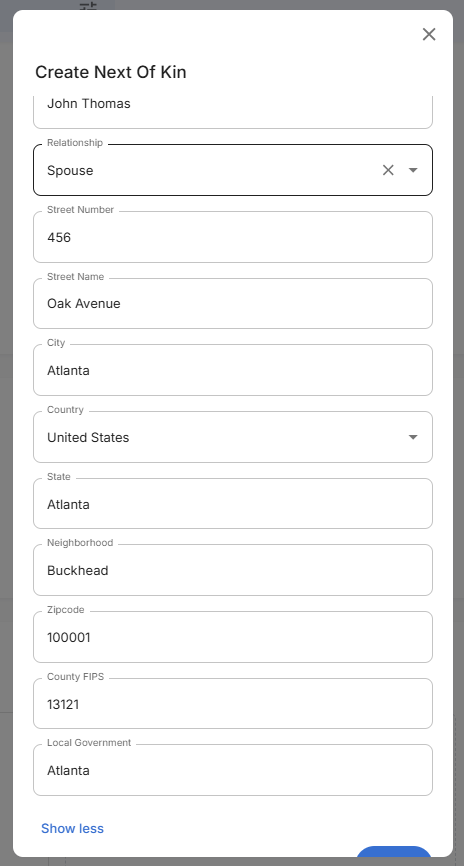
Step 5: Complete Address Information
Use "Show more" to access additional address fields for complete contact information:
Extended Address Information:
- State - State or province where the contact resides
- Neighborhood - Local area, district, or community name
- Zipcode - Postal code for mail delivery and location verification
- County FIPS - Federal Information Processing Standards county code
- Local Government - Municipal or local administrative authority
Step 6: Save Next of Kin Information
- Review all entered information thoroughly
- Click the blue "Save" button to save the next of kin details
- The system will validate the information
- The form will close and return to the employee profile
Step 7: Confirm Next of Kin Addition
- Return to the employee profile Next of Kin section
- Verify the new next of kin information appears correctly
- Check that relationship and contact details display properly
- Confirm all address information is accurate
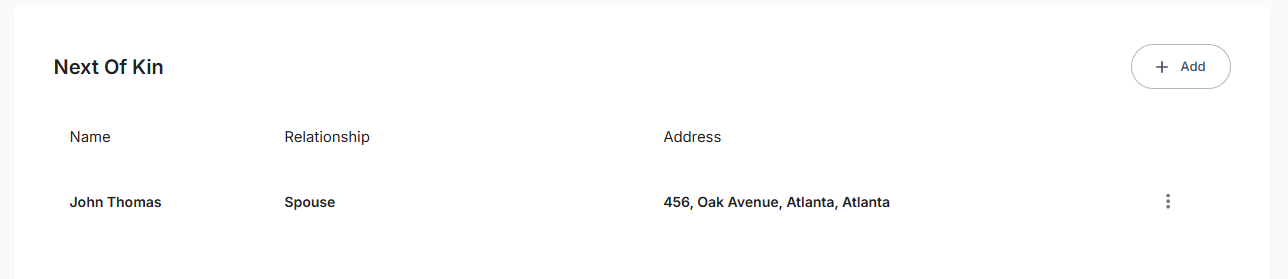
Successful Addition Confirmation:
- Display showing Name, Relationship, and Address columns
- Complete contact information with full address details
- Relationship type clearly displayed (e.g., "Spouse")
- Management options - three-dot menu for editing existing contacts
- Add button remains available for additional next of kin entries
Related Tasks
After adding employee next of kin information, you might also need to: