How to Add and Edit an Organization Vision
Overview
This guide shows you how to add and update the organization's vision statement in the Organogram Workspace. You'll learn how to input a vision manually or generate one using AI, format the text using the editor, and make updates when necessary.
Prerequisites
- Access to the Organogram workspace platform
- Admin or authorized permissions to modify organization settings
When You Need This
- Defining the organization's long-term direction
- Updating a previously set organizational vision
- Leveraging AI assistance for professional vision statements
Step-by-Step Instructions
Step 1: Access the Settings Page
- Log into your Organogram workspace at
people.organogram.app - From the left-hand sidebar, click "Settings"
- Locate the "Vision" card on the settings page
Step 2: Add a New Vision Statement
- Click the "+" icon inside the Vision card
- The "Add Vision" dialog will appear
Step 3: Enter or Generate the Vision
You have two options:
Manually Enter a Vision
-
Type your organization's vision directly into the text field
-
Use the built-in text editor to apply formatting:
- Bold
- Italic
- Underline
- Bullet list
- Numbered list
Generate a Vision Using AI
- Type a few relevant keywords or a short description
- Click the "Suggest Vision" button below the text area
- The AI will provide a vision suggestion you can review and edit
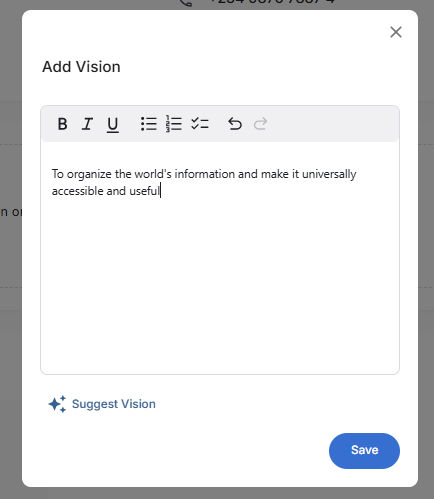
Step 4: Save the Vision
- Once satisfied with your input or AI-generated vision, click the blue "Save" button
- A notification will appear: "Vision added successfully"
- The vision will now display on the Vision card in the settings page
Step 5: Edit an Existing Vision
- To make changes, click the pencil icon (✏️) on the Vision card
- The "Update Vision" dialog will appear, pre-filled with the current vision
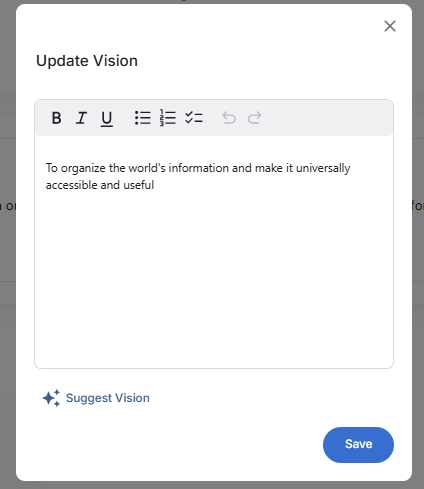
- Update the text as needed using manual input or the text editor
- Click the blue "Save" button
- A confirmation notification will appear: "Vision updated successfully"