How to Manage Employee Locations
Overview
This guide shows HR managers how to create, edit, and delete employee location records in the Organogram HCM system. You'll learn how to add new location details, update existing ones, and remove outdated records to maintain accurate employee location information.
Prerequisites
- HR manager access to the Organogram workspace platform
- Permissions to manage location information
- Accurate location details for entry or update
When You Need This
- Removing outdated or unused locations
- Maintaining accurate location data for compliance and logistics
Step-by-Step Instructions
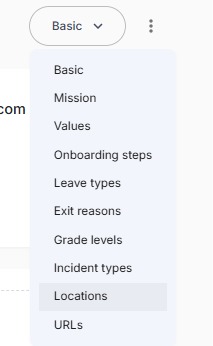
Step 1: Access the Locations Section
- Log into your Organogram workspace at
people.organogram.app - On the left sidebar, click "Settings"
- Scroll down to "Locations" or use the dropdown navigator to go directly to Locations
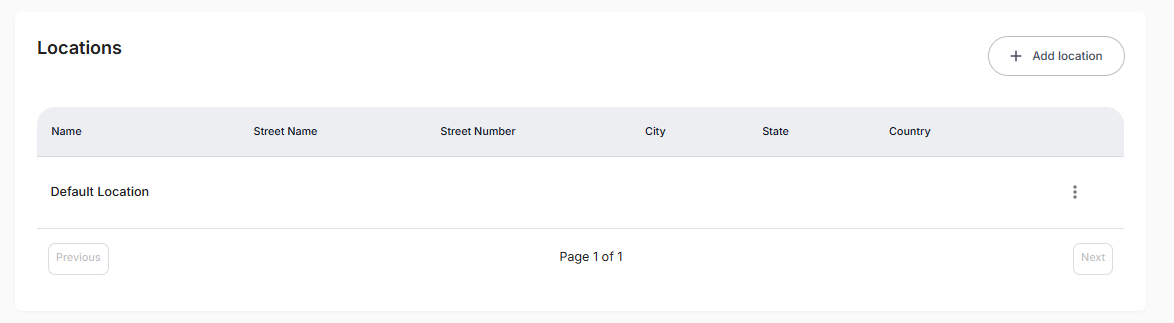
Step 2: Create a New Location
- Click the "+ Add Location" button in the top-right corner of the locations page.
- The Create Location modal will appear.
- Fill in the following fields:
- Name – Location name (e.g., "Head Office")
- Street Number – Building or street number
- Street Name – Street or road name
- City – City of the location
- State – State or province
- Country – Select from the dropdown list
- Neighborhood – Local area or district
- Zip Code – Postal code
- County FIPS – County code (if applicable)
- Local Government – Local administrative area
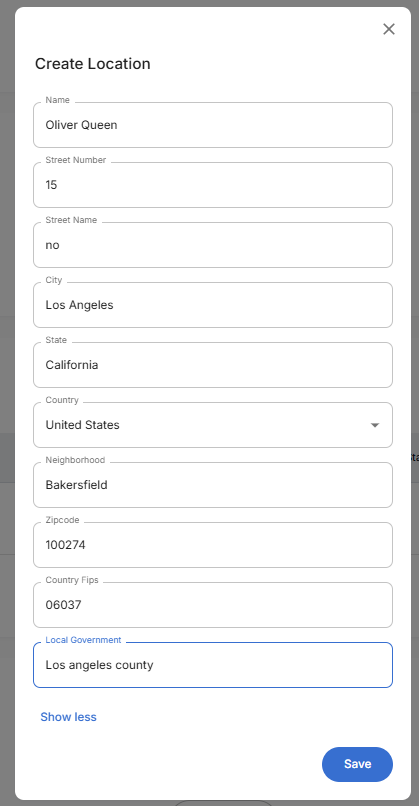
- After completing the form, click the "Save" button.
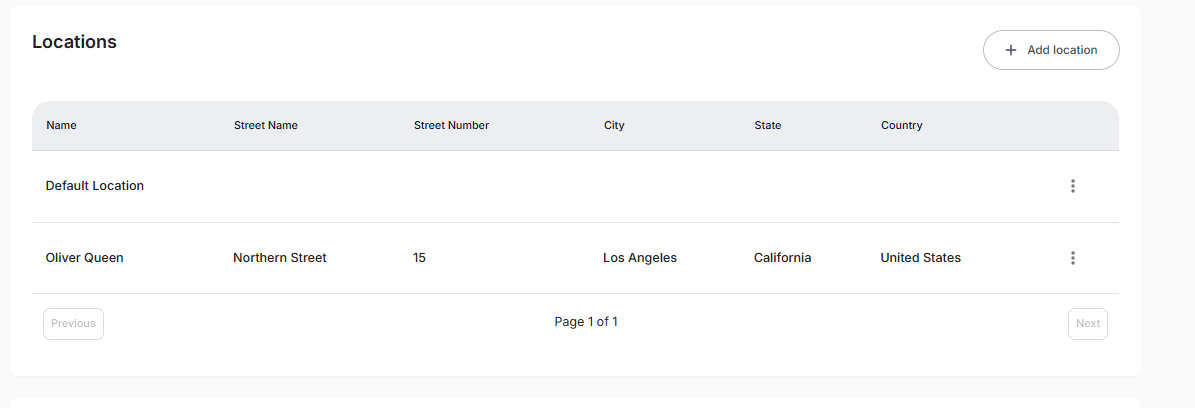
- A toast notification will appear: "Location created successfully".
- The newly added location will now appear in the locations list.
Step 3: Edit an Existing Location
- Locate the location you wish to edit in the list.
- Click the three-dot menu (⋮) next to the location entry.
- Select "Edit" from the dropdown menu.
- The Edit Location modal will appear with the existing details pre-filled.
- Update the necessary fields.
- Click "Save" to apply changes.
- A notification will confirm: "Location updated successfully".
Step 4: Delete a Location
- Locate the location you wish to delete.
- Click the three-dot menu (⋮) next to the location entry.
- Select "Delete" from the dropdown menu.
- Confirm the deletion by clicking on yes on the confirmation dialog.
- The location will be removed from the list.
What You'll See After Adding
- The inputed data shows in their respective columns
- The Add Location button still shows to add more location
Related Tasks
After managing employee locations, you might also need to: